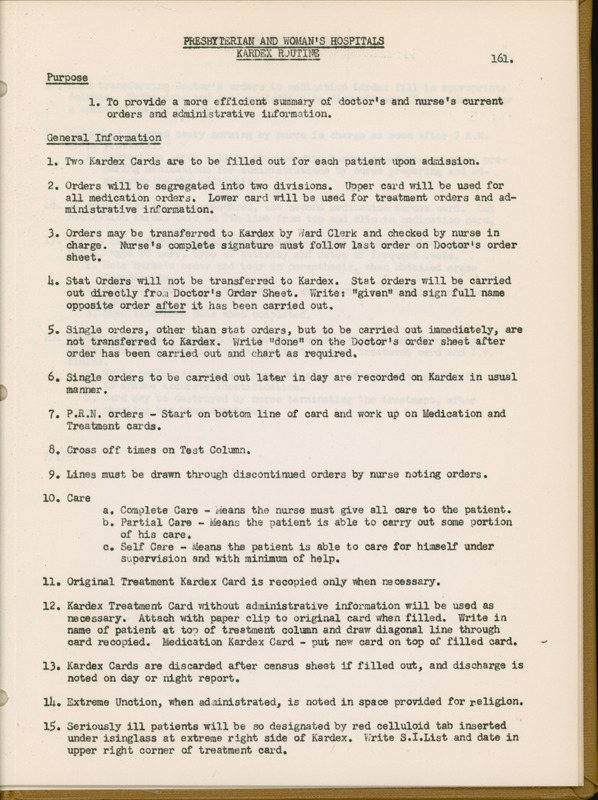
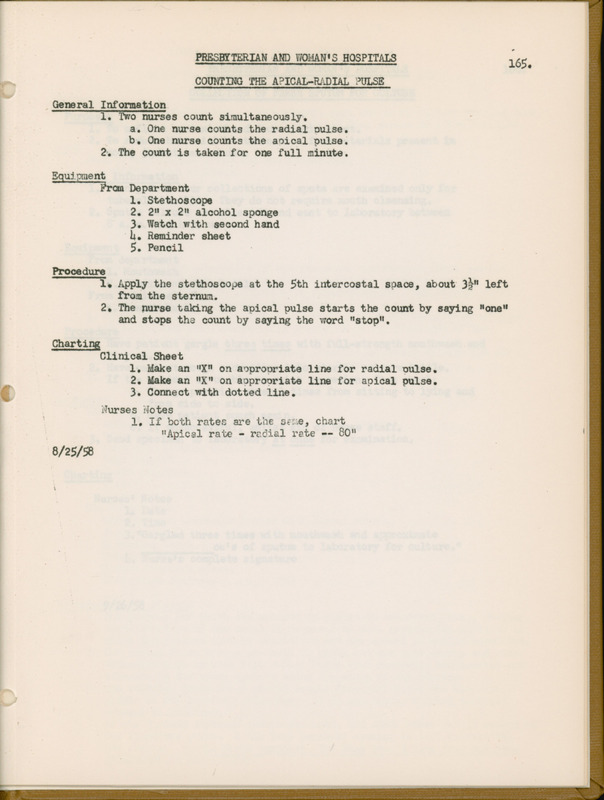
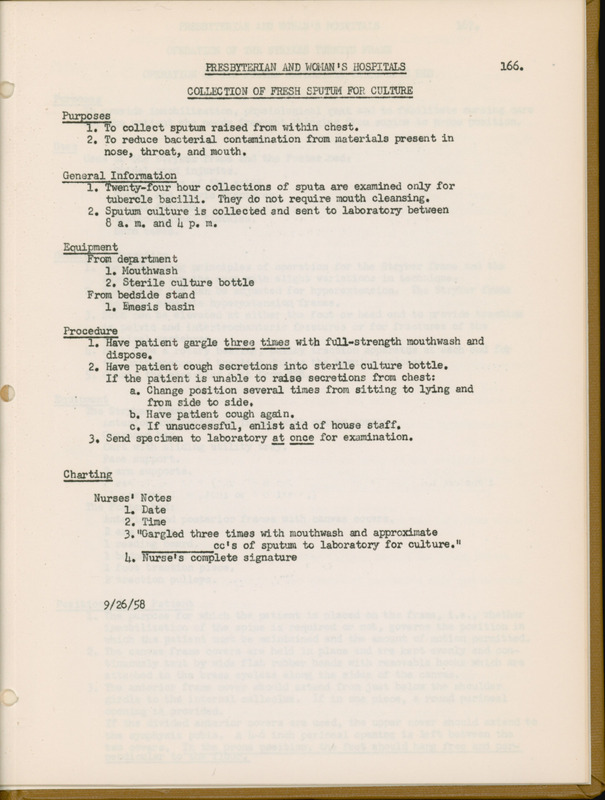
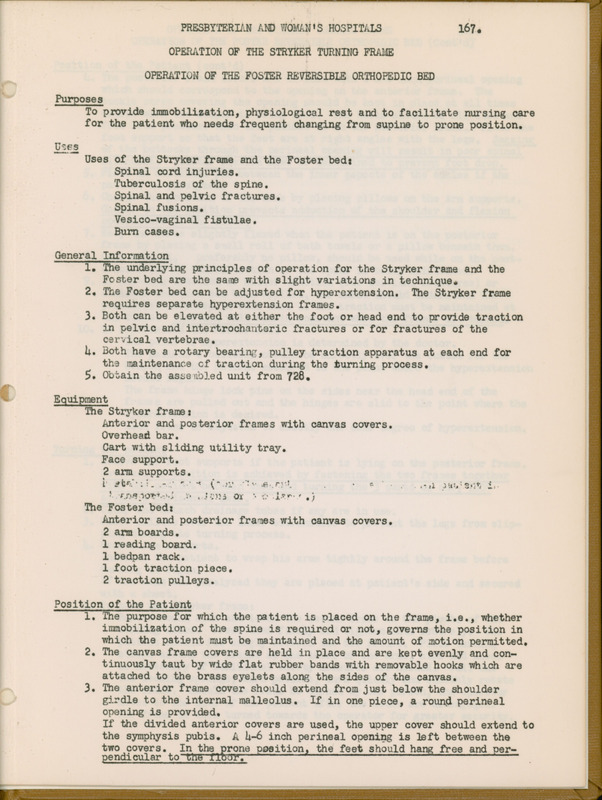
-
Title
-
Nursing Procedures for Presbyterian and Women's Hospitals
-
Creator
-
Presbyterian Hospital
-
Date
-
1959
-
Description
-
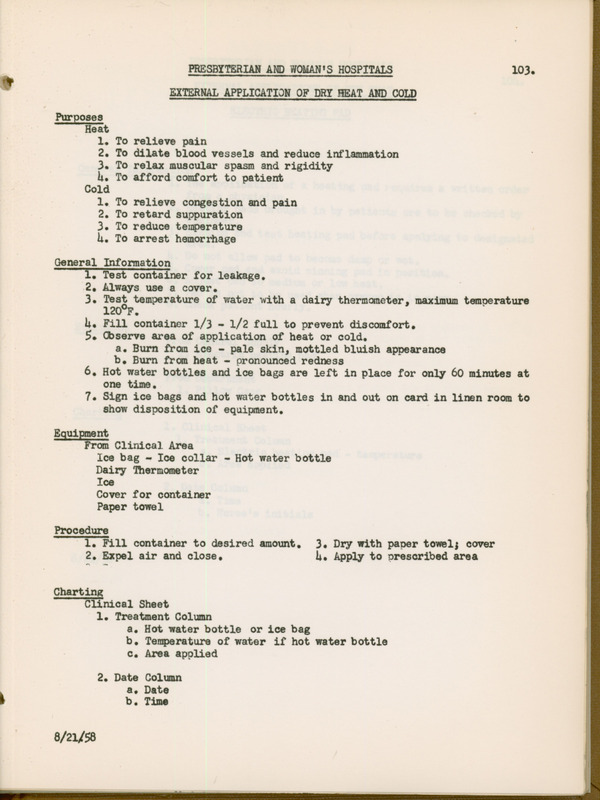
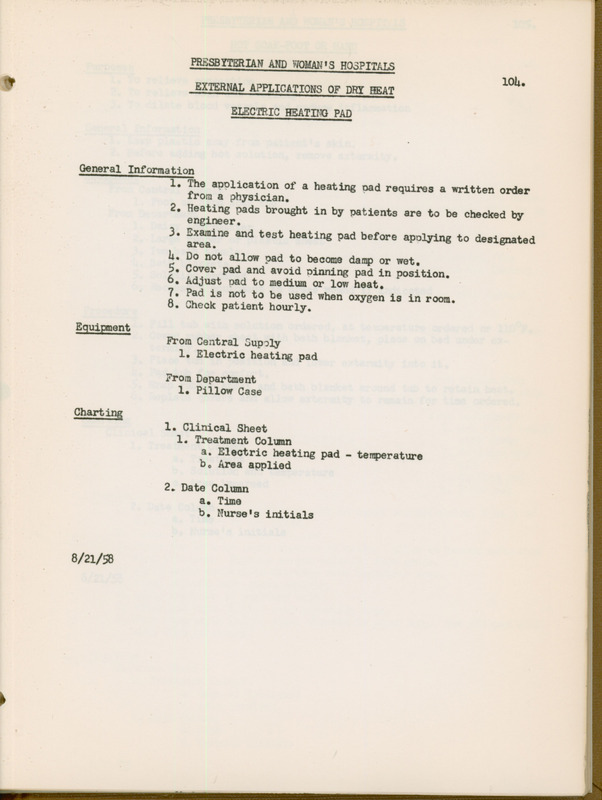
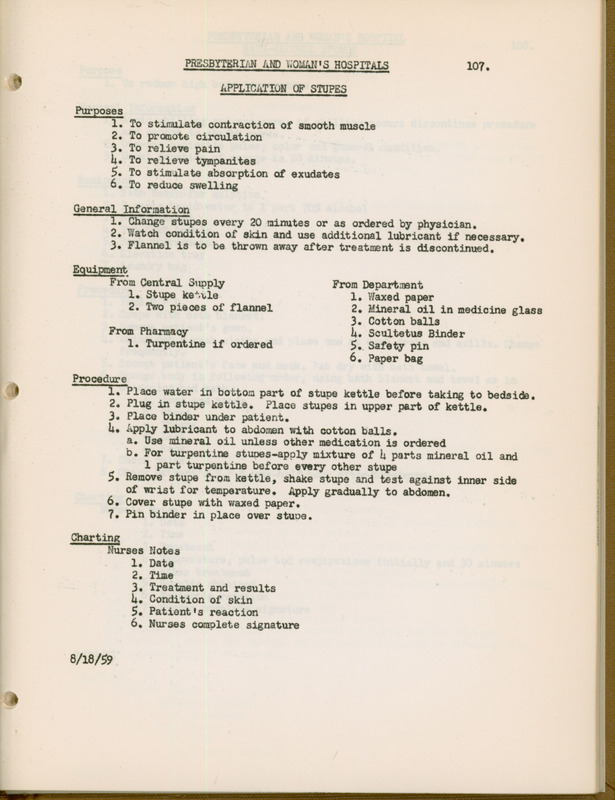
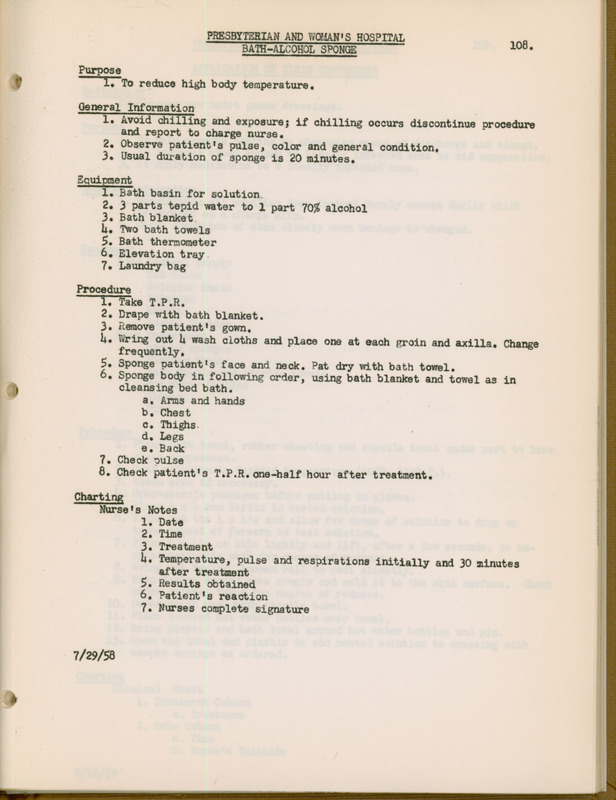
Mimeographed book of nursing procedures for two hospitals in Pittsburgh.
169 pages. Illustrated.
-
Language
-
English
-
Publisher
-
Pittsburgh : publisher not identified
-
Extent
-
30cm
-
Subject
-
Nursing
-
extracted text
-
re by teriay Hospital
NURSING PROCEDURES
FOR
PRESBYTERIAN AND WOMAN'S HOSPITALS
ANY CHANGES IN OR ADDITIONS TO THIS BOOK WILL BE MADE BY MEMBERS OF THE NURSING
PROCEDURES COMMITTEE,
AUGUST, 1959
�
le
PRESBYTE? TIAN & NOMEN'S HOSPT TALS
PRACTIC’S COMMON TO PROGIDURES
° 1. Before performing any procedure:
Ae Check Kardex for order to insure accuracy.
B. Assemble all equipment to save time, energy and material,
1. Gather all necessary materials before entering room.
2. Use equipment and supplies as listed in procedure,
C. Explain procedure to patient to gain cooperation and to minimize
fear,
1. Explain procedure in terms which patient can understand,
2. Adjust explanation to satisfy patient's needs,
De Prepare patient physically to insure safety, to provide privacy
and to promote relaxation and cooperation.
1. Screen patient by drawing curtains and/or closing doors.
2. Position according to comfort and needs.
3. Expose only required area,
(\ he Protect patient from injury.
Ee Wash hands to prevent cross contamination and preserve optimun
_ health of individual,
F. Provide suitable environment to minimize exertion of patient's
resources.
1. Adjust ventilation, temperature and lighting.
2e Minimize disturbing noises.
3e Eliminate unpleasant odors and sights.
lh. Guide housekeeping versonnel in keeping environment clean.
Ge. Identify patient to insure sa‘cty.
1. Check identification band (if not possible, check bed tag.)
�
II. During the procedure. 26
A. Use health conversation to teach positive health practices,
prevent complications, and rehabilitate the patient to maxi-
mum capacity.
1. Set a good example of health habits.
2, Disseminate accurate information.
3. Use basic principles of nursing when giving care.
he Stress patient's independence recognizing individual
limitations,
B. Position to facilitate performance and prevent injury.
1. Use proper body mechanics.
2, Adopt positioning and draping to procedure and/or
patient's needs.
3. Begin procedure on sice farthest from worker.
C, Provide safety for patient and personnel to prevent injury.
1. Recognize signs of distresse
2. Correlate basic »rinciples of sciences and nursinge
3 Respond to patient's requirements promptly to best of
) your ability.
he Develop skill in handling equipment.
III. After the procedure.
A, Restore favorable environment to maintain mental and physical
comfort of patient.
1. Maintain proper body alignment,
2e Replace linens.
30 Leave patient area in order,
le Remove and/or replace equinment.
5. Eliminate unpleasant odors and sightse
B, Care of equipment and supplies to conserve materials, time and
energy.
le Assume responsibility for equipment used.
26 Clean equipment according to composition.
3. Store in designated area.
7/1/58
�
PRESBYTZRIAN AND ‘IOMAN'S HOSPITALS %
CLEANING AND STERILIZING OF BQUIPMENT
1. Metalware (monel, enamelware)
A. Cleaning
1. Rinse in cold water (heat coagulates protein),
2. Scour with Temp; Use Sparklé for urinals. :
3. Rinse with warm water,
uh. Dry with cloth.
B,. Sterilizing
1. Send to Central Supply for steam sterilization.
ll. Glassware
A. Cleaning
1. Rinse in cold water, (This is the only cleaning necessary
for syringes.)
2. Wash with detergent in warm water,
3. Rinse with hot water,
4. Dry with cloth.
B,. Sterilizing
1. Send to central supply for steam sterilization,
111. Rubber or plastic materials
Ae Cleaning
1. Resove foreign material with cloth,
2. Remove adhesive marks with waste ether.
3. Rinse with cold water,
4. Soak rectal tubes and catheters in detergent solution
if indicated,
5. Wash with soap and hot water.
6. Rinse in hot water,
Ze Dry with cloth,
B,. Sterilizing
1. Rectal tubes: Boil for 15 minutes in Sprex solution,
Use 1 oz. dry Sprex in W.H. sterilizer and 24 oz, dry
Sprex in P.H. sterilizer with enough water to cover shelf,
2. Send all other equioment to Central Supply for steri-
lization.
7/1/58
�
le
PRESBYTERIAN AND WOMAN'S HOSPITAL
STRIPPING LUNEN FROM EMPT’’ BED
General Information
1. Eliminate excessive movement of linen to minimize air circulation.
2. Strip bed of all linen before terminal cleaning,
3. Strip unoccupied bed of ell linen except mattress cover in preparation for
remaking bed,
4. Handle linen away fron body to prevent contamination of uniform and/or linen,
5» Always work from top to Lcttom on both sides,
Scripping Linen for Re-use
General Statement
Linens may be re-used when giving daily care,
Procedure
1. Renove pillow case frc:n pillow by grasping villow and pulling case back on it-
self until free. lacs »2se over chair back,
2. Place pillow on choir.
3. Loosen all linen dow) 4 na'tress cover. Support mattress with hand nearest
mattress and loosen line: with other hand,
4. As each piece of linen is a°proached, grasp at top center with one hand and
bottom center with other hand,
5« Bring top and bottom center together and grasp with one hand,
6. Grasp fold of linen in middle, lift from bed, and drape over chair.
7. Remove contour sheet
&. Urasp contour sheet at top right corner with left hand,
b. Make pressure on top right corner of mattress with right hand,
c. Roll corner of sheet off mattress over hand,
d. Repeat on remaining corners and remove in same manner as regular
linen,
Stripping Soiled Linen
Equipment
From linen closet
1. laundry bag
Procedure
1. Tie laundry bag to foot of bed,
2. Remove pillow case and discard into laundry bag,
�
5.
Stripping Soiled Linen
Procedure
3e Place pillow on chair,
4. Each piece of linen is removed Separately to permit observation for such items
as patient's dentures, rings, watches, emesis basin, etc.
-a.Grasp hem of linen item at top with one hand and at bottom with other
hand,
b.Bring ends toward center of bed,
c.Draw up near side of linen item to center of bed, then far side,
5. Gather up linen item and place in laundry bag,
7/1/58
�
PRESBYTERIAN AND WOMAN'S HOSPITAL .
TERMINAL CEZANING OF UNIT
General Statement
Terminal cleaning is done after each Cischarge or transfer of patient to prevent
cross contamination arid to have a clean unit available for an admissién,
Bouipnent
From bottom shelf in sterilising room cupboard in P.H.
From bottom shelf in treatment room cupboard in W.H,
le Tray
1 wash basin
1 bar soap
1 can temp
2 cleaning cloths
From Linen Closet
From Department
Preparing to Clean the Unit
Procedure
1. Inspect bedside stand, drawers, and 1. Belongings left by the patient are
wardrobe for extra ecuipment and/or labeled with name and room number
belongings of former patient, and sent to Nursing Service Office,
Extra eouipment is considered con
taminated and disposed of in proper
manner.
2. Remove linen from drawers, bedside
stand and wardrobe and place in
laundry bag, Blankets are placed
on cart,
3- Collect all metal eouipment and place 3¢ To be cleaned after unit is cleaned
on cart, in Presbyterian sterilizing room
and Woman's Treatment Room.
4. Collect drinking equipment in same
manner.
Se Remove cart and dispose of eaquip- 5. Laundry bag hampers in service rooms
ment, apenusedconshdand 13aPreabyterian
instead of laundry chute.
6, Exchange blankets by placing soiled
blanket in Breaking Room, 348 Presby-
terian and obtaining a clean one from
Linen Room,
7. Obtain hot water, Wring out cloth and 7. Cloth is wrung out in order to clean
take tray to bedside, stand top before placing tray. Water
is changed when necessary.
�
7°
Cleaning the Unit
Procedure Explanatory Statements
1. Place plastic draw sheet and pillow
on lower half of mattress,
2. Clean bedside chair,
3. Sponge upper half of mattress with 3e then a plastic mattress cover has been
damp cloth, dry. used, clean it instead of the mattress,
Care should be taken not to wet the
material too much because of the danger
of prolonged dampness and mildew,
he Sponge one side of pillow, dry and he Only clean surfaces should touch each
place clean side of pillow on clean other,
portion of mattress,
5. Clean other side of pillow, place
on chair,
6. Clean plastic draw sheet in same
manner and place on chair,
7- Sponge lower half of mattress, }
8. Fold mattress toward foot of bed.
9. Clean upper half of bed and springs.
10. Fold mattress toward head of bed,
il. Clean lower half of bed and sprincs.
12, Clean bedside stand and dresser
drawers,
13. Remove cleaning tray to service
ToOOMe
14, Clean metal ware and drinking 14. The following eouipment should be
ecuipment. in the unit:
a» Return drinking eouipment ae Vash basin
' to unit b. Emesis basin
be Exchanre utensils in Central Ce Soap dish
Supply d. Bedpan
e,. Urinal except in wards
for females
f, Bakelite tray
ge Drinking glass
h, Water pitcher
i. Soap
je Mouthwash cup
k,. Baby lotion
1. Toilet tissue
Me Celluwipes
‘5. Obtain linen and make bed,
7/10/58
�
PRESBYTERIAN AND WOMAN'S HOSPITALS 8.
C BED
% Definition = An anesthesia bed is a bed prepared to receive a patient who
has had an anesthetic,
Equipment
From Linen closet From dressing cart
1. Linea as for closed bed 1. Paper bag
2. Rubber protector at
least the width of the From bedside stand
bei. 1. Zmesis basin
3, Cotton draw sheet 2, Celiuwipes
lh, Bath blanket
From Nurse's station I, V, Standard
1. Tongue blade
2. Safety pins
Procedure
1, Place all equipment on bedside stand except linen,
2, Make foundation of bed in usual mamner,
3. Place rubber protector at head of bed.
h. Cover protector with cotton draw sheet, miter corners and tuck; cover
% foundation with bath blanket if bed is to go to 0, R.
|
5e Place the top linen in following order without tucking |
ae Bath blanket |
b. Top sheet |
c, Blanket, when necessary |
ad. Spread |
6. Make top cuff in usual mamer,folding bath blanket down over cuff,
7. Fold back linen at foot of bed, making the fold even with mattress edge.
8, Make a cuff at the top linen along the side of the bed from which the
patient will be received,
9. Fmfold or roll linen to opposite side of bed,
10. Pin bag on bedside after patient has been returned to bed,
7/1/59
�
Ie
: _ CLOSED BED
Definition -A closed bed is one to which there is no patient assigned.
\ uipment
From linen closet
1. Pillow case 7. Bath blanket
2. Spread 8, Bed pan cover |
3. Top sheet 9. Patient's gown
4. Cotton draw sheet if necessary 10. Yash cloth
5. Contour or regular sheet 11. Face cloth
6, Cotton mattress cover if plastic 12. Bath towel
mattress cover is not used.
Procedure |
1. Select linen in the sequence given above. (Listing in order of use)
2. Place linen (Items 1-6) on bedside chair,
3. Place linen (Items 7~12) in bedside stand,
4. Apply mattress cover.
a. Unfold mattress cover on mattress with open end toward foot of bed,
b. Place hand inside cover; work hand along seam to corner of closed
end of mattress cover.
c. Grasp corner of mattress through mattress cover.
d. Turn cover over corner of mattress.
e. Repeat at head of bed on onposite side, reversing hands.
’ f. Pull cover toward foot of bed until free of wrinkles,
5. Apply bottom sheet
a. Regular Sheet
(1) Unfold sheet with rough hem surface next to mattress.
(2) Place bottom hem of sheet even with foot of mattress.
(3) Pull excess sheet toward head of bed; tuck under head of
of mattress.
(4) Miter corner and tuck sheet, too, middle and bottom,
b. Contour Sheet
(1) Grasp corner of contour shect; turn back over hand.
(2) Grasp corner of mattress with hand covered with contour
sheet, slip sheet over mattress.
(3) Repeat on remaining corners,
(4) Tuck along sides.
6, Place rubber draw sheet, if used,1" from top of mattress; tuck on side.
14"" is approximately 2 hand spans,
7. Place cotton draw sheet 12" from top of mattress; tuck.
8. Place top sheet even with upper edge of mattress and drop over foot of bed,
Smooth hem surface toward mattress,
4 9. Place spread in same manner,
10. Tuck top sheet and spread together at foot of mattress,
�
Closed Bed 10.
Procedure
ll. Miter corner,
12. Go to opposite side of bed and repeat steps 5.(2) through 11.
13. Pull top linen free of wrinkles.
1h. Make 8" cuff of top linen,
a. Turn spread under 8"
b. Fold top sheet down over spread 8",
15. Place pillow case on pillow.
a. Place right arm into open end of pillow case.
b. Grasp middle of closed end with left hand.
c. Turn case back over left hand,
d. Grasp pillow with hand holding pillow case; pull cover down over
Pillow,
@. Place pillow on bed, sean side to top of bed, closed end toward
door.
és
OPEN BED
ome
Definition-An open bed is a bed to which there is a patient assigned but ““,
who is not presently in the bed,
Procedure
1. Obtain the necessary linen,
2. Make a closed bed,
3, If a blanket is necessary, apply between top sheet and spread in the same
manner as the spread,
4. Fanfold cover to center of bed,
7/1/58
�
CRADLE BED il.
Definition - A cradle bed is a bed made in such a manner as to keep the top
covers from touching a specific area of the body.
Equipement
From splint room
1. Cradle-size to meet needs of patient
From linen closet
l.Linen as for occupied bed - small cradle
2. Linen as for occupied bed plus sheet & spread ~ large cradle
From nurse's station
1.Safety pins
Procedure
e Make foundation of bed,
2. Place cradle over area to be protected and directly on foundation
linen.
3. Pin cradle to bottom linen
lk. Apply top linen to prevent collapsing
a. Small cradle
(1) Proceed as for occupied bed
b, Large cradle
(1) Place first top sheet over cradle; cover patient's
shoulder;make cuff,
(2) Drape second top sheet over foot of bed and overlap
first sheet.
(3) Drape blankets, if used in same manner,
(4) Drape spreads in same manner,
(5) Perform first step of mitered corner. Pin to bottom
sheet near top edge of mattress; let linen fall loosely
over side of bed.
7/1/59
�
OC SUPIED BED
Making the Bed (cont'd) {2,
| |
Definition~- An occupied bed is a bed to which there is a patient assigned
ap and who is presently in the bed,
Equioment
From linen closet
1. Laundry bag
2. Bath blanket, if necessary
3. Linen as necessary
Procedure
l. Tie laundry bag to foot of bed,
2. Loosen all linen excent contour sheet; change contour sheet when necessary.
3 Remove all top linen except top sheet. Apply bath blanket if vatient
is being bathed.
lh. Leave one pillow under patient's head,
5. Pull mattress to head of bed,
6. Assist patient to turn on side,
7. In sequence, fanfold all linen to center of bed,
8. Apply bottom linen on working side.
ae If linen is to be re-used release on working side.
b. Free mattress cover of wrinkles, re-anply linen.
9. Assist patient to completed side of bed.
10. Apply bottom linen on opposite side of bed.
ll. Make top of bed as for open bed,
12. Change pillow case,
7/1/58
�
a ie
PRESBYTERIAN AND WOMAN'S HOSPITALS 1d.
OSCILLATING OR SANDERS BED ;
Definition - A method of providing passive exercise by intermittent filling and
emptying of the blood vessels in order to relieve congestion,
Purpose - To aid in respiration in the thoracic poliomyelitis patients,
Equipment
From Physical Medicine Department
1. Oscillating Bed
2. Large rubber draw sheet
General Information
1. A daily charge is made, Notify Physical Medicine when bed is not in use.
2. Notify engineer when bed is on department. A daily requisition is sent to the
engineering department by Ward Clerk or charge nurse to have bed oiled and
checked once every 2); hours.
3. Long rubber sheet is used to cover the entire zattress.
4. Patient to remain in center of bed to avoid falling because Fulcrum changed
if not in center of bed.
a. Small side rail with red paint and shims may be used on these beds
when indicated and ordered.
b. Padded foot board may be used to prevent patient and mattress from
sliding.
5. Always stop bed at horizontal position (this prevents throwing gear off) to
give nursing care unless otherwise indicated by physician's order.
6. Metal plate with instructions concerning the cycle is fastened under the head
of the bed. The longer end of bed is the foot. The off and on switch is al-
ways to the patient's left,
7. The time cycle on these beds is 90 seconds. A faster or slower speed can be
obtained. Call the engineer to have it changed, Notify Physical Medicine that
it has been changed,
8, Stop and start at regular intervals until patient is accustomed to the regular
excursion of the bed, especially if patient is nauseated,
9. For elderly patients or those who have been ill over long period, use an even
cycle and increase it gradually.
10. Never place excessive weight at head or foot of bed at any time.
ll. Remove any object that might interfere with the excursion of the bed, such as
chairs, drainage bottles or waste basket.
Charting
‘Clinical sheet Nurse's notes
1. Treatment column 1. Date
2. Time column 2. Patient's reaction to
3. Time started; Nurse's initials treatment
. Time discontinued, Nurse's 3. Nurse's signature
initials.
1/16/58
�
FRESBYIIIIAN AN) UOUAN'S HOSPITALS
PPE-BYEAKFAST CARE
Purpose
To prepare patient for breakfast,
Eouipne nt
From bedside stand:
1. Bath basin
2e Soap dish and soap
3- Linen
&e Bath towel
be Face towel
' @» Wash cloth
he Eouipment fo: oral hy “iene
&@e Emesis basin
Ce Tooth paste
de Mouthwash cup
Se Comb and brush
Procedure
1. Explain that bath will be ~iven after breakfast.
2. Offer bedpan and/or urinal,
3. Assist patient with oral hygiene.
4. Assist patient to wash face and hands,
5. Patient nay care for hair if desired and patients needing assistance will have
hair cared for after bath,
6. Prepare for receiving breakfast tray.
7. Repeat oral hygiene immediately after breakfast,
7/2/58
�
PRESBYTERIAN AND WOMAN'S HOSPITALS 15.
BED BATH
ose
1. To cleanse
2. To make patient comfortable,
3. To stimulate circulation,
lh. To promote elimination through skin
5. To prevent odors
6. To teach principles of personal hygiene
7e To observe any significant change in patient's condition
Equipment
om bedside stand From linen closet
1. Bath basin 1. Laundry bag
2. Soap in soap dish 2. Clean linen for bed as needed
3. Oral hygiene equipment if not already distributed to
a, Lmesis basin unite
b. tiouth wash cup 3. Patient gown
c, Tootbrush From Central Supply
d. Toothpaste or powder 1. Nailclippers if necessary
h. Equipment for care of the From Dressing Cart
hair 1, Applicator, if necessary.
a. Comb
b. Brush
5e Linen required for bathing
a. Bath blankot
b. Wash cloth
c, Face towel
6, Beck lotion
. 7. Finger nail file or
orange stick
Procedure
1. Drape with bath blanket.
2. Obtain bath weter: 120°-115°F, Obtain water for oral hygiene.
3. Assist patient with oral hygiene.
h. Remove patient's gown. If patient is wearing own gown, place in
dresser drawer or bedside stand.
5. Bathe or have patient bathe his face, neck and ears and continue as
condition permits.
@ Place bath towelunder arm, Bathe, in sequence, axilla, upper
arm and forearm, Place towel in such a manner as to protect bed.
b, Place bath towel under patient's hand. Flace basin on towel and
wash patient's hand, Clean nails.
ce Cover chest with towel. Fold bath blanket back over abdomen,
d. Expose one half of chest at a time, bathe and replace cover.
Observe sub-mammary region for irritation.
@. Fold bath blanket down to pubic region, Bathe abdomen. If
necessary, use cotton applicator to clean umbilicus,
f, Bathe legs and feet in same manner as arms and hands,
�
Bed Bath (cont'd) 16,
Procedure
g- Position for back care, If condition permits, turn patient on
abdomen, otherwise turn on side away from worker,
h. Bathe back and buttocks; massage with baby lotion. The use of
alcohol requires physician's written order,
i. Leave patient alone to complete bath. Instruct to signal when
finished. Nurse will finish bath of helpless female patient.
Orderly will complete bath of helpless male patient,
6. Assist patient to put on gown,
7. Make bed. Pillow case is changed after hair is cared for,
8. Assist patient to comb hair,
Charting
Clinical Sheet
1. Complete care
2. Partial care
36 Self care
h. Time
5.lNurse's initials
Nurse's Notes (Chart on Nurse's notes only if patient's condition
has changed)
1. Date
2 Time
3. Observation of patient's condition
4. Nurse's complete signature.
7/1/59
�
PRESBYTERTAN AND WOMAN'S HOSPITALS 17.
SLTé BATH
se
1. To relieve pain and congestion,
2. To promote rectal drainage,
3. To relieve intestinal spasm,
General Information
1. Stay with patient during first treatment, then observe according to
patient's condition,
2. Observe for signs of fatigue andgmcope frequently.
3. If patient shows signs of fatigue or weakness, discontinue treatment
immediately,
- , Check temperature of water with bath thermometer.
5. Maximum length of treatment is 20 minutes,
6, Instruct patient to leave bathroom door unlocked, Place treatment
sign on door to provide privacy for patient.
7. Male patients will beassisted by orderly,
Equipment
i, Thermometer, bath.
2. Bath towels
3. Bath blanket,
lh. Dry gown and bathrobe
5.Hand bell
6. Treatment sign
7. Two quilted pads
Procedure
« Prepare for Sitz bath
a, Have patient void before he is taken to the tub.
b. Place hand bell so it will be in reach of the patient when
he is in the tub,
c. Fill tub about 1/3 fullof water at a temperature of 115°F.
d. Place one quilted pad on bath mat and one in tub ‘
2. Administer Sitz bath
a. Help patient undress and get into tub and adjust pad under
buttocks.
b. Cover shoulders with bath blanket,
c. Allow patient to remain in tub for time ordered,
d. Assist patient out of tub. Dry and dress patient; return
him to bed immediately.
e, If patient should show signs of fatigue or weakness, discontinue
treatment immediately.
Charting
Clinical Sheet
1. Treatment column
2. Date column
a. Time
b. Nurse's initials
Nurse's Notes
le Date
2. Time
3. Patient's untoward reaction only,
. Nurses complete signature,
7/29/59
�
PRESBYTFRIAN AND WOMAN'S HOSPITALS 18.
Furpose
« To cleanse
2. To make patient comfortable
3- To stimulate circulation and promote elimination through skin.
l. To prevent odors,
5. To teach principles of personal hygiene.
General Information
1. A physician's written order is required.
2. Bathroom door is to be left unlocked.
3. Patients should be instructed to avoid touching any electrical
equipment while in contact with water,
lh, Orderlies will assist male patientsif necessery.
5. Worker should check the patient's condition frequently during tub bath.
6. If patient is unable to tolerate the bath, drain tub.
ee
rom Patient Unit From Nurse's station
1. Bath towel 1, Hand bell
2. Face towel 2. Treatment sign
3. Wash cloth From Linen Closet
4. Soap in soap dish 1.Two quilted pads
5. Robe and slippers From Service Room
6. Gown 1. Bath thermometer
Procedure Charting
1. Place treatment sign on bathroom 1.Clinical Sheet
door. a, Morning, afternoon or evening
2. Fill tub half-full of water (100- care column, under proper
105°F). date - Tub bath, time, nurse's
initials.
3. Escort patient to bathroom,
4. Place one quilted pad on bath mat
and one in tub,
5. Assist patient to undress; assist
into water.
6. Place hand bell on tub; instruct
patient to signal for assistance.
7. Assist in bathing, if necessary.
8, Assist patient from tub; escort
to room,
5/23/59
�
19.
PRESBYTERTAN AND WOMAN'S HOSPITALS :
ORAL HYGTENE
Purpose
1. To keep mouth clean and in good condition,
General Information
1. Have patient remove lipstick prior to procedure.
2. Encourage patient to brush teeth after each meal.
From bedside stand
1. Patient's tooth brush and dentifrice
2. Emesis basin
3. Cup of water at a temperature desired by patient
lh. Face towel
- From department
1. Mouthwash if patient desires it
2. Drinking tube
Procedure
1. If patient is permitted to have back rest elevated, place him in
a sitting position. Spread a towel over his chest and olace emesis
basin in front of him,
2. If his condition contraindicates an elevated position, he is turned
on his side with his face along the edge of the pillow. A towel
is placed on pillow and emesis basin on the towel close to the
patient's cheek.
3. Hold brush over emesis basin and pour on water to moisten well.
Put dentifrice on brush.
4. Give brush to patient. Hold emesis basin under patient's chin or
along the cheek,
5. Place toothbrush on gum and brush to biting edge of teeth.
6, Assist patient to dry lips with towel.
8/7/58
�
PRESBYTERIAN AND WOMAN'S HOSPITALS 20.
a Purpose
rn 1. To keep mouth clean and in good condition,
General Information
1. To make swab, split a tongue blade lengthwise and wind gauze around
end of tongue blade covering 2 inches, Tuck free end under fold.
2. Glycerin dehydrates mucous membrane, therefore mineral oil is the
only medication that can be used without a physician's order,
3, Mouthwash is 20% alcohol solution and therefore must be diluted
with 3 parts of water,
Equipment
From bedside stand
1. imesis basin
From department
1.Bakelite tray (8 x 10 x 3/) containing:
a. Small gauze sponges (2 x 2) or bandage ends
b,. Tongue depressors
c. Applicators
a. One dram mineral oil
2. Cup of mouthwash end water
3. Newspaper bag pinned to bed
lh, Drinking tube
Procedure
. 1. Spread towel over patient's chest.
P 2. Hold swab over emesis basin and moisten with mouthwash.
3. Hold chin and press dow gently to open patient's mouth,
. If mouth is parched and dry, apply mineral oil, leave in place
for 15 minutes,
5. Cleanse mouth in following manner w ith mouthwash:
a. Outer and inner surfaces of upper teeth and gums
b. Outer and inner surfaces of lower teeth and gums
c. Roof of mouth
d, Tongue
e, Inner sides of cheeks
6, If patient is able, place drinking tube in cup of water and
have patient rinse mouth, turning head slightly to one side, If
patient is not strong enough, cleanse mouth as above with water
to remove mouthwash, Hold emesis basin for return of contents from
mouth.
7. Wipe patient's mouth with towel.
Charting
Clinical Sheet
1. Treatment Column
ae Name of treatment
2. Date Column
Qe Time
b, Nurse's initials
Nurse's notes
4 1. Date
2.lime
3. Condition of patient
h. Nurse's complete signature
8/8/59
�
PRESBYTERIAN AND WOMAN'S HOSPITALS 2l.
CARE OF DENTURES
Purpose
1. To keep mouth clean and in good condition
- 2. To keep dentures clean and free from odors
General Information | Sat
« Unconscious patients and patients going to surgery should have
dentures removed and cared for by nurse, fot by family.
2. Special care should be taken when handling dentures as they aré
very costly.
3. Be tactful, for patients may be sensitive about wearing dentures,
4. Encourage patient to care for dentures when able to go to sink,
5. If patient wishes to leave dentures out of his mouth for any
period of time, they are to be placed in a denture cup with water.
6, Dentures are to be cleaned after each meal.
Equipment
From patient unit
1. Patient's toothbrush and dentifrice
2. Face towel
3. Cup of mouthwash or water
. Denture cup
Procedure
3}. Remove or have patient remove dentures and place in denture cup,
®. Fill sink 4 full with water to minimize breakage of dentures,
>. Take denture cup to sink, cleanse thoroughly under running water
using patient's toothbrush and dentifrice,
i. Place cleaned teeth in the rinsed denture cup and return to
patient.
5. Have patient rinse mouth and replace teeth.
Charti
A ans cal Sheet
l. Treatment Column
a. Name of treatment
2. Date Column
Be Time
b. Nurse's initials
8/8/58
�
228
se i i
1, To make patient comfortable,
2. To stimulate circulation,
3. To promoté cleanliness,
General Information
1. Back care is given at least once a day to all patients.
2, Back care given as part of daily care of »atient is not charted,
3. Increased administration of back care is determined by patient's
condition,
Equipment
ron bedside stand
1. Bath basin
2. Towels and washcloth
3. Soap
lh. Back lotion
5. Bath blanket
Procedure
le Drape vatient with bath blanket.
2. Reaove patient's gown and turn patient on abdomen.
a. Patient may be turned on side as condition permits,
3. Wash patient's neck, back and buttocks, rinse well, dry thoroughly.
4, Massage back with back lotion until desired effect is obtained and
patient is comfortable,
Charti
1. Clinical Sheet
a. Treatment Column (Back Care)
If medication used, chart with treatment.
b. Date Column
Time
Nurse's initials
2. Nurses Notes
a. Date
b. Time
c. Condition of »xatient's back
d. Nurses complete signature
7/29/58
�
PRESBYTERIAN AND WO: 'S HOSPI 236
SHAMPOO OF Tae ath
Purpose
1. To insure cleanliness
2. To make patient confortable
3. After treatment for pediculosis
General Information
1. A written order must be secured from physician before shampooing
patient's hair.
ee Adjust temperature of water to vatient's comfort.
3. It may be more convenient to place patient on a surgical stretcher
and shainpoo hair at the sink in the service room.
Equipment
From Central Supply From Clinical Area
1. Kelly pad L. Small newspaper bag
2. Two oitchers 2. Cotton pledgets for ears
3. Pail 3. Newspapers
From Linen Closet From Bedside Stand
1. Rubber protector 1. Shampoo
2. Three bath towels 2. Comb
3. One face towel
Procedure
- Patient lies on back across bed with head near upper side edge of
mattress with head tilted backward,
2. Unfasten gown at neck and turn band down.
3- Place rubber protector covered with bath towel on mattress.
h. Place Kelly pad on mattress. Cover pad edge with face towel.
5« Place end of Kelly pad into pail.
a. Place pail on chair protected with newspapers.
6. Place bath towel over chest and tuck under gown.
7. Comb vatient's hair,
8, Place small pledgets of cotton in ears,
9. Pour water, temperature 105°F, on hair. Hold pitcher close to head
to prevent splashing. Continue pouring until hair is well moistened,
holding your hand on patient's forehead to direct flow of water,
10. Apply shampoo and rub all parts of head and hair.
ll. Rinse, pouring water on hair until all shampoo is removed,
12. Apply shampoo on hair again,
13. Rinse hair thoroughly.
14. Squeeze surplus water from hair,
15. Remove Kelly pad and cover patient's head with bath towel.
16. Carry Kelly pad and pail of waste water to service room.
17. Return to patient. Remove cotton pledgets and discard into paper bag.
18. Dry ears, forehead and neck. Rub hair and scalp with bath towel
until dry. Comb hair,
19. Remove bath towel and protector from under patient's head.
Chart
1. Clinical Sheet
a. Treatment Column
Name of treatment (Shampoo)
b. Date Column
Time
Nurse's initials
2. Nurses Wotes
ae Date d. Condition of patient
b. Time 6. Nurses complete signature
Cc. Name of treatment
7/30/58
�
PRESBYTERIAN AND WOMAN'S HOSPITAL 2h.
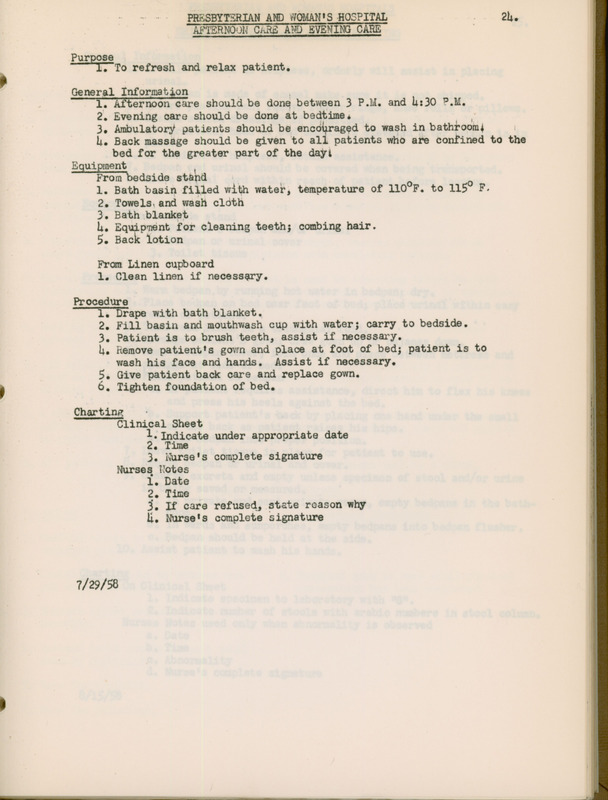
APTERNOON CARS AND EVENING CARE
Purpose
» To refresh and relax patient.
General Information |
1. Afternoon care should be done between 3 P.M. and 4:30 P.M.
2. Evening care should be done at bedtime. ;
3. Ambulatory patients should be encouraged to wash in bathroom
lh. Back massage should be given to all patients who are confined to the
bed for the greater part of the dayi
Equipment ’
From bedside stand
1. Bath basin filled with water, temperature of 110°F. to 115° F.
2. Towels, and wash cloth
3. Bath blanket
Le Bae bps for cleaning teeth; combing hair.
5. Back lotion
From Linen cupboard
1. Clean linen if necessary.
Procedure
1. Drape with bath blanket.
2. Fill basin and mouthwash cup with water; carry to bedside.
3. Patient is to brush teeth, assist if necessary.
4. Remove patient's gown and place at foot of bed; patient is to
wash his face and hands. Assist if necessary.
5. Give patient back care and replace gown.
6. Tighten foundation of bed.
Charting
Clinical Sheet
5: Indicate under appropriate date
3. Nurse's complete signature
Nurses Notes
1. Date
2. Time
3, If care refused, state reason why
i. Nurse's complete signature
7/29/58
�
PRESBYTERIAN AND WOMAN'S HOSPITALS ‘
256
URINAL AND BEDPAN-GIVING AND REMOVING
General Information
1. If male patient is helpless, orderly will assist in placing
urinal.
2. If bedpan is made of enemel make sure it is not chipped,
3 Before placing pan, remove rubber rings, knee rolls or pillows.
4. Change soiled dressings if permitted,
5. If permitted, head of bed should be elevated after bedpan is in
place,
6. If patient is helpless, obtain assistance.
7 Bedpan and urinal should be covered when being transported,
8, Leave signal cord within reach of patient before leaving.
Equipment
From bedside stand
1. Patient's bedpan and/or urinal
2. Bedpan or urinal cover
3. Toilet tissue
Procedure
« Warm bedpan by running hot water in bedpan; dry,
2.-Place bedpan on bed near foot of bed; place urinal within easy
reach of patient,
3. Turn back linen in a triangular fold.
4. Arrange patient's gown; draw gown up or pajamas down,
5e Remove bedpan cover, fold once and place between mattress and
Springs at side of bed,
6. Place patient on bedpan
a. If patient requires assistance, direct him to flex his knees
and press his heels against the bed,
b. Support patient's back by placing one hand under the small
of the back as patient raises his hips.
¢. Slip bednan into proper position.
7. Leave toilet tissue in place for patient to use.
8, Remove bedpan or urinal and cover,
7. Observe excreta and empty unless specimen of stool and/or urine
is being saved or measured,
a. In private and semi-private rooms, empty bedpans in the bath-
room.
b. In wards and sunporches, emoty bedpans into bedoan flusher,.
c. Bedpan should be held at the side,
10. Assist patient to wash his hands.
Charti
On Clinical Sheet
1. Indicate svecimen to laboratory with "S$",
2. Indicate number of stools with arabic numbers in stool column,
Nurses Notes used only when abnormality is observed
a. Date
b. Time
c. Abnormality
d. Nurse's complete signature
8/15/58
�
PRESBYTERIAN AND 'OMAN'S HOSPITALS
ADMISSION OF PATTENT
General Infornation
1. Ambulatory patients are received by admitting clerk and escorted to clinical
division,
2. Emergency Room admissions are taken Cirectly to clinical division by Energency
Room personnel,
3e Patients admitted by ambulance are taken directly to clinical division by
ambulance attendants, Admitting clerk notifies clinical division of arrival
of patients,
he Admitting clerk fills out patient's record sheet, secures complete set of *
chart forms and takes to clinical division with ambulatory patient. ,
52 Responsible person accompanying patient is sent to Admitting Office to cive
information concerning patient admitted through Emergency Room or by ambulance,
S2t of chart forms is taken to clinical division by admitting clerk, .
6. Nursing personnel notify evening or nicht supervisor when patient arrives
between 7 P.M. and 7 A.M,
7. All valuables or articles retained at bedside are responsibility of patient as
long as reasonable judgment can be exercised, This explanation is made by ad-
a mitting clerk and re-affirmed by nurse admitting the pationt.
8. A plastic identification band will be placed on wrist of cach patient by ad-
mitting clerk. If this is not possible, band is attached to chart and applied
by nurse admitting patient,
9. All patients should be received and escorted to patient unit by a nurse,
— a eee
Procedure Explanatory Statements
1. Fanfold covers to foot of bed when’
notified patient is to be admitted,
2e Assist the patient to undress and 29 Hospital gown is worn until physical
put on hospital sown, examination has been completed,
3e Measure heicht and weight whenever
possible,
he Patient is to remain on unit until
seen by physician,
/
5. Care for clothing, .
9 6, Care for valuables, |
�
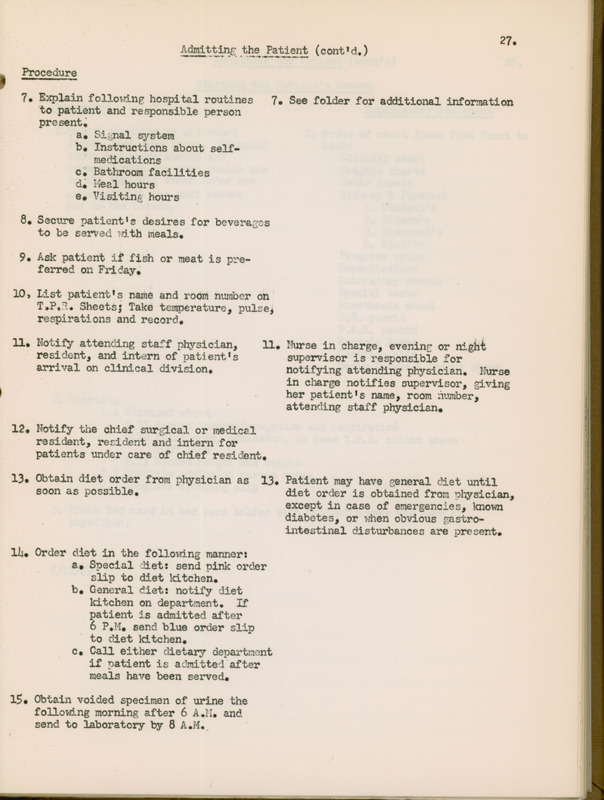
276
Admitting the Patient (cont'd, )
Procedure
oo
7» Explain following hospital routines 7. See folder for additional information
to patient and responsible person
present.
@e Signal system
be Instructions about self-
- medications
Ce Bathroom facilities
de lieal hours
@» Visiting hours
8. Secure patient's desires for beverage
to be served with meals,
9. Ask patient if fish or meat is pre~
ferred on Friday.
10, List patient's name and room number on
TsP.2. Sheets; Take temperature, pulse,
respirations and record,
li. Notify attending staff physician, 11. Nurse in charge, evening or night
resident, and intern of patient's supervisor is responsible for
arrival on clinical division, notifying attending physician. Nurse
in charge notifies supervisor, giving
her patient's name, room aumber,
attending staff physician,
12. Notify the chief surgical or medical
resident, resident and intern for
patients under care of chief resident,
13. Obtain diet order from physician as 13, Patient may have general diet until
soon as possible, diet order is obtained from vhysician,
except in case of emergencies, known
diabetes, or when obvious gastro-
intestinal disturbances are present.
Lh. Order diet in the following manner:
&e¢ Special diet: send pink order
slip to diet kitchen,
be General ciet: notify diet
kitchen on department. If
patient is admitted after
6 P.M. send blue order slip
_ to diet kitchen,
Ce Call either dietary department
if patient is admitted after
meals have been servede
15~ Obtain voided specimen of urine the
following morning after 6 A.M. and
send to laboratory by 8 A.M.
�
Admitting the Patient (cont'd) 28.
Starting the Patient!s Record
Procedure lanatory Statement
1.Fill’n headings on all chart 1. Order of chart forms from front to
forms, last name first, Clinical back:
eheet and order sheets are Clinical sheet
arranged with the most recent one Graphic charts
on the tepj-all other forms are Order sheets
arranged with the most recent History & Physical
one on the bottom, 1. Student's
2. Intern's
3. Resident's
. Staff's
Progress notes
Consultations
Laboratory sheets
Special tests
Anesthesia sheet
O.R, permit
P.A.R, record
Nurse's Notes
Clothing slip
Daily Intake & Output sheet
2. Charting
col Clinical shoet
2,11 Kecorc temperature,pulse and respiration
2,12 Print word, admission, in same T.P.R, column above
104° line
2.13 Record height and weight
2.2 Complete admission nurses notes
2.3 Complete clothing slip
3» Place bed card im bed card holder with patient's name and name of
physician,
8/11/59
�
PRESBYTERIAN AND WOMAN'S HOSPITALS
296
CARE OF CLOTHING
Purpose = To provide safe keeping of clothing while a patient is in the hospital.
Points of auphasis
e inspect clothing for vermin or unusual conditions and report to
the nurse in charge,
If vermin are present,place clothing in paper bag.
2. Account for allcontents of suitcase, pockets, purse, etc.
3. Be alert for detection of narcotics, medications, firearms or weapons,
If necessary, the policeman on duty may be summoned to dismantle firearms,
h. Sncourage family to take home any medications which have been brought
to the hospital,
5. Always have patient or other responsible person check clothing with
nurse.
6, Clothes are stored in closet in private and semi-private rooms and 13 P,
in lockers on the department for ward and sunporch.
7. When patients are admitted with medical aseptic technic precautions,
place clothing in a paper bag and request fanily to take home or place in
dresser drawer,
aqripment
rom Nurses’ Station
1. Clothes List
26 Tag
Procedure
For Storing Clothin
l. Identity, with a second person,
all articles on Clothes List,
2. Arrange clothes on hanger and
identify with tag which lists
patient's name and room number,
3. Obtain clothes locker key from
designated area.
4, Put clothes and baggage in
closet or locker,
a, Store medications in medicine
cupboard until discharge.
b. Store firearms and weapons in
safe in business office,
5. Return key to designated area,
From Linen Closet or Clothes Closet
1. Clothes Hanger
For Returning Clothing
1. Obtain clothes slip from chart.
2. Obtain locker key from designated
area.
3. Obtain clothes from locker and check
all articles against listing on
clothes slip. Report any discrepancy
to charge nurse,
4, Have patient and witness sign clothes
list to verify receipt,
5. Return clothes list to chart,
CHARTING
Clothes List
ae g-name of patient, date, unit and room number,
b. List locker number or check closet,
Co noua of all articles - number and description. (soiled,torn and
bloody
d. Signatures of patient and nursing personnel for clothing stored and
valuables retained,
e. Valuables in safe - Check yes or no,
f, Under medications, describe container and contents and list storage area.
g» Listing and signatures for other than articles which are stored in
locker or clothes closet,
7/31/59
�
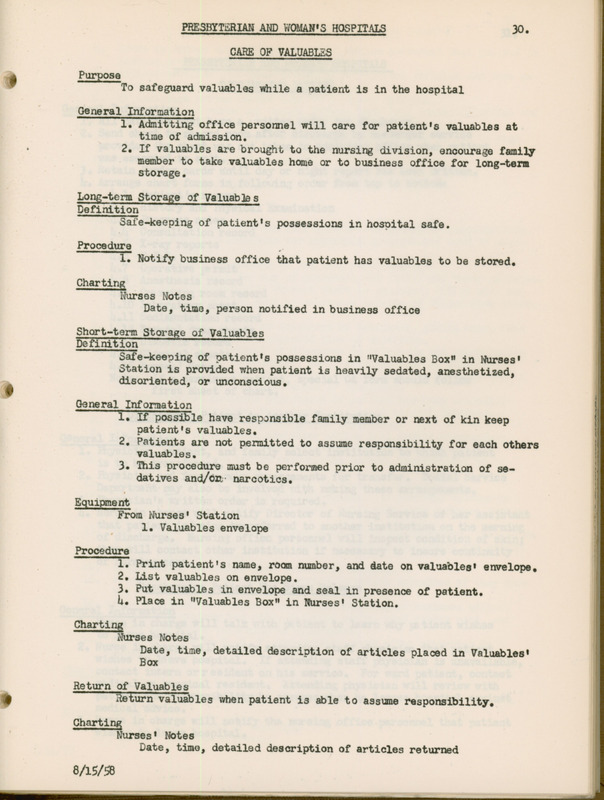
PRESBYTERIAN AND WOMAN'S HOSPITALS 30.
CARE OF VALUABLES
Purpose
To safeguard valuables while a natient is in the hospital
General Information
1. Admitting office personnel will care for patient's valuables at
time of admission.
2. If valuables are brought to the nursing division, encourage family
member to take valuables home or to business office for long-term
storage.
Long-term Storage of Valuables
Definition
Safe-keeping of patient's possessions in hosvital safe.
Procedure .
- Notify business office that patient has valuables to be stored,
Charting
Nurses Notes
Date, time, person notified in business office
Short-term Storage of Valuables
Definition
Safe~keeping of patient's possessions in "Valuables Box" in Nurses!
Station is provided when patient is heavily sedated, anesthetized,
disoriented, or unconscious.
General Information
° possible have responsible family member or next of kin keep
patient's valuables,
2. Patients are not permitted to assume responsibility for each others
valuables .
3. This procedure must be performed prior to administration of se-
datives and/onm: narcotics,
Equipment
From Nurses! Station
1. Valuables envelope |
Procedure |
- Print patient's name, room number, and date on valuables! envelope, |
2. List valuables on envelope.
3. Put valuables in envelope and seal in presence of patient.
kh. Place in "Valuables Box" in Nurses! Station.
Charting
Nurses Notes
Date, time, detailed description of articles placed in Valuables!
Box
Return of Valuables
“Return valuables when patient is able to assume responsibility,
Charti
Desia Notes
Date, time, detailed description of articles returned
8/15/58
�
31.
FRESBYTIRIAN AND WOMAN'S HOSPTTALS
| DISCAARGING PATIZNT
General Information
1. All patients must have a written order for discharge,
2. Send chart to record room after discharge by messenger service
provided the chart was not taken to admission office when patient
was escorted to exit.
3« Retain Kardex cards until day or night report has been written.
4, Arrange chart forms in folloving order from top to bottom:
4
Patient's record
History and Fhysical Examination
Proeress notes
Consultation record
X-ray reports
UeK.G.
Operative permit
Anesthesia record
Oye rating room record
4210 Laboratory sheet
ell Sedimentation record
4.12 Special drug sheets
4.13 Diabetic record
holy Clinical sheets
helS5 Nurses! Notes
Note: If a carcinoma patient, special CA form should follow
first sheet of chart.
Discharging Patient to Another Institution
General Information
i. Physician, patient, and family select institution to which patient
is to be transferred,
2. Fhysician and family make arrangements for transfer. Social Service
Department may also be involved tith making these arrangements.
3. Physician's written order is required.
4, Nurse in charge will notify Director of ilursing Service or her assistant
that patient is being transferred to another institution on the morning
of discharge, Nursing officc personnel will inspect condition of skin;
they will contact other institution if necessary to insure contimity
of nursing care,
Discharging Patient Who Signs Release
General Information
‘i. Nurse in charge will talk with mtient to learn why mtient wishes
to leave hospital.
2. Nurse in charge will notify attending staff physician that patient
wishes to leave hospital. If attending staff physician is unavailable,
contact intern orresident on his service, For ward patient, contact
medical or surgical resident, Attending physician will review with
patient the responsibility he assumes when he leaves hospital against
medical advice,
3 Nurse in charge will notify the nursing office personnel that patient
wishes to leave hospital.
�
32.
Discharging Patient Who Signs kelease (cont'd)
4. Nurse in charge will notify admission office personnel that patient is
leaving hospital against medical advice,
a 5. Admission office personnel will come to clinical division and have pa-
9 tient sign release.
6. If admission office cannot come to clinical division,
6.1 Graduate nurse may obtain Release Book from admission office and
have patient sign before leaving clinical division.
6.2 Graduate nurse may escort patient to admitting office to sign
Release Book,
7 Release Book may be witnessed by:
7el Physician
702 Admitting office clerk
7.3 Graduate nurse
Procedure
1. Check medicine cupboard and refrigerator for patient's prescriptions,
2. Complete credit memorandums for remaining medications; send to phar~
macy immediately,
3. Print on credit memorandum in red ink, "Discharged."
4. Check on department for any of patient's old charts and X-ray pictures,
Old charts and taken with current chart to admission office when pa-
tient is discharged or sent by messenger service to Record Room immed-
iately after discharge,
5. Notify cashier's office or discharge by telephone, giving name, room
number, hospital number, expected time of departure.
6. Notify dietary department of discharge by telephone and cancellation
slip, giving name, room number, diet, expected time of departure.
Dietary department must be notified as soon as it is known so that a
9 dietary conference may be arranged if necessary.
7. Notify Physical Medicine Department if patient has been receiving
treatment, giving name, room number, expected time of departure,
8. Send any late charge slips to proper department.
9. Upon request of mtient, admitting office will notify responsible
person that patient has been discharged by doctor,
10, Review with patient and/or responsible person, instructions to be
followed after discha ge.
ll. Obtain clothes and assist patient to dress if necessary.
12. Check patient unit for personal belongings. If personal belongings
are left behind, pkace in bag, seal, label with name and room number,
and send to Nursing Office,
13. Put patient in wheelchair or assist to ambulance stretcher. Unless on
a stretcher, all patients are taken to exit in wheelchair for safety
and to conserve energy.
14. Notify nurse in charge when patient is leaving.
15. Accompany patient to business office to obtain valuables if they have
not been obtained by responsible person.
16, Escort patient to hospital exit after stopping at business office,
17. Remove and destroy bed card, medicine cards, ward roster card, and
chart card after returning to department,
18. Cross off name on T. P. R. and dietary sheet after returning to
department,
Chartin
@lingoal Sheet
o 1. Print word, "Discharged" - above 10°F in appropriate time column,
Nurses! Notes
1. Date, hour, method of discharge
2. Nurse's complete signature
7/31/59
�
“
33.
PRESBYTERIAN AND WO:AN'S HOSPITALS
RAKING A SURGICAL STRETCHER
Definition - A carriage prepared for transportation of patient to
Furpose
uipment
Procedure :
8/1/58
hh
and from various departments in hospitals.
1. To prepare a stretcher that will keep patient warm
2. To protect him from injury.
From Linen Closet:
1. One woolen blanket, if needed.
2. Two bath blankets.
3. One large sheet.
4. One face towel, ether boots, and gown when patient
is going to Orerating Roome
From Patient Unit:
ie Pillow
1. Place large sheet, folded once Ingthwise, over rubber
pad and tuck in at sides. idiiter corners at ends and tuck.
2. Place first bath blanket on stretcher and fanfold back once
lengthwise from the center of the stretcher,
3« Make surll triangular folds at the heac of the carriaze.
4. Fold se.ond bath blanket in half lengthwise and place on
stretcher, making an eight inch cuff at top.
�
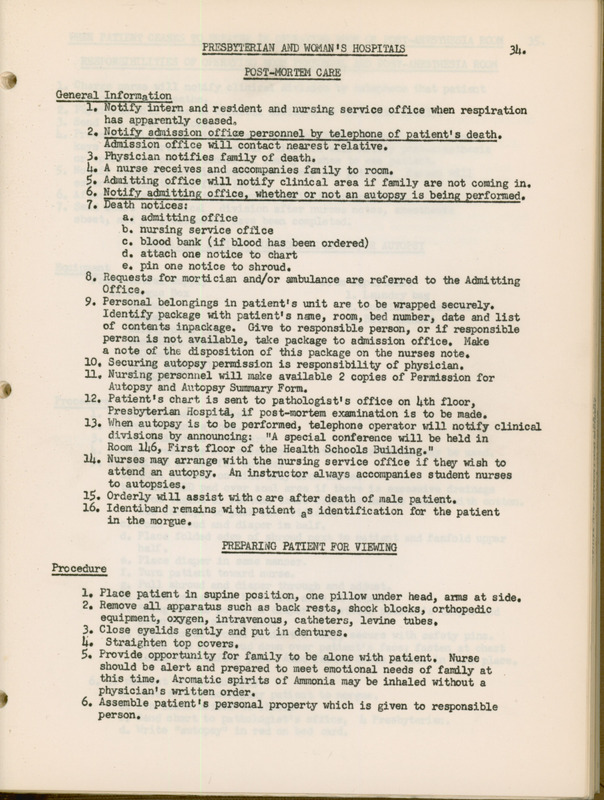
PRESBYTERIAN AND WOMAN'S HOSPITALS 3he
@ POST-MORTEM CARE
General Information
¢ Notify intern and resident and nursing service office when respiration
has apparently ceased,
2. Notify admission office personnel by telephone of patient's death.
ssion office will contact nearest relative.
3e Physician notifies family of death.
e A nurse receives and accompanies family to room.
ge Admitting office will notify clinical area if family are not coming in,
» Notify admitting office, whether or not an autopsy is being performed,
7. Death notices:
a admitting office
b. nursing service office
C. blood bank (if blood has been ordered)
d. attach one notice to chart
€. pin one notice to shroud.
8, Requests for mortician and/or ambulance are referred to the Admitting
Office,
9. Personal belongings in patient's unit are to be wrapped securely.
Identify package with patient's nane, room, bed number, date and list
of contents inpackage. Give to responsible person, or if responsible
person is not available, take package to admission office, Make
a note of the disposition of this package on the nurses note,
10, Securing autopsy permission is responsibility of physician,
ii. Nursing personnel will make available 2 copies of Permission for
® Autopsy and Autopsy Summary Form.
12, Patient's chart is sent to pathologist's office on lth floor,
Presbyterian Hospita, if post-mortem examination is to be made,
13. When autopsy is to be performed, telephone operator will notify clinical
divisions by announcing: "A special conference will be held in
Room 146, First floor of the Health Schools Building."
14. Nurses may arrange with the nursing service office if they wish to
attend an autopsy, An instructor always accompanies student nurses
to autopsies,
15. Orderly will assist withcare after death of male patient.
16, Identiband remains with patient ,s identification for the patient
in the morgue,
PREPARING PATIENT FOR VIEWING
Procedure
1, Place patient in supine position, one pillow under head, arms at side,
2. Remove all apparatus such as back rests, shock blocks, orthopedic
equipment, oxygen, intravenous, catheters, levine tubes,
3e Close eyelids gently and put in dentures,
he Straighten top covers,
5. Provide opportunity for family to be alone with patient. Nurse
should be alert and prepared to meet emotional needs of family at
this time, Aromatic spirits of Ammonia may be inhaled without a
physician's written order,
% 6. Assemble patient's personal property which is given to responsible
person,
�
WHEN PATIENT CEASES TO BREATHE IN OPERATING ROOM OR POST-ANESTHESIA ROOM 35.
- RESPONSIBILITIES OF OPERATING ROOM PERSONNEL AND POST-ANESTHESIA ROOM
1. Charge nurse will notify clinical division by telephone that patient
has ceased to breathe,
2. Physician will come to clinical division to talk with family.
3. Send out death notices,
4. Prepare patient for viewing and take to 1105, After 7 p. m. secure
keys from supervisor, Clinical division will notify post-mesthesia
or operating room personnel if femily wishes to see patient.
5. Notify clinical division when family may see patient. Nurses will
escort family to and from 1105,
6, After family has visited, prepare patient for mortician,
7. Send chart to clinical division after nurses notes, anesthesia
sheet, and progress notes have been completed.
PREFARING PATIENT FOR MORTICIAN AND/OR AUTOPSY
ipment
rom Central Supply From Department
1. Morgue Box 1. Laundry bag
shroud 2. Surgical stretcher
diaper 3 Bath blenket
safety pins (12)
absorbent cotton
ABD pad
aper bags (2)
Feces
Procedure
« Drape with bath blanket
2. Renove patient's gow,
3. Bathe patient as necessary.
4. Change dressings as necessary. Unsterile dressings may be used,
5. If patient is not for autopsy
a. Turn patient on side away from nurse,
b. Place ABD pad over anal area if there is excessive drainage
from vagina or rectum, these orifices may be packed with cotton.
Use forceps to pack the orifices,
c, Fold shroud and diaper im half,
d. Place folded edge of shroud next to patient and fanfold upper
half,
@. Place diaper in same manner.
f. Turn patient toward nurse.
g Pull shroud and diaper through and adjust.
h. Place patient on back with arms at sides,
i. Bring middle point of diaper up between patient's thighs and
secure with safety pin.
je Wrp shroud around patient's body, secure with safety pins.
k, Bring top of shroud down over patient's face; fasten at chest
level with safety pin, Also fasten death notice in this place.
6. If patient is for autopsy:
a. Have shroud accompany patient to morgue.
b, Pin death notice to shroud
c. Send chart to pathologist's office, Presbyterian.
d. Write "autopsy" in red on bed card.
�
l.
26
he
5.
6.
7°
TRANSPORTING PATIENT TO MORGUE
Place patient on surgical stretcher,
Pull top covers over patient's face,
Obtain orgue key from Presbyterian Admission Office.
Remove name tag from patient's bed. Use name tag to identify patient
in Morgue locker,
Transport patient to morgue. All clinical divisions except 13 P.H.
take Woman's Hospital freight elevator to lst Floor of Woman's
Hospital... 13 P.H. take Presbyterian Hospital's elevator to third
floor, then take Woman's Hospital's freight elevator to lst Floor
Woman's Hospital. Elevator operator will make non-stop trip. Enter
Health Profession's Buildling through Woman's Hospital,
Lift patient into locker in morgue. At least two People are needed
to lift patient into locker, A nurse always accompanies patient to
morgue. Orderly can assist with lifting vatient into locker,
Return morgue key to Presbyterian Admission Office.
Chartin
ices Notes
8/15/58
1. Date
2. Time
3. Name of physician who pronounced patient dead
4. Family present or not. :
5. Disposition of valuables and clothing
6, Nurse's complete signature
�
PRESBYTERIAN AND WOMAN'S HOSPITALS 37.
TEMPERATURES
9 General Information
° s Temperature, Pulse and Respirations are to be taken
a. On all patients at 4 A.M. and ) P.M, |
b. On newly admitted patients at the time of admission and every
hours while awake for 72 hours
c. On all post-operative patients every hours (8-12-l)-8 Etc.) for
48 hours; if elevation occurs follow rule for elevations
d. On all seriously ill patients every l hours while awake
6. On all patients who have an elevated temperature every hours
until normal range has been maintained for 72 hours, (Temperature
of 100°F.is considered an elevation.)
f. After a chill subsides and 1 hour later; then follow rule for
elevation
&» On any patient who has a physician's order for other than routine
times
2. Determination of Method
a. All temperatures are to be taken orally unless contraindicated and/
or ordered by the physician,
1. Oral temperatures are contraindicated if the patient is un-
able to cooperate, in an oxygen tent, if oral or nasal sur-
gery has been performed and in the presence of nasal ob-
struction, dyspnea or acute respiratory infection,
2. Delay taking oral temperature for 10 minutes if a patient has
taken a tub bath, has been smoking or has had hot or cold
fluids.
9 b. Rectal temperatures are contraindicated if there is rectal ob-
struction or if rectal surgery has been performed.
c. Axillary temperatures are taken with the permission of the charge
nurse when oral and rectal temperatures are both contraindicated,
3. Supply of Thermometers
a. Central Supply personnel will deliver and pick up thermometers on
each clinical division acco to the following schedule:
6 A.M. = Deliver 8 A.M. trays
Pick up elevation trays
9AM. Deliver elevation trays
Pick up 6 A.ii, trays
2330 P.M. Deliver & P.M. trays
Pick up elevation trays
5:30 P.M. Deliver elevation trays
Pick up & P..i. trays
7 P.id, Pick up @levation trays and deliver 1 tray
b. When a thermometer is broken, a slip must be put in the tray with
the broken thermometer before returning it to the storage area,
This is to be reported to the charge nurse immediately.
c. When clean thermometers are needed, take
elevation tray to P.C.S. and a clean holder fixample
will be exchanged for a soiled holder, 1 thermometer dropped
on floor
9 5P
4. If thermometer should be broken while in patient's mouth, rectum, oF
axillae, remove all particles of glass and notify charge nurse and
physician at once,
« Patient is to be asked how many bowel movements he had during the
previous 2 heurs at the same time that 8 A.M. temperature is taken,
6. No more then five thermometers may be distributed at one tine.
�
PRESBYTERIAN AND WOMAN'S HOSPITALS
TEMPERATURE, PULSE, RESPIRATION
AXILLARY TEMPERATURES
General Information
1. Take one temperature at a time,
2. Make sure that axilla is dry.
3. Ensure maximum contact of bulb with skin surface,
Procedure
1. Secure oral thermometer tray,
2. Remove gown from shoulder. Dry axilla with bath towel.
3. Place bulb end of thermometer in hollow of axilla with stem of thermometer
pointed toward chest,
4. Place arm across chest and allow thermometer to remain in Place for 10
minutes,
5. Proceed as for oral T.P.R.
7/15/58
�
PRESBYTERIAN AND WOMAN'S HOSPITALS a
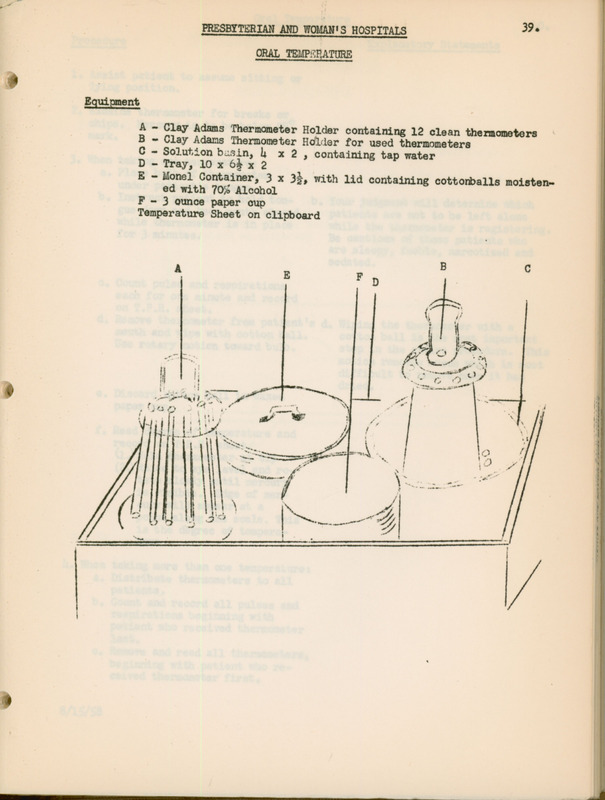
Equipment
A ~ Clay Adams Thermometer Holder containing 12 clean thermometers
B ~ Clay Adams Thermometer Holder for used thermometers
C ~ Solution basin, h x 2, containing tap water
D - Tray, 10 x 64 x 2
E - Monel Container, 3 x 33, with lid containing cottonballs moisten-
ed with 70% Alcohol
F - 3 ounce paper cup
Temperature Sheet on clipboard
�
Oral Temperature 0.
Procedure Explanatory Statements
1. Assist patient to assume sitting or
lying position.
2. Examine thermometer for breaks or
chips. Mercury is to be below 95°
mark,
3- When taking one temperature:
a. Place bulb of thermometer
under patient's tongue.
b. Instruct patient to hold ton- b. Your judgment will determine which
gue down and keep mouth closed patients are not to be left alone
while thermometer is in place while the thermometer is registering.
for 3 minutes. Be cautious of those patients who
are sleepy, feeble, narcotized and
sedated,
Cc. Count pulse and respirations
each for one minute and record
on T.P.R. sheet.
d. Remove thermometer from patient's d, Wiping the thermometer with a
mouth and wipe with cotton ball. cotton ball is the most important
Use rotary motion toward bulb, step in the entire procedure. This
motion removes mucus which is most
difficult to remove once it has
dried,
e. Discard cotton ball in waxed
paper cup.
f, Read degree of temperature and
record on T.P.R. sheet.
(1.) Hold thermometer at tip
(2.) Raise to eye level and ro-
tate slowly until mercury
is visible. Edge of mer-
cury Will appear at a
point along the scale. This
is the degree of tempera-
ture
4. When taking more than one temperature:
a. Distribute thermometers to all
patients,
b. Count and record all pulses and
respirations beginning with
patient who received thermometer
last.
¢. Remove and read all thermometers,
beginning with patient who re-
ceived thermometer first,
8/15/58
�
hl
PRESBYTERIAN AND WOMAN'S HOSPITALS 7
TEMPERATURE -PULSE-RESPIRATIONS
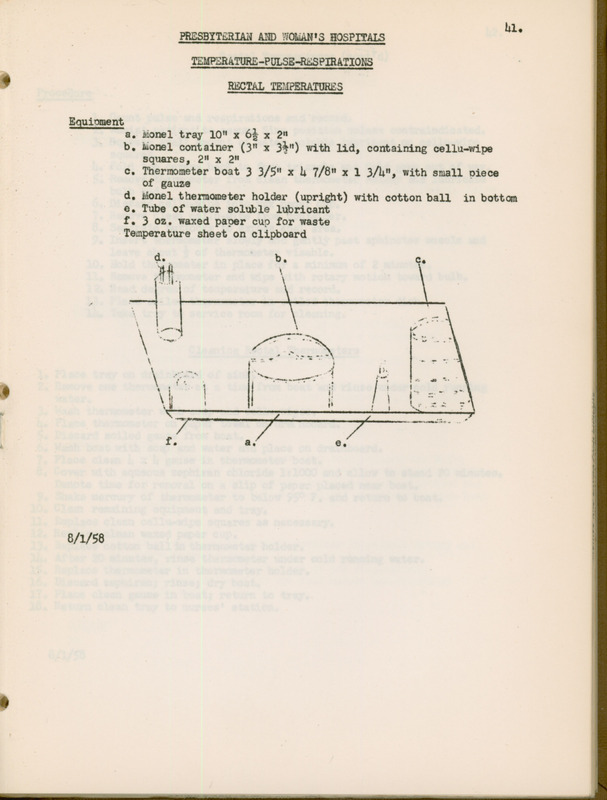
RECTAL TEMPERATURES
a. Monel tray 10" x 63 x 2n
b. lionel container (3" x 34") with lid, containing cellu-wipe
Squares, 2" x 2"
c. Thermometer boat 3 3/5" x h 7/8" x 1 3/4", with small piece
of gauze
ad. Monel thermometer holder (upright) with cotton ball in bottom
é. Tube of water soluble lubricant
f. 3 02. waxed paver cup for waste
Temperature sheet on clipboard
d. b.
Gx \
J oat a,
8/1/58
�
Rectal Temperatures (cont'd)
Procedure
1. Count pulse and respirations and record.
2. Assist patient to assume Sims position wnless contraindicated,
3. Squeeze small amount of water soluble lubricant on cellu-wipe
squares,
4. Fold top covers back to form triangle and fold gown out of way.
5. Remove thermometer from clean thermometer holder and lubricate
bulb end,
6. Discard cellu-wipe into wax paper cup,
7. Remove clean cellu-wipe from container, |
8. Separate buttocks to expose anal area. |
9. Insert thermometer slowly and gently past sphincter muscle and
leave about 4 of thermometer visable.
10, Hold thermometer in place for a minimum of 2 minutes.
11. Remove thermometer and wipe with rotary motion toward bulb.
12, Read degree of temperature and record,
13. Place soiled thermometer in soiled thermometer dish,
1. Take tray to service room for cleaning.
Cleaning Rectal Thermometers ss
1. Place tray on drainboard of sink.
a 2. Remove one thermometer at a time from boat and rinse under cold running
water, :
3 Wash thermometer with soap and cellu-wipes,
4. Place thermometer on paper towel on drai nboard,
5. Discard soiled gauze from boat.
6. Wash boat with so and water and place on drainboard.
7- Place clean x gauze in thermometer boat,
8. Cover with aqueous zephiran chloride 1:1000 and allow to stand 20 minutes,
Denote time for removal on a slip of paper placed near boat,
9. Shake mercury of thermometer to below 95° F, and return to boat,
10, Clem remaining equipment, and tray,
ll. Replace clean cellu-wipe squares as necessary.
12, Replace clean waxed paper cup,
13. Replace cotton ball in thermometer holder,
1). After 20 minutes, rinse thermometer under cold running water.
15. Replace thermometer in thermometer holder.
16. Discard zephiran; rinse; dry boat.
17. Place clean gauze in boat; return to tray.
18. Return clean tray to nurses' station,
8/1/58
�
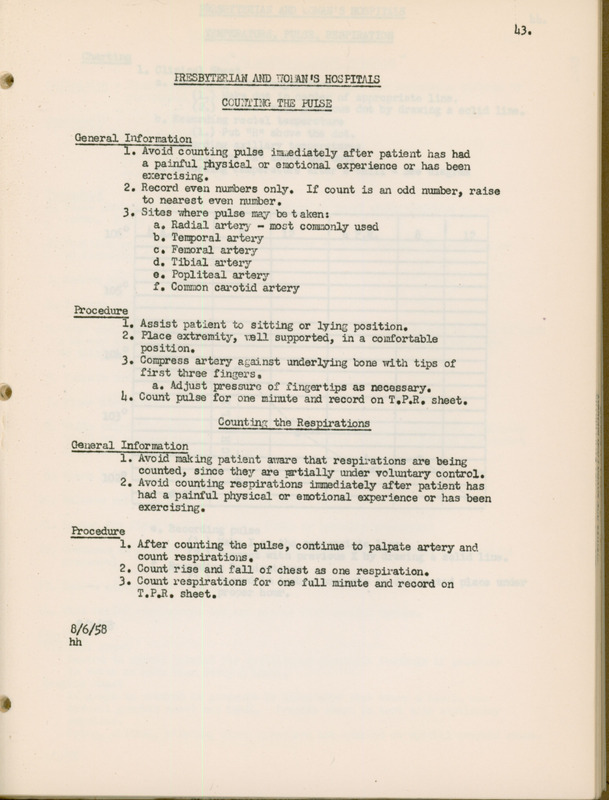
h3.
FRESBYTERIAN AND ‘OLAN'S HOSPITALS
COUNPING THE PULSE
General Information
“1. Avoid counting pulse imediately after patient has had
a painful physical or emotional experience or has been
exercising.
2. Record even numbers only. If count is an odd number, raise
to nearest even number,
3. Sites where pulse may be taken:
a» Radial artery = most commonly used
be Temporal artery
Ce Femoral artery
d, Tibial artery
@. Popliteal artery
f, Common carotid artery
Procedure
I, Assist patient to sitting or lying position.
2. Place extremity, vell supported, in a comfortable
position,
3- Compress artery against underlying bone with tips of
first three fingers,
a. Adjust pressure of fingertips as necessary.
4. Count pulse for one minute and record on T.P.R, sheet.
Countine the Respirations
General Information
1. Avoid making patient aware that respirations are being
counted, since they are mrtially under voluntary control.
2. Avoid counting respirations immediately after patient has
had a painful physical or emotional experience or has been
exercising.
Procedure
1. After counting the pulse, continue to palpate artery and
count respirations,
2. Count rise and fall of chest as one respiration.
3- Count respirations for one full minute and record on
TeFeheo sheet.
8/6/58
hh
�
PRESBYTERIAN AND \,0MAN'S HOSPITALS bbe
TEMPERATURE, PULSE, RESPIRATION
Charting
1. Clinical Sheet
* a. Recording oral temperature
a Make dot in center of appropriate line.
2.) Connect with previous dot by drawing a solid line,
b. Recording rectal temperature
(1.) Put "R" above the dot.
Ce Recording axillary temperatures
(1.) Put "A" above the dot.
d. Recording temperature after a chill - See diagram
106°
105
104°
103°
102°
6, Recording pulse
(1.) Make X on the appropriate line .
(2.) Connect with previous X by drawing a solid line,
f, Recording Respirations
(1.) Record in Arabic numerals in designated place under
prover hour,
8/1/58
�
PRESBYTERIAN AND WOMAN'S HOSPITALS U5.
TAKING AKTERIAL BLOOD PRESSURE
Definition = Blood pressure determines work of heart and resistance offered by
peripheral vessels,
Equipment
Tron Nurses! Station
1. Sphygmomanometer
2.Stethoscope
3. Alcohol sponge
Procedure
1. Place equipment so that sphygmomanometer is level while pressure is being
taken. Place stethoscope around neck.
2. Position patient so that arm is supported at heart level. Eyes should be
at manometer level,
3- Remove arm from gown,
4. Squeeze cuff to expel air,
5. Wrap cuff smoothly around the arm above the elbow. This should be done in such
a manner as to expose the anticubital space and to permit easy attachment
to sphygmomanometer,.
6. Palpate brachial artery.
7. Place stethoscope in ears,
8. While palpating radial pulse squeeze inflator bulb until manometer indicates
10-30 mm, mercury beyond obliteration of radial pulse, to prevent discomfort
from unnecessary pressure of cuff,
9. Place ball or diaphragm of stehoscope over brachial artery.
10. Release valve on side of inflation bulb,
ll. Listen for first audible sound, (This is systolic pressure.)
12. Continue to release air until change of tone is heard. (This is diastolic
pressure),
13. Remove stethoscope from ears,
1h. Wipe ballof stethoscope and ear pieces with alcohol sponge.
eee
cal Sheet
Record in spaces labeled for systolicad diastolic readings if pressure
is taken no more than every ), hours.
Graphic Sheet
If graph is ordered or pressure is taken more than every |, hours, use
special graphic sheet and labél. Graphic sheet is kept with stationary |
supplies, .
Lying, sitting, standing blood pressures are charted on special graphic sheet.
7/1/58 |
�
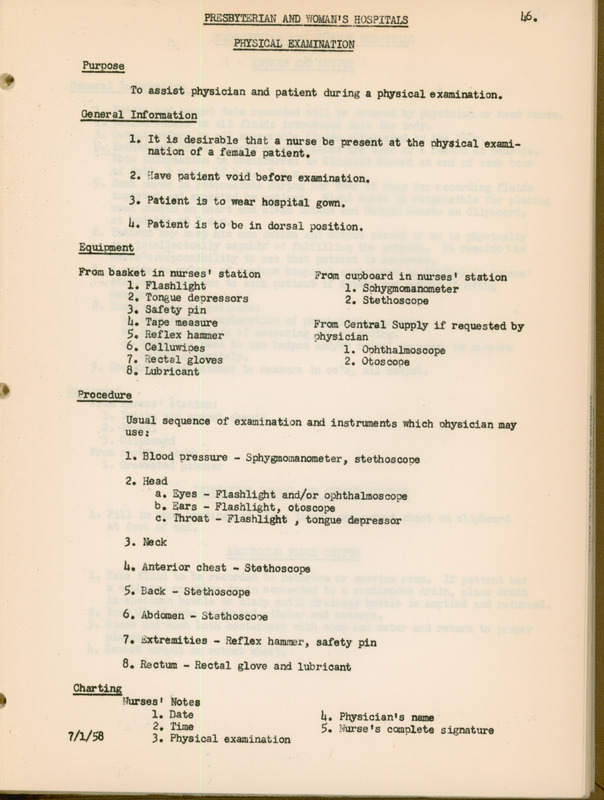
PRESBYTERIAN AND WOMAN'S HOSPITALS Wb.
PHYSICAL EXAMINATION
Purpose
» To assist physician and patient during a physical examination,
General Information
1. It is desirable that a nurse be present at the physical exami-
nation of a female patient,
2. Have patient void before examination.
3. Patient is to wear hospital gown.
4. Patient is to be in dorsal position,
Equipment
From basket in nurses! station From cupboard in nurses! station
1. Flashlight 1. Sohygmomanometer
2, Tongue depressors 2. Stethoscope
3. Safety pin
lh. Tape measure From Central Supply if requested by
5. Reflex hammer ohysician
6, Celluwipes 1. Ovhthalmoscope
7+ Rectal gloves 2. Otoscope
8. Lubricant
° Procedure
Usual sequence of examination and instruments which ohysician may
use;
1. Blood pressure - Sphygnomanometer » stethoscope
2. Head
a. Byes - Flashlight and/or ophthalmoscope
b,. Ears - Flashlight, otoscope
c. Throat - Flashlight , tongue depressor
3. Neck
4, Anterior chest ~ Stethoscope
5. Back - Stethoscope
6, Abdomen - Stethoscone
7. sxtremities - Reflex hammer, safety pin
8. Rectum - Rectal glove and lubricant
Charting
4 Nurses! Notes
1. Date 4. Physician's name
2. Time 5. Nurse's complete signature
7/1/58 3. Physical examination
�
U7.
PRESBYTERIAN AND WOMAN'S HOSPITALS
INTAKE AND OUTPUT
* General Information
1. Intake and output tobe recorded will be ordered by physician or head nurse,
2. Intake refers to all fluids introduced into the body.
3 Output refers to all measurable fluids eliminated by the body.
4. Intake and Output Sheets on Clipboards are used as a record at bedside.
This information is transferred to Clinical Record at end of each tour
of duty, 3 peme, 11 peme, 7 Acme
5» Hach nurse is responsible during her tour of duty for recording fluids
ingested and excreted by patient. Night nurse is responsible for placing
used sheets on chart and clean Intake and Output Sheets on Clipboard,
at bedside at 7 a.m.
6. Patient my leep his own intake and output record if he is physically
and intellectually capable of fulfilling the purpose. It remains the
nurse 'sresponsibility to see that patient is accurate,
7. A guide to volume of various hospital containers is located in nurses!
Station. Give one to each patient if intake and output is being
measured,
8. Instructions to patients:
a. Give simple explanation of physician's purpose.
b. Explain methods of measuring and recording.
C. Emphasize need to use bedpan and/or urinal in order to measure
output accurately,
9. Use graduated pitcher to measure in cc's, all output.
° uipment
om nurses! station:
1. Intake and output sheets
2. Pencil
From service room:
1. Graduated pitcher
INITIATING INTAKE AND OURPUT RECORDS
1. Fill in card heading and place intake and output sheet on clipboard
at foot of bed.
RECORDING FLUID OUTPUT
1. Take fluid to be recorded to bathroom or service room, If patient has
a catheter or other drain comected to a continuous drain, place drain
in specimen bottle or clamp until drainage bottle is emptied and returned,
2. Pour fluid into graduated pitcher and measure,
3 Rinse and wash both containers with soap and water and return to proper
places. A
4. Record uutput on output sheet,
�
li7.
FRISBYTERIAN AND WOMAN'S HOSPITALS
INTAKE AND OUTPUT
General Information
1. Intake and output tobe recorded will be ordered by physician or head nurse,
2. Intalce refers to all fluids introduced into the body.
3. Output refers to all measurable fluids eliminated by the body.
4. Intake and Output Sheets on clipboards are used as a record at bedside.
This information is transferred to Clinical Record at end of each tour
of duty, 3 peme, 11 pome, 7 Aeite
5. Zach nurse is responsible during her tour of duty for recording fluids
ingested and excreted by patient. Night nurse is responsible for placing
used sheets on chart and clean Intake and Output Sheets on Clipboard,
at bedside at 7 aem.
6. Patient may leep his own intake and output record if he is physically
and intellectually capable of fulfilling the purpose. It remains the
nurse 'sresponsibility to see that patient is accurate,
7» A guide to volume of various hospital containers is located in nurses!
Station. Give one to each patient if intake and output is being
measured,
8. Instructions to patients:
ae Give simple explanation of physician's purpose,
be Explain methods of measuring and recording.
c. Emphasize need to use bedpan and/or urinal in order to measure
output accurately.
9. Use graduated pitcher to measure in cc's, all output.
uipment
m nurses! station:
1. Intake and output sheets
2e Pencil
From service room:
1. Graduated pitcher
INITIATING INTAS AND OURPUT RECORDS
1. Fill in card heading and place intake and output sheet on clipboard
at foot of bed.
RECORDING FLUID OUTPUT
1. Take fluid to be recorded to bathroom or service room. If patient has
a catheter or other drain comected to a continuous drain, place drain
in specimen bottle or clamp until drainage bottle is emptied and returned,
2. Pour fluid into graduated pitcher and measure.
3» Rinse and wash both containers with soap and water and return to proper
places. :
4. Record uutput on output sheet.
�
PRESBYTERIAN AND WOMAN'S HOSPITAIS 49.
TESTING FOR PRESENCE OF SUGAR IN THE URINE
General. Information
° st and test tape are sensitive to light which may affect
accurate results,
2. Clinitest is caustic substance and will bum if handled with moist hands,
Equipment
ervice Room:
1. Bakelite tray 8" x 10"
a» Tes-tape dispenser and/or clinitest
b. Medicine dropper
c. Bottle of acetest tablets
d. Non-absorbent paper - 3 x 5 pad = use + sheet
€. Iodine cup
£, Paper cup and test tube if clinitest is used.
2. Acetest and clinitest color chart
ae Scotch tape to tile directly above tray
Procedure
1. Offer bedpan or urinal for collection of specimens at 7 a. m, ll a.m,
4 poms, and 9 p.m, For 7 asm. specimen, collect urine at 6 @. m,.,discard.
Force fluids and collect another specimen at 7 a.m. to insure freshness,
Ambulatory patients may prefer using bedpan or urinal in bathroom,
2. Remove bedpan or urinal; take to Service Room, If urinal is used to
collect specimen, pour approximately 4 oz. urine into iodine cup for testing
3. For testape:
a, Hoisten a strip of testape, about 14" in length, with urine specimen
b. Hold testape between fingers for one minute. Only a one minute
reading is accurate, Do not lay tape on any surface while testing,
c, Compare darkest area of test Strip with the color chart on the
dispenser, Each color chart is prepared specifically for the
tape in the dispenser,
l. For clinitest:
&. Place test tube in paper cup because chemical reaction creates heat.
b. Measure 5 drops of urine into test tube,
c. Measure 10 drops of water into test tube
d. Drop one clinitest tablet into test tube and observe reaction.
e. Remove test tube from cup and shake gently 15 seconds after
boiling has ceased,
f, Compare with color scale,
5. Clean droppers and test tubes thoroughly
charting
iabetic Record
1. Under correct date, beside correct time, place a dot under results
obtained. (Negative, 1/10 #1,14% = 2,) 4% = 3, 24 =.) Join
dots with straight lines. If patient is unable to void, indicate
on diabetic record at proper time space,
8/6/59
�
FRESBYTERIAN AND WOLAN'S HOSPITALS
TESTING FOR PRESENCE OF ACETONE IN URINE
Procedure
I. Place one acetest tablet on piece of white non<absorbent
payer, Absorbent paper will give incorrect results.
2. Recap bottle of acetest tablets, Undue exposure to air
may effect composition of tablets,
3. With medicine dropper, moisten tablet with one drop of
urine.
. Wait 30 seconds. Observe color of tablet at end of
30 seconds and compare result with color chart.
Chartin
Sintetic record sheet
1. Under correct date, across from correct time, indicate
results as negative, moderate, or strongly positive,
2. If patient is unable to void, indicate this on diabetic
record at proper time space.
Example of Charting
24 | 34 | UF | Acetone
Negs
Neg.
Nege
© void
3-1- 58
�
51.
FRESBYTERIAN AND WOMAN'S HOSPTTAIS
COLIECTICN OF STOOL SPECTIENS
ose
1. To collect specimen of feces for laboratory examination,
uipment
om patient unit
Le Bedpan
From department
1. Waxed paper + pint cup with cover for specimen.
2e Tongue blades
3 laboratory requisition
he Paper towel
5. Rubber band
6. Requisition
Procedure
« Instruct patient to defecate into clean bedpan.
a. Ask patient first to void in bedpan; clean bedpan
and return it to patient for stool specimen,
2. Print on cover:
a. Patient's name
be Room number
Ce Stool specimen
de Date
3 Remove bedpan and carry to utility room.
4, Using two tongue blades, transfer specimen from
bedpan to container,
5» Place requisition around container label side out, and
secure with rubber band,
6. Clean bedpan in usual manner; replace.
7. Send specimen to laboratory immediately, if for ameba.
lessenger will deliver other specimens to laboratory.
Charting
Clinical Sheet
1. Indicate specimen sent to hboratory by an "S!!
in stool colum,
Nurse's Notes
ae Date
2. Time
34 Any abnormal ities
4. If unable to obtain specimen, indicate
reasons for failure
5. Nurse's complete signature
8/1/58
hh
�
52.
FRESBYTERIAN AND WOMAN'S HOSPITALS
COLLACTION OF A SINGLY URINE SPACIMEN
uipment
From Faticnt Unit
le Bedpan
From Department
1. Waxed specimen bottle and cap
2. Laboratory requisition
3 Rubber band
General Information
e Collection of urine specimen requires physician's written
order, except for routine urine specimen on admission,
2. Routine specimens are collected from 6 asm. - 8 acm.
3. Specimens mist be at least 90cc.
lh, Stat specimens are talen to laboratory by nursing
persomel on clinical division.
"Stat specimens include pre-operative specimens"!
Procedure
1. Print information on cap and requisition. If stat specimen,
print "stat" in red ink on laboratory requisition,
2. Remove bedpan, place on bedside chair. Ambulatory patient
may prefer to use bedpan or urinal in bathroom, A male :
patient may use a waxed urine specimen bottle in bathroom.
3e Take bedpan to service room or to yatient's bathroom.
4. Pour urine into clean specimen bottle and place cap on bottle,
5. Place requisition around specimen bottle,
6. Place specimen bottle in mssenger's box in nurses! station.
Lessenger taxes snecimen to laboratory,
Chartinz
Clinical Sheet
1. Urine Colum
Under correct date column, under correct time 9
print "S" in specific eight hour urine colum,
Nurse's Notes
1. Date
Ze Time
P Abnormalities noted
e Inability to obtain specimen and why
5. Condition of patient
6. Nurse's complete signature
8/44 8
hh
�
536
FRESBYTERLAN AND WOMAN'S HOSPITALS
TWENTY-FOUR HOUR URINE SPECIMEN
” General Information
+ { a mM, 18 the most desirable time to begin and complete collections.
They are to be started no later than 9 a.m, Sunday through Thursday
are the most desirable days for collection so that the laboratory may
examine specimen as soon after completion as possible,
2. Mark starting time on Kardex Treatment Card.
3. Print, in pencil, on label, patient's name, room number, date, hour
started, and date and hour to be discontinued,
4. In explanation to patient, emphasize:
a. Ambulatory patient to use bedpan or urinal.
b. Urine must be free of all fecal material,
Ce No toilet tissue is to be in urine,
Equi. pment
From Central Supply Room
1°e¢ A dark gallon jug with lid,
2. Copper sulfate preservative if urine is to be tested for 17
ketosteroids,
- From Clinical Division
1. Gummed label,
: 2. Laboratory requisition.
4 3°. "2h hour specimen" card
4. Pper bag.
Procedure
« Have patient empty bladder, discard urine. Begin 2h hour urine
collection,
2. Place "2h hour specimen"card on bed to remind personnel to save
all urine.
3. Place jar on bathroom floor, If bathroom is not available, use
nearest service room,
4. Fasten completedrequisition to jar at end of 2h hour period.
5+ Take specimen to Fourth Floor laboratory, Put on table outside
Biochemistry Laboratory, Sign specimen in, in book,
Chartin
OT Tat oa Sheet
1. Record "2l; Hr.S" opposite word "Urine" in correct date and time
column,
2. Treatment column
a. 2 hour urine specimen started.
be 2) hour urine specimen completed,
36 Date column
ae Time
b. Nurse's initials,
a 8/1/59
�
She
FRESBYTERIAN AND WOMAN'S HOSPITALS
“ INSERTION OF RECTAL TUBE
Purpose
1. To relieve distention by providing a clear passage for the
expulsion of flatus,
General Information
° not force tube if obstruction is encountered,
2. Patient may be positioned on side or back,
See partment:
1. Large bakelite tray
2 Disposable urine bottle
3. Rectal tube #22-#28
4. $ inch adhesive
5. Lubricant - water soluble
6, Toilet tissue
7+ Emesis basin
Procedure
« Make an opening in urine bottle cap.
2. Insert rectal tube thru opening in cap,
Allow 2" of tube to extend into urine container,
3¢ Place cap on bottle.
# 4. lubricate rectal tube.
5. Bring equipment to room; place on bedside chair,
6. Insert rectal tube 3-6 inches and tape to leg,
7» Leave tube in place 20 to 30 minutes,
Chartin
ST nivel Sheet
1. Treatment
2e Date
3. Time
Nurses Notes
1. Date
2. Time
3. Treatment
4. Results obtained
5. Nurse's complete signature
‘
u
‘
ee ee
*
eT Sel ee ee
3 . Ce i a
en
8/11/58
hh
�
PRESBYTERIAN AND WOMAN'S HOSPITALS 556
GENERAL INFORMATION FOR ALL ENEMAS
1. All enemas require a physician's written order.
2. Prevent passage of air into rectum by running solution through rectal
tube before inserting and by not allowing solution container to become
empty.
3e Elevate irrigating can 10-18 inches above rectum since the pressure of
the solution flowing into the rectum varies directly with the height of
the container. Increased pressure causes the urge to defecate,
4. Select rectal tube according to the purpose of the enema.
a. Rate of flow varies with the size of the lumen of the tube,
b. The larger the lumen of the rectal tube » the greater the stim-
lation of the anal sphincter,
5. Patient is placed in left Simts position so that gravity will aid the
flow of solution into the colon,
6. Rectal tubes are inserted 3-6 inches,
7» Rectal tubes are lubricated to reduce friction.
8. Slow insertion of a rectal tube minimizes spasm of the rectal wall,
9. Test temperature of all solutions with a dairy thermometer,
10, All patients must use a bedpan to expel an enema except proctological
patients,
ll. If the patient complains of pain, discontinue treatment.
8/15/58
�
PRESBYTERIAN AND WOMAN'S HOSPITALS %,
CLEANSING ENEMA
Definition
tillation of a solution into the rectum with subsequent evacuation,
Purposes
1. To relieve constipation
2. To relieve flatulence
3. To evacuate the lower bowel
General Information
1. Temperature of solution is 105° 110° F,
2. Prepare 1000 cc. of solution. The amount administered depends on
patient's tolerance and purpose of enema,
3. Solutions commonly used and ration of ingredients
a. Soap solution - 1 ounce soap jelly: 1000 cc. water
b. Tannic acid - 3 drams tannic acid: 1000 ec. water
Ce Saline - 2 drams salt: 1000 cc. water
ad. Plain water - tap water 1000 ec,
4. Cover patient with bath blanket if a cleansing enema is given.
Equipment
From department From patient unit
l. Tray le Bedpan
a. Irrigating can 2. Bath blanket
b. Rubber tubing
ce. Hoffman spring clamp
d. Glass connector
e. Emesis basin
f. Protector and bedpan cover
Ge Water soluble lubricant
h. Toilet tissue
i. Bedpan cover = to cover tray
2. Solution as ordered by physician
3. Rectal Tube #22 ~ #28
Procedure
« Prepare solution in container, put lubricant on tissue.
2. Position patients; place covered rubber protector under buttocks,
3. Place tray on bed and bedpan at the foot of the bed,
4. Expel air from tube and lubricate the tube,
5. Expose anus and insert tube 3-6 inches allowing solution to flow
after tube has passed the sphincter muscles.
6. Pinch off rectal tube and remove,
7. Clamp tubing and wrap rectal tube in toilet tissue.
8. Place tray on chair,
9. Place patient onbedpan, preferrably in a sitting position/
Charti
@1inical Sheet 3. Stool column
1. Treatment Column a. e/i = effectual enema
a. Treatment b. = = ineffectual enema
b. Solution
ce. Amount Nurses Notes
d. Temperature 1. Date h, Results obtained
2. Date Column 2. Time 5. Patient's re«
a. Time 3. Treatment action
b. Nurse's initials 6, Nurse's complete
Signature
8/15/58
�
PRESBYTERIAN AND WOMAN'S HOSPITALS a76
SIPHONING AN ENEMA
Purpose
1. To remove enema solution not expelled,
General Information
« Place patient in right Sim's position so gravity will aid in the
flow of solution,
Equipment
From department
1. Retention enema tray
2. Rectal tube
3. 250 cc. water - 105°-110° F,
From patient unit
1. Bedpan and cover
Procedure
1. Place covered rubber protector under buttocks,
2. Place tray on bed and bedpan on chair,
3e Lubricate rectal tube and insert,
4, Pour small amount of water into funnel and quickly invert funnel
over bedpan. Allow to drain, This step may have to be repeated
several times,
5. Pinch off rectal tube and remove.
6, Wrap tube in tissue and place in emesis basin
Charting
Nurse's Notes
Le Date
Ze Time
3. Results of procedure
4. Condition of patient
5. Nurse's complete signature
8/15/58
�
%
PRESBYTERIAN AND WOMAN'S HOSPITALS 58
Lae tNtethaesesssannttinsnsnesan een e
RETENTION ENEMA
General Information
. Smali lumen rectal tube to orevent rapid distention of rectum,
2. A cleansing enema should follow any highly irritating enema in 1
hour,
3. Instruct all patients to retain retention enemas 15-30 minutes as
@ minimum,
4. A bath blanket is not necessary for a retention enema,
5+ Protector and cover are left under the patient as long as the enema
is retained,
6, Bedpan is kept in bedside stand until necessary in order not to
Suggest an urge to defecate,
7. Temperature of solutions is 100° 105° F,
8, A medicine card is required if any medication is given via enema,
¢ 180 cc, of solution is the: maximum amount given for a retention
enema unless specifically ordered by a ohysician,
10. Specific amount and solution should be ordered by physician, If
only "oil retention" enema is ordered, 90 - 180 cc, of mineral oil
is used,
ll. Remove tubing slowly and apply pressure over rectum to minimize
the desire to defecate,
Equipment
From Department
1. Small tray containing
a. funnel
b. small pitcher
Cc. Water soluble lubricant
d. Protector bedpan cover
e. Emesis basin
f. Toilet tissue
2. Small size rectal tube
example: size 21
1. Place tray on bed,
2. Position patient and place covered rubber protector under buttocks,
30 Lubricate tube,
4. Expose anus and insert tube 3-6 inches.
5» Keeping tube pinched off, fill funnel with solution.
6. Place pitcher on bed and elevate funnel slowly.
7. Refill as solution flows into rectum,
8. Pinch off rectal tube and remove,
9. Using toilet tissue, make pressure over rectum until sphincter
muscle relaxes,
10. Wrap tube with toilet tissue. Place tube in emesis basin pitcher
on tray.
Chart
Clinical Sheet
1. Treatment Column 2. Date Column
a, Treatment a. Time
b. Solution b. Nurse's initials
c. Amount 3. Stool Column
d, Temperature a. Chart’ E/y (Effectual
| enema
Nursés Notes b. Chart ae
1. Date 4. Results obtained enema 6
2. Time 5. Patient's reaction
3. Treatment 6, Nurses lete signature
8/15/38 a
�
PRESBYTERIAN AND WOMAN'S HOSPITALS 59.
SPECIAL ENEMATA - OIL
POINT OF EMPHASIS: For all special enematas a medicine card is required
for the medication used,
PURPOSES 3
1. To soften feces and to prevent strain on sutures after perineal
and rectal operations,
2. To soften feces in an impacted rectum.
3. To soothe irriteted mucous membrane,
4, To serve as a basis for drugs.
SOLUTIONS USED
1. Use kind of oil ordered by physician.
Olive oil usually, 3 - 6 ounces ~ temp. 100 ~ 105°
Cotton = oil (same amount and temp. as olive oil)
Castor oil
Olive oil ) each, 2 ounces (equal parts)
Cottonseed oil)
Sneianainn ) each, 2 ounces (equal
NOTE:
1. To be retained as long as possible.
2. In impaction, and following operations, may be followed in
one hour by a cleansing soap enema, if ordered, or
physician may order length he wishes oil to be retained.
CARMINATIVE
PURPOSE :
1. To irritate nerve endings in lining of intestine causing
contraction and expulsion of flatus,
M.G.W. ENEMA 1-2-3
1. Use: Magnesium sulphate....1 ounce
Glycerine vescenceocceed ounces
WEeer 0c cb ocesessaccoel ounces
2. Dissolve Mag. Sulphate in water and add glycerin,
3. Give at temperature of 100-105° F,
4. Should be retained 15 ~ 30 minutes. If not effective, may be
followed by soap suds enema.
MILK AND MOLASSES
e Se@3 Mi Foowcdvel ounces
Molasses....8 ounces
2. Heat milk, add molasses, stirring well using tongue depressor ,
3. Should be given at taémp. 100~105° F,
4. Retained 15 - 30 minutes. Follow by enema of tap water.
ALUM AND GLYCERINE
y Use: Bilis oathe ok dram
Glycerire...2 ounces
Water ..eceeel pint
2. Dissolve alum. in water; add glycerine
3. Give at temp. 100-105° F,
�
TURPENTINS ATE O<L
e Use Turpontine......4 to 1 eunce
Olive 011.......6 to 8 ouness
2. Heat oil, add turpentine
34 Give at temp, 100-105° F,
he Retain 4 to 1 hour, Followed by soap suds enema,
COMPOUND MEDICATED
1. Use: Turpentine......) drame-
Asafetida.......2 drams
Ox Gall.........4) drams (Fel Boxis)
Ulycerine.......l; ounces
Soap suds.......1 quart
2. Wix ox gall crystals with turpentine. wiix in dry utensil, Add
other ingredients to ox gall and turpentine, Mix in dry utensil,
.add other ingredients and ox gall and turpentine to Soapy water
at temp. 110° F. Givo at temp, 100-} F,
ALUM
Poy Vone--Aluri...ccccecceck ounce
a oa oe quart
2. lot water ta 105°, add alum.
3e If not expelled immdiately, siphon off,
li. Give at temperature of 100-105° F,
GLYCERIN AND WATER
1. Use: Glycerine.......30 CeCe
Water..........100 CeCe
2. Mix water and glycer ing
+ Give at temperature 100-105° F,
ANTHELMINTIC ENEMATA
PURPOSES :
1. To dehydrate rectum and destrey intestinal parasites,
2. To lessen amount of intestinal mucus which harbors intestinal
parasites,
QUASSTA
1. Use: Quassia chips......3 eunce
Boiling water......20 eunces
2. Pour boiling water Over quassia chips, cover receptacle and let
stand until ceol, Strain off mixture,
3. Always precede quassia enema by soap suds enema 2 hours before,
h. Instruct patient to retain quassia enema for 20 to 30 minutes.
5. Treatment usually repeated daily until parasites are destroyad,
TANNIC ACID
lL. Use: Tannie neid, eee30 yrains
Water at 105°F...1 pint |
2. Precede with elwansing enema tvo hours before,
3e Tannie acid enema retained 20 = 30 minutes, If not expelled, siphon
off.
�
ALUM
Le Use er rains
i ; Het Water 105°F.....1 pint
2. Precede by twp hpurs with seap suds enema, if net expelled in
30 minutes, siphgn off.
0 ei NUTRIENT ENEMATA
PURPOSES : | 7
1. To supply nourishment by rectum when it cannot be given by mouth.
GENERAL INSTRUCTIONS:
1, When given daily, a daily cleansing enema must be given.
2. if expelled, masure amount and deduct from original feeding, If
patient persists in expelling solution, report to doctor,
3. Give at temperature not over 105° F,
SOLUTIONS USED:
Glucoses Glucose solution, 5 = 10%, 3 = 6 ounces, This often is given
at 3 or ); hour 4ntervals.
Normal Saline: a
; ae Use warm water 105 F, eoese l pint
Salt. eseeeteoeeseeeeeeeaeeeneenee 1 teaspoonful
a ' BMMOLLIRNT ENEMATA
PURPOSES :
le To check diarrhea
2. To soothe irritated mucous menbrane
3. To serve as a base for cer#tin drugs.
NB, Usually preceded by cleansing enema.
STARCH
e Uses Cornstarch.....+eeee-l teaspoonful
Cold aneeesoreil ounce
B oiling Water......,6 ounces
2. Dissolve cornstarch in cold water, Add boiling water slowly,
constantly stirring mixture. Cool to 105° F,
3. When medications are given, add to first funnel of solution.
PEARL BAR IE Y
1, Use Pearl barley....sseeee.% Ounce
B oiling water.......sseeee0h quart
Cold WEeeecccccervccccccectets
2. Wash barley in cold water, Pour boiling water over barley and allow.
this to simmer until reduced to abéut 1 pint. Strain and give at
temperature of 1 Fr, |
�
Fe 62.
FR SBYTERIAN AND WOMANS HOSPITAL
SEDATIVi ENEMATA
PURPOSES :
1. To administer medications which may allay nervousness and produce
sleep. |
2. To act as an antispasmodic in tetanus and other conditions.
3. To relieve convulsions,
CHLORAL HYDRATE
Le Uses Chloral Hydrate. .cecsceceeeeseoeslQ= grains
Starch solution, olive olive oil, or milk....3 ounces.
2. Dissolve in solution, give at temp. 105° F, Apply pressure to anus.
SODIUM BROMIDE
1. Uses Sodium Bromide........amount as ordered by the doctor
Hot water 105° F......3 ounces
2. Dissolve medication in water, Give at temperature of 105° F,
PARALDEHYDE :
1. Uses Paraldehyde...........Amount ordered by the doctor
Cornstarch or milk....3 ounces.
2. Mix paraldehyde with solution, Give at temperature of 105° P.
STIMULATING ENEMATA
a PURPOSES :
1. To stimulate the heart action and general circulation in shock and
collapse,
2. To arouse patient to consciousness in certain conditions,
CO FFE
- 1, Use: strong black coffee. +5 to 6 ounces
2 Give at a temperature of 110° F,
WHISKEY
1. Use: Normal saline.........l} ounces
Whiskey or brandy.....2 ounces }
2. Dilute in normal saline, Give at temperature of 110° F, 4
Occasionally coffee and whiskey are administered together,
.The coffee is substituted for the normal saline.
1956
6<15=5),
�
63.
FRUSBYTERIA AND VOUAN'S HOSPITALS
COLON I IGATION OR ENTEROCLYSIS
Defintion
e An instillation of fluid into the intestine in a steady stream
under low pressure with provision for immediate return flow of
all that is not absorbed,
Purpose
e to provide body with fluids
2. To cleanse large intestine
3- To relieve pain in intestinal colic
4. To supply heat in cases of shock
General information
"is iaintain continuous return flow
2. If patient complains of pain, clamp inlet tube and note
whether flatus is expelled, If pain continues, discontinue
treatment and report to physician, If difficulty with return
flow, move outlet tube up and down, If not successful, remove
tube and cleanse.
3 Watch patient closely for signs of exhaustion.
Solutions
le kind
ae Plain tap water
be NOrmal saline
@.e Soda bicarbonate 5%
d.. Barley water
2. Temperature
ae For absorption, 105°F
be For inflammation, 115°F
36 Amount
ae As ordered
Position of Patient
lL. Lateral
2. Dorsal
uiprent
on departrent °
1. Rubber protector and cover
2e I.V. Standard
From Central Supply
be TOA: C
‘2. Tray containing
@e Irrigating can with rubber tubing anc screw clamp
be Two glass connections
ce Extra piece of tubing about 18 inches long
ad. imesis basin
‘a Lubricant
e Toilet tissue
5. Catheter about #10 F. for inflow
6, Rectal tube about #28 F. for outflow
Te Adhesive
8, Newspapers
�
6h.
Colon Irrigation or Enteroclysis (cont'd)
Procedure :
1. Mark rectal tube 5 inches from tip with strip of
adhesive
2 Mark catheter 10 inches from tip in same mamer
3- Put glass comection into free end of tubing attached
to irrigating can and connect this with catheter
lh. Place second glass connection in extra piece of tubing
and connect this with rectal tube,
S. Prepare solution. Put lubricant on tissue
6. Place patient in Sim's position and loosen covers
at foot of bed,
7+ Place tray on foot of bed.
8. Cover chair with newspaper, place pail on chair.
9, Elevate can on standard 18 inches above patient.
10. Expel air from catheter by allowing solution to flow through,
Pinch off,
11. Lubricate tubes as far as adhesive marks and insert tip of
catheter into side opening of rectal tube. Ylace free end
in pail.
12. Insert rectal tuve and catheter, Release catheter fromrectal
tube and insert into rectum up to adhesive mark.
13. At conclusion of treatment remove tubes as in cléansing enema.
Charting:
Clinical Sheet
1. Treat ment Column
2 Treatment
b. Amount of solution and temperature
2 Date Column
& Time
be Nurse's initials
Nurse's Notes
1. Date
2e Time
3. Results obtained
he Patient's reaction
5. Nurse's complete signature
8/1/58
hh
�
Definition.
656
FRESBYTERIAN AND WOMAN'S HOSPITALS
FROCTOCLYSIS (MURFHY DRIP)
Proctoclysis is a slowly regulated flow of fluid to |
be retained in the rectum.
General Information
i. rhysician is to order type of solution.
2
3e
Equipment
Procedure
Temperature of the fluid is 120°F,
Make up solution 500cc at a time to control temperature.
From Central Supply
l. irrigating can
2e Rubber tubing = 6 inch length, feet Iength
3, Glass connecting tube
lh, Screw clamp
5. Morphy drip bulb
6. Bresis basin
From denarsmants
le
13.
15.
lL. Towels and safety pin
2. I.V. standard
3. Two rubber protectors, one bedpan cover
4. 1/2 inch adhesive
5. Lubricant
6, Toizet tissue
7» Rectal tube No. 22 or No. 1 catheter
Attach tubing anc clamp to can
ae Attach 6" length of rubber tubing to can
be Place claisp on 6" length of rubber tubing
ce Attach lurphy Drip bulb to 6" length of tubing
de Attach } foot length of rubber tubing to Murphy Drip bulb
e» Attech glass connector to foot length of tubing _
Run hot water through tubing to warm it and expel air.
Clamp off tubing and pour in measured amount of solution.
Lubricate rectal tube and wrap in toilet paper.
Carry equipment to bedside, place on bedside chair.
Loosen covers at foot of bed, fold back in a neat cuff,
Turn patient on baci or side.
Fold back covers in a triangular fold,
Protect bed with rubber covered protector,
Hang irrigating can on standard,
Insert rectal tube six inches to allow flatus to escape.
Secure with tape. Place free end in emesis basin.
Expel air by allowing solution to flow from container through
tubing. Pinch off, Attach to catheter and allow solution to
drip at rate of 0 drops per minute,
Place tubing between knees if patient is on back.
Cover can with towel end protector and pin neatly,
Measure remaining fluid in can and subtract from total amount
put in to obtain amount taken by patient.
�
Charting:
Froctoclysis (liurphy Drip) (Cont '4)
oe Clinical Sheet
1. Treatment Colum
Be
b.,
c.
ad.
Name of treatment
Solution
Amount
Temperature
2. Date Colum
a@. Tine
b. Nurse's initials
Nurse'"s Notes
le Date
2. Time
3. Treetment
he Amount of solution retained
5 Reaction of patient
6. Nurse's complete signature
8/1/58
hh
�
®
67,
FROSBYTERIAN AND WOLIAN'S HOSPITALS
TIDAL WAVE Zilia
Purpose
Given for absorption of fluids or for relief of distention,
uipment
om Central Supply
1. Irrigating can .
From Department
1. Small size rectal tube
2. Glass connector
3 Protector - bedpan cover
h. Water soluble lubricant
5. Toilet tissue
6. Emesis basin
7e Gauze bandage 9. Solution according to physician's
8. I.V. Standard orders, 110°- 1150
Procedure
- Prepare equipment and solution in container and put .
lubricant on tissue in service room.
2 Dring equipment to room, place on bedside chair.
3. Place standard conveniently,
4, Place patient in left Sim's position, if possible.
5. Raise patient's gown over abdomen.
6. Place covered rubber protector under buttocks,
7+ Place can of solution on standard so that it is about
4 inches above rectum.
8, Expel air from tube, lubricate, and insert into rectum 36 inches.
9 Allow can to remain in this position for 5 minutes, lower the
can to seat of chair or below the bed level for 5 minutes.
10. Alternate raising (not to exceed 18 inches) and lowering of
solution gives results desired,
ll. Change solution as often as is necessary to keep it clear and warm,
12. To discontinue , pinch off tube, lower can to bed, close clamp,
remove tube from rectum,
13. Wrap tube in toilet tissue and separate from glass connector.
Place tube in emesis basin and irrigating can on tray.
14. Remove rubber covered protector and place on tray.
15. Give bedpan if desired.
Charting
linical Sheet Nurse's Notes
1. Treatment column 1. Date
a. Treatment 2. Time
b. Solution 3. Treatment
c. Temperature . Results obtained
2. Date column 5. Nurse's complete signature
a. Time
b. Nurse's initials
Stool Column
a. Chart E/ (Effectual enema)
b. Chart B/1 (Ineffectual enema)
6
8/15/58
�
8
@
PRESBYTERIAN AND WOMAN'S HOSPITAIS 68.
Purpose - To insert a tube into the gastro~intestinal tract by way of nose or
mouth for removal of contents of gastro-intestinal tract or intro-
duction of fluids,
General Information - Passing Gastric Tubes
- Preferred route for the passage of gastric tubes is through the nose,
2. Inspect nostrils for obstructions
a. Try opposite nostril if an obstruction is encountered,
3. Tube may be passed through ‘the mouth when nose is completely obstructed
or when indicated,
4, Call an intern if unable to insert tube,
5. Observe patient for signs of exhaustion or trauma.
6. Preferred position for insertion of tube is a sitting position,
7. Dentures are removed before inserting gastric tube,
8. Test for placement in lung by putting free end of gastric tube in
water and observing for bubbles,
9. Avoid introduction of air.
10, Measure the tube for depth of insertion by measuring from ear to tip
of nose to end of sternum.
ll. Water soluble lubricant is used to prevent introduction of oil into
the lung.
12. Breathing should be natural, Hissing sounds with strmgling and
cyanosis indicates that tube is in the larynx,
13. Plastic tubes should remain at room temperature or be placed in warm
water for ease of insertion,
E ent
rom Central Supply
1. Monel basin
2. Gastric tube
From department
1. Ice-for rubber gastric tubes 5. Enesis basin
2. Celluwipes 6. Clamp
3. Water soluble lubricant 7. Medicine glass
4. Adhesive tape = 4 inch 8. 30 cc glass tip syringe if
necessary
Procedure
« Four water into medicine glass,
2. Drape face towel over patient's chest; pin
3. Measure tube as instructed. Mark with adhesive
4. Lubricant tube
5+ Guide tube along the curve of the hard and soft palate into the pharynx
and esophagus, Avoid touching the back of the pharynx
a. Encourage swallowing and deep breathing while tube is being inserted
6. Place free end of tube in glass of water when measured length has been
inserted
a. Continuous flow of bubbles indicates that tube may be in the lung
b. Remove tube if bubbles appear
7. Clamp tube
8. Tape to side of face
9. Remove towel and use pin to fasten screw clamp to neck of gown to
remove tention,
�
69.
Irrigation of Gastric Tube
General Information
1. No more than 30 cc of solution is inserted unless otherwise
ordered.
2. Avoid introduction of air through tubing,
Zqusment
rom Central Supply
1. Monel basin
2. Syringe as needed
3. Solution as ordered
Procedure
i. Pour solution into basin and fill. syringe
2. Clamp gastric tube and separate from glass connector
3. Insert solution slowly through tubing
4, Attach gastric tube to glass connector
5. Watch for return of solution
a. To facilitate return flow, change position of patient when
permitted if solution is not returned,
b. Notify charge nurse if solution is not returned,
Removal of Gastric Tube
General Information
1. Discard plastic tubes and return all rubber tubes to C,. S.
after cleaning.
E ent
« Paper towel, bag, or basin
Procedure
« Remove tape and clamp tube
2. Pull tube gently from nose or mouth and receive in paper towel,
3. Remove clamp
Chartin
tc linical Sheet
1. Treatment column
a. Treatment (note place of insertion)
2. Date column
a. Time
b. Nurse's initials
8/6/59
ae
es
ae
So
* Se Ee
�
70.
PRESBYTERIAN AND WOMAN'S HOSPITAIS
GASTROSTOLY FEEDING
furpose
© administer fluids through an artificia opening into the
stomach.
Hau ipne nt:
om Central Supply
Le Small tray
&» Long tipped asepto syringe (without bulb)
be 500ce calibrated pitcher
¢. Solution basin = 6" diameter
ad One calibrated glass
From refrigerator
lL. Prescribed feeding
Procedure
e take tray to kitchen. Pour designated amount of feeding
into calibrated pitcher,
2. Place pitcher containing feeding in basin of hot water
to bring feeding to room temperature,
3. Pour 60cc tap water in glass to rinse tubing before and
after feeding.
4. Place tray on bedside stand.
5+ Fanfold top covers sufficiently to expose gastrostomy tube,
6, Place patient in a semi-fowlers or dorsal position, unless
contraindicated,
7» Attach syringe to gastrostomy tube, holding syringe at an angle
to prevent air from entering tube.
8. Pour 30cc tap water into Syringe, hold syringe at an angle to
prevent air from entering tube,
9. Release screw clamp.
10. Follow water with feeding, allowing fluid‘ to flow by gravity.
Keep syringe from emptying completely, Flow is regulated by raising
and lowering syringe,
ll. Pour 30cc water into syringe to rinse tube and maintain patency.
12. Clamp tube and remove syringe.
charting
inical Sheet
1. Diet column
& Name of feeding
b. Amount of feeding
2. Date column
&@. Time
b:. Nurse's initials
8/4/58
hh
�
PRESBYTERIAN AND WOMAN'S HOSPITALS m1.
ASSISTING WITH GASTRIC LAVAGE
Definition
| Washing out of stomach with a bland solution (To be done by physician)
Purposes
1. To remove irritating substances
2. To check persistent vomiting
3e To relieve acute or chronic dilatation of stomach
4. To cleanse the mucous lining and stimulate peristalsis and
secretions of the stomach
5. AS a pre-operative treatment
General Information
1. if patient has swallowed lye, do not attempt to pass tube,
2. One to three gallons of solution are usually used at a temperature
of 100° 105° F,
3. Five hundred cc. is the maximum amount of fluid that can be intro-
duced without siphonage,
Equipme nt
From Central Supply
1. Gastric analysis tray plus two extra towels, #18 rubber
levine tube
2. Sterile funnel
3 Sterile graduated pitcher
4. Sterile culture bottle
From Department
lL. Emesis basin
2. Cellu-wipes
3. Water soluble lubricant
i, Rubber protector
5. Newspaper
6. Solution as ordered by ohysician
Procedure
1. Put bucket near bed on chair covered with newspaper.
2. Insert gastric tube. |
3. Attach and fill the funnel with solution; allow to run through;
refill funnel before it is empty to prevent air fron entering the
Stomach.
4. Pinch tube, invert funnel over bucket and allow fluid to siphon
back after two or three funnels full have been introduced and
before all water has run through tube,
5. Repeat until return flow is clear.
6. Remove tube,
Charting
Clinical Sheet Nurse's Notes
1. Treatment column 1. Date
a. Treatment 2» Time
b. Solution 3. Treatment
c. Amount and temperature 4, Name of ohysician
2e Date column 5. Character of return flow
a. Time 6, Patient's reaction
b. Nurse's initials 7. Nurse's complete signature
8/1/58
�
72.
FRISBYTERIAN AND ‘OLAN'S HOSPITALS
GAVAGE (ORAL)
Definition
ntroduction of food into stomach through mouth my means of a tube.
Purpose
1. To prevent trauma following certain operations on jaw or tongue.
2e To prevent aspiration of fluids.
Squipnent
om Central Supply
1, Gastric analysis tray
2. Asepto syringe
3. Graduated pitcher
From Department
1. Ice
2. Water soluble lubricant
3. Forma or diet = (100°F)
l. 2 oz. water in glass
Procedure
« Introduce levine tube about 18 inches through mouth, Use same
precautions as when inserting through nose.
2, Attach asepto syringe.
3- Pour 1 oz. water into tube, unclamp, and allow to run through
tube. Do not ellow syringe to become empty e
4. Pour food slowly into asepto syringe.
5. Pour 1 oz, water thru tube to maintain patency.
6. Clamp tube and detach asepto syringe.
7+ Rewove tube gently but quickly in one motion if it is
to be removed,
Charting |
Clinical Sheet
1. Diet Column
@e Name of diet and amount
2. Date Colum
ae. Time, nurse's initials.
3. Treatment Column
a. Treatment
be Amount
ce Temperature
h. Date Column
Qe Time
b. Nurse's initials
Nurse's Notes
1. Date
Ss Time
3. Any unusual reaction, or if patient did not retain
feeding.
h. Nurse's complete signature,
8/4/58
hh
�
73.
FRISBITIRIAN AND WOWAN'S HOSPIPALS
” GAVASE (ASAL)
Equipment
From Central Supply
1. Gast~ic Analysis Tray
2. Asepto syringe
36 Graduate
From Department
1. Ice
2. Water
3 Water soluble lubricant
h. Formula
Procedure
1. Insert gastric tube
2. Attach asepto syringe
3+ Pour 1 oz. water into tube, unclamp, and allow to run through.
Do not allow syringe to become empty.
4. Pour food slowly into asepto syringe. |
5« Pour 1 oz. water into tube to maintain patecny. |
6. Clamp tube and detach asepto syringe, |
7+ Remove tube gently but quickly in one motion if it is |
to be removed, .
2 Charti
gtr Sheet |
le Diet column
e Name of diet and amount
2e Date column
e . Time and nurse!s initials .
3. Treatrent colum .
& Treatrent .
be Amount
C. Temperature |
h. Date colum
& Time
bo Nurse's initials
Nurse's Notes
1. Date
2. Time
3 Any unusual reaction or if patient did not
retain feeding,
4. Nurse's complete signature,
8/1/58
hh
�
@ Purpose
PRESBYTERIAN AND WOMAN'S HOSPITALS The
COLOSTOMY DRESSING
To absorb drainage from the artificial anus.
General
Information
1. Encourage patient to observe procedure,
2. If abdominal pad or any ) x 8's are not soiled, they may
be re-used,
3. Three colostomy packs are to be kept in patient's bedside
Stand, Additional packs are to be kept in designated area
on ward unit,
a. Montgomery Straps, when needed, are available from
surgical cart,
Equipment
rom Central Supply
1. Colostomy pack containing:
a. 12" x 10" abdominal pad
b. Kerlix fluff
c. Webril (R) collar
d. Precut Telfa (R) protective sheet
From patient's unit
26
36
he
5.
6.
7.
8.
9s
10,
ll.
1. Wash basin
2. Soap
Procedure
Place colostomy pack on foot of bed,
Remove components of pack intact, unfold abdominal pad to reveal
contents; place on foot of bed,
Place paper bag on bed,
Remove soiled dressings and Montgomery Straps if soiled and
discard in bag.
Cleanse and dry abdomen thoroughly with soap and water using sponges,
Discard used sponges with soiled dressings.
Place Telfa sheet on abdomen with Stoma protruding through hole with
film side dow
Place Webril collar around Stoma
Fluff Kerlix over Stoma
Place abdominal pad over other dressings with blue line up.
Replace Montgomery Straps if necessary.
Burn dressings,
Chartin
Nurse's Notes
1
2
3
e Date
e Tine
« Amount and character of stool
4. Condition of skin around colostomy
5
8/6/59
s
« Nurse's complete signature,
�
PRESBYTERIAN AND WOMAN'S HOSPTTALS 756
COLOSTOMY IRRIGATION
Purpose
1. To cleanse the bowel,
2. To establish bowel habit.
General Information
1. Instruction to patients:
a All Dr. Shirer's patients are taught to irrigate t heir
colostomy in the bathroom before being discharged,
(1) All of his patients are required to obtain
irrigating equipment from Feick Brothers, Family is
instructed to obtain equipment by Dr. Shirer,
(2) As soon as equipment is obtained, patients are instructed
by the nurse to do their om irrigation,
be All other patients with acolostomy are not to be instructed
unless specific orders are obtained from attending physician,
2. Consider time element to fit patient's post-hospital routine,
Approximately 60 minutes is necessary for entire procedure,
3. Complete emptying of bowel takes between 20=50 minutes; explain
this to the patient,
eau spent
rom Central Supply
Tray containing:
1. Irrigating can with approximately 2 feet rubber tubing,
with glass connecting tip and clamp,
2, 2 large emesis basins
35 Abdominal pad.
From Clinical Division
1. Lubricant kh. Rubber protector and bedpan cover,
2.Bath blanket .. Paper bag.
3- Solution 105°F 6, #20 rectal tube,
Procedure
« *repare solution ordered
2. Drape with bath blanket
3. Place bedpan on bed to empty emesis basin
lL. Place covered protector under patient near colostomy opening
5. Place paper bag on foot of bed
6. Remove dressing,
SS ST
�
76.
Colostomy Irrigation (cont'd)
Procedure
7 Turn patient slightly toward affected side, support baclc
with pillow
e Adjust emesis basin under colostomy opening; protect patient's
abdomen along basin edge with abdominal pad.
9 Allow solution to run through recital tube into emesis basin.
LO, Lubricate tip of rectal tube.
ll. Pinch tube, insert gently 2-18 inches without force or pressure
into colostomy. Distance of introduction will vary according
to angle at which bowel is brought to surface.
12, Hold irrigating can 12-18 inches above level of colostomy,
Height of can determines pressure,
13. Allow first 500cc solution to run in slowly. If no return
after 30 minutes notify doctor. hore than 500e¢ solution may
be used if colostomy is functioning,
1. Clamp tube, slowly withdraw rectal tube, place in empty emesis
basin,
15. Leave one emesis basin in place for drainage.
16. Apply clean dressing
Chartin
Clinical Sheet
1. Treatizent Column
a. Colostomy irrigation
b. Amount of solution
Ce. Kind of solution
d. Temperature of solution
26 Date Column
ae Tine
b. Nurse's initials
3. Stool Column
ae Cel, é
De Cele 3
Nurse's Notes
1. Date
2. Time
3. Description of return flow
Lh. Signature of nurse
7/31/59
�
Definition
Catheterization is introduction of a catheter through urethra
into the bladder for withdrawal of urine,
Equipment
Procedure
Chart ing
From Central Supply
1. Catheterization Pack
PRESBYTERIAN AND WOMAN'S HOSPITALS 776
CATHETERIZATION
From Clinical Division
1. Aqueous zephiran 1-1000
1 stainless steel 2. Tube water soluble lubri-
solution bowl cant for males
6 cotton balls 3, Sterile towels for male cathet
2. 1 pair gloves From Patient Unit erzatz
3. Board with 2 #4 1h 1. Bedpan and cover
French Catheters or 2. Floor lamp
l Coude Catheter 3. Bath blanket
1. Place bedpan for excess urine on bedside chair,
2. Apply perineal drape for female patients,
3. Place light on far side of bed approximately 2-36 inches
from perineum,
4. For female patient:
Qe
be
Ce
d.,
Se
f.
Be
he
i.
Je
Ke
1.
Me
Ne
Oe
Inspect external genitalia, if there is bleeding or ex-
cessive drainage, bathe or assist patient to bathe with
soap and warm water,
“lace catheterization pack between patient's thighs with
Open end of pack toward head of bed,
Place corner of catheterization cover under buttocks.
Grasp corner toward patient, turn cover back on hand, tuck
material under buttocks by pressing on mattress,
Pour approximately 1/2 ounce of aqueous zephiran into bowl.
Unwrap catheter, place on catheterization cover,
Put on gloves,
Separate labia minora with thumb and forefinger and cleanse
perineum with cotton balls, Clean far side, near side, and
middle going from clitoris to anus.
Pick up catheter 3 inches from tip and dip into aqueous
zephiran,
Place catheter outlet in bowl.
Insert catheter through urinary meatus 2 inches or until
urine begins to flow,
Release labia and hold catheter in place.
hen bowl is 3/4 full and urine is still flowing steadily,
pinch off catheter, Empty urine into bedpan and replace
bowl between patient's thighs.
Allow urine to flow into bowl until steady flow ceases,
Withdraw catheter and drain into bowl,
Dry perineum with cotton balls,
5. Physician will catheterize male patient,
Nurses! Notes
Le Date
2. Time
3. Treatment
kk. Amount of urine in cc.'s,
5. Character of urine
6, Physician who catheterized
male patient
7. Nurse's comolete signature
�
PRESBYTERIAN AND WOMAN'S HOSPITALS 78,
INSERTION OF FOLEY CATHETER
; Equipment
e i — Supply From Clinical Division
1. Foley Catheter Tray 1. Aqueous zephiran 1-1000
l tray 9 x12 1 towel 2. Sterile normal saline solution
1 iodine cup 25" x 5/8" 3. Roll 1/2" adhesive
needle.
i stainless steel From patient's unit
solution bowl 1. Floor lamp
1 paper cup with 3 cotton 2. Bedpan with cover
balis inside 3. Bath blanket
1 hemostat 3 cotton balls
1 10 cc. syringe with adaptor
1 catheter plug
2 rubber bands -
1 small paper bag for waste
2. Foley catheter size 18 with
5 ec, bag unless otherwise
ordered.
3. Pair of gloves
General Information
1. A physician's written order is necessary to initially insert or to change
a Foley Catheter.
2.To prepare a butterfly strap:
a. Cut 6" piece of adhesive
oO b, Cut diagonal line on each side of strip about 13" from each end.
Ce Fold middle section so that smooth side of adhesive is on both sides.
3. Discard foley catheter after use. If catheter is contaminated but not left
in the patient, clem and return to C.S, with credit ticket,
L. Allplastic drainage tubing is discarded when procedure has been discontinued.
5+ Prevent injection of air into bladder by eliminating air from syringe,
6. Discontinue treatment and notify physician if difficulty is encountered when
injecting solution or if patient has severe pain,
7. Note amount of solution injected and amount returned in amy irrigation.
8. Foley Catheters are to be changed from 5-1) days after insertion according
to the physicim's order,
9. External genitalia should be cleansed daily with morning care and as often
as indicated,
10. Wash catheter plug each time catheter is released,
11, Be careful when inflating bag of self-sealed foley catheter that the needle:
does not puncture the wall of the catheter as a leak will result.
Procedure
1. Prepare butterfly strap
2. Place bedpan on bedside chair
3. Apply perineal drape for female patient
4, Place light on far side of bed approximately 2-36 inches from perineum,
5. For female patient:
. @ Inspect external genitalia if there is bleeding or excessive drainage,
bathe or assist patient to bathe with soap and warm water,
) b. Place tray between patient's thighs with opeh end of back toward
3 head of bed.
Cc. Place corner of catheterization cover under buttocks, Grasp corner
toward patient, turn cover back on hand, tuck material under buttocks
by pressing on mattress,
d. Pour approximately 4 ounce of aqueous zephiran into paper cup with
cotton balls,
�
i
79.6
Insertion of Foley Catheter (cont'd)
Procedure
@. Pour enough normal saline into iodine cup to inflate bag.
f, Unwrap catheter, place on tray cover,
ge Put on gloves,
h. Inflate catheter bag with specified amount of air to test,
(1) Insert adaptor and syringe into accessory tube of
open-end Foley,
(2) Inject needle with attached syringe into self-sealed
Foley.
(3) Remove adaptor and syringe or needle and syringe.
i. Separate labia minora with thumb and forefinger,
Je Cleanse perineum with cotton balls. Clean far side, near
side and middle going from clitoris to anus.
k. Pick up catheter 3 inches from tip and dip into aqueous
zephiran,
l. Place catheter outlet in bowl.
m. Insert catheter through urinary meatus 2 inches or until
urine begins to flow,
mn. Release labia and hold catheter in place,
0. When steady flow ceases, push catheter into bladder about
4 more inches to insure Foley catheter bag being in
bladder, not in urethra.
pe Insert catheter plug.
q- Inflate bag with saline.
- C p acceBsory tube +: ; | : °
by leaving adaptor in-place but removing syringe,
(?) Remove needle and syringe,
8. Gently and slowly pull catheter until resistance is met.
t. Remove gloves, b@nd accessory tube back on itself and
secure with rubber band,
ue Remove adapter,
ve. Secure catheter to inner aspect of thigh with butterfly,
6. Physician will catheterize male patient.
Chart
Nurses' Notes
l. Date
2. Time
3. Treatment
4. Amount of urine in cc.'s,
5. Character of urine
6. Indicate if catheter plug is in place
7- Physician who catheterized male patient
8. Nurse's complete signature.
TO RELEASE RETENTION CATHETER
Equipment
a Patient's Unit
1. Bedpan and cover
Procedure
. Ove catheter plug.
2. Allow urine to drain into bedpan,
3. Wash catheter plug,
4. Replace catheter plug after steady flow of urine ceases,
Chartin
Nurses Notes
1.
2.
8/13/59 3s
Date 4. Amount
Time 5. Character of urine
Treatment 6. Nurse's complete signature
�
Pm
PRESBYTERIAN AND WOMAN'S HOSPITALS 80.
TO CONNECT RETENTION CATHETER TO STRAIGHT DRAIN
Equipment
From Central Supply
l.plastic bag for bed
1 disposable straight drain
1 safety pin
General Information
1. Wash drainage bag and tubing at time of measuring urine (7 a. m
3 Pe Mey ll Pem,)
2. When ordering disposable bags, specify "bag for bed" or "bag
for leg".
Procedure
1. Insert drainage tubing into canal of bag by moving canal opening
between thumb and index finger.
2. Snap bag over bed rail,
3eRemove plug aid insert adaptor of straight drain into Foley Catheter.
« Adjust tubing so that patiet may turn easily but prevent stasis
of uring in tubing.
5+ Place plug in jar on catheter Irrigating Tray.
TO EMPTY DRAINAGE BAG
Procedure
1. Remove tube and allow to drain in bedpan,
2. Hold neck of bag with one hand,
3 Open shap with other hand,
li. Carry bag by neck,
5+ Flush with HO from open end before bag is returned to bedside.
TO DISCONTINUE STRAIGHT DRAIN
Procedure
1. Disconnect adaptor from catheter and place in drainage bag,
2» Place plug in catheter or proceed as to remove catheter,
REMOVAL OF FOLEY CATHETER
Equipment
From Patient Unit
1. Bedpan and cover
Procedure
1. For female patient:
a. Empty bladder and loosen butterfly strap.
b. Deflate catheter bag by removing rubber band from accessory tube.
C. Remove catheter, drain into bedpan,.
2. Physician is to remove catheter from male jatient,
Charting
Nurses Notes
1, Date
2. Time
3. Treatment
4. Nurse's complete signature
7/31/59
7 a
�
9
PRESBYTERIAN AND WOMAN'S HOSPI (ALS 81.
BLADDER IRRIGATION
Furposes
« fo maintain continuous flow of urine through the catheter,
2. To cleanse bladder of sediment,
General Information
« The tray is changed daily to ensure cleenliness,
2. A physician's written order is necessary to irrigate the bladder or
catheter,
3. No more than 2 ounces of solution is injected into bladder withovt
allowing return flow,
h. Place catheter plug in jar of aqueous zephiran whenever it is necessary to
remove plug from catheter,
5. Use at least 12 ounces (360 cc) of solution or amount as ordered by
physician,
6. Eliminate irrigating bladder or catheter, or cleaning drainage bottle
when 2l; hour urine specimen is ordered,
Sauimment
rom Central Supply From Clinical division
1. Bladder Irrigation Tray 1. Flask sterile normal saline
Stainless steel solution bowl solution,
Metal tipped irrigating 2. Bottle of aqueous zephiran
syringe 1:1000
Jar with lid
Emesis basin From Patient's Unit
1. Bedpan and cover
Procedure
« Open bladder irrigating pack on chair,
2. Fill. jar with aqueous zephiran 1:1000
3. Place bedpan beside patient, |
4. Remove plug and allow urine to drain into emesis basin, Empty basin
in bedpan,
5. Wash plug and place in jer until procedure is comple ted.
6 If retention catheter is attached to straight drain, separate,place end
of straight drain in drainage bag and allow catheter to drain into bedpan.
7. Empty bedpan, measure if on intake and output,
8. Place desired amount of normal saline in solution bowl.
9. Draw 2 ounces of solution into syringe and apply only enough pressure to
inject solution, and allow to flow back into syringe.
10, Discard return flow in emesis basin or bedpan,
ll. Irrigate catheter until return flow is clear,
12. When flow ceases, insert catheter plug into catheter outlet,
13. Clean tubing and drainage bag in service room and re-connect to catheter,
1h. Cover bladder irrigation tray.
Chartin
Nurses Notes
1. Date
2. Time
3e Name of treatment, kind and amount of solution
4. Character of return flow
5. ‘mount of drainage in ce,'s
6. Nurse's complete signature
7/31/59
5 se a eons
a
�
PRESBYTERIAN AND WOMAN'S HOSPITALS
BLADNER INSTILLATION
Purpose
« To relieve inflammation and cystitis.
2. To prevent development of bacteria and decomposition of urine,
Equipment
From Central Supply
1. Sterile medicine glass
2, Sterile asepto syringe without bulb
From Clinical Division
1. Medication at room temperature
Procedure
1. Take medication to bedside in bottle and pour into medicine glass,
2. Empty bladder.
3. Attach syringe to catheter and pour medication into syringe.
. Remove syringe from catheter after medication has been instilled,
5. Plug catheter,
Charting
Clinical Sheet
1. Treatment Sheet
a, Treatment
2. Medication Column
a. Name of drug
b. Amount of drug
3. Date Column
a. Time
b. Nurse's Initials
82.
�
83.
PRESBYT RIAN AMD OMAN'S HOSPTTALS
bit
“Brose
i
To prevent exposure of the patient curing the following treatments and exami-
nation: female catheterization, va-inal irrigation, sursical skin preparation
involving perineum and vaginal exa:iination,.
Equipr eat
‘rom bedside stand
1. Bath blanket
Procedure Explanatory Statements
1. Assist patient to assume dorsal Ll. lying on back with one pillow under
recumbent position, unless contra-~ head, knees flexed; thighs rotated
incicatec, outwards; feet flat on beds arms ree
laxed at side,
2e Dreze patient with bath blanket,
3e Turn bath blanket dia onally on
patient so that a corner points
toward head of bed,
hk. Assist patient to flex leg on far
side of bec,
5 Grasp corn.” of blanket on far side;
wrap secure.7 around foot.
6. Wrap other foot in same manner,
Te Fold corner which covers perineun
back over paticnts abdomen when
ready to expose nerineum,
10 RENOVS PERINPAL DRAPE
le Remove drapes from patients legs.
2o Straighten blanket in usual position,
3e Replace top linen,
7/10/58
�
PRESBYTERIAN AND WOMAN'S HOSPITALS 8h.
PERTNEAL HYGIENE (ped Patient)
Definition
erineal hygiene is a cleansing of vulvar and anal areas,
Purpose
1. To enphasize principles of good perineal hygiene
2. To prevent infection
3. To promote local comfort of patient
4. To pronote healing of verineal wounds
General Information
1. Patients are instructed and supervised in doing perineal hygiene
before they are permitted to do so by themselves,
2. Perineal hygiene is done routinely on all patients who have had
vaginal or perineal surgery, and others as ordered, as part of
morning care. It is repeated after each bowel movement and other
times as necessary, ;
3. The complete procedure of washing and rinsing of vulva takes
place first. Second step is to wash and rinse anus and surround
ing area.
Equipment
From Department
1. Two disposable wash cloths
2. Wash basin
3. Warm tap water
, Cake of soap
5. Clean perineal pad (package of 12 given to each patient)
Procedure
1. Remove equipment from bedside stand and place within patient's
reach, |
2. Pill basin and test temperature of water by pouring small amount
Over wrist. Have water as warm as can be tolerated by the patient.
3. Place one wash cloth in water.
4. Instruct vatient to lie on back and flex knees,
5. Place newspaper sheet on bed between knees.
6, Remove perineal pad using downward motion fron pubis to anus,
7» Place soiled pad on newspaper,
8. Wash and rinse and dry vulva using circular and downward motion.
9. Wash and rinse and dry anus and surrounding area, using posterior
approach,
10. Discard washcloths on newspaper sheet with soiled pad,
ii. Place wrapped pad and wash cloths on quilted pad at patient's side,
12. Place perineal pad on perineum with colored line away from body,
adjusting from vulva to anus.
Charting
Nurses Notes Clinical Sheet
1. Date 1. Treatment Column
2. Time a. Perineal Hygiene
3. Record on nurses! notes, 2. Date Column
"Instructed on perineal a. Time
hygiene for the bed b. Nurse's initials
patient"
4. Nurse's complete signature
8/1/58
A A a ae
�
BS, |
PRESBYTERIAN AND WOMAN'S HOSPITALS
;
’ PERINWAL HYGIENE (AMBULATORY PATIENT) |
Equipment
From patient unit
1. Two disposable wash cloths.
2. Wash basin.
3. Warm tap water,
4. Cake of soap,
5. Clean perineal pad (package of 12 given to each patient).
6. Sanitary belt.
Procedure
1. Take own equipment to bathroom,
2. Fill basin with warm water from faucet. Make water as warm as can be
tolerated by patient.
3. Remove soiled pad using downward and backward motion from pubis
to anus. |
l. Place soiled pad on newspaper. |
5. Wash, rinse and dry vulva with circular and downward motion using
disposable wash cloth, Stress to patient to complete this step
before going on to next.
6. Wash and dry anus and surrounding area using posterior approach,
7» Place pad on perineum with colored line away from body.
Charting |
Nurses Notes |
Le Date {
2. Time
Record on nurse's notes, "Instructed on perineal hygiene
for the ambulatory patient _ (complete
signature of nurse giving instruction)."
�
Purposes
PRESBYTERIAN AND WOMAN'S HOSPITALS
MIGATION = VAGINAL
1. To cleanse
2. To reduce inflammation and congestion
3- To jrepare for vaginal surgery
General Information
he vi
2
36
line douche nozzle for imperfections.
Keep water pressure low by holdingc an in proper position.
Test temperature of solution with dairy thermometer,
4. Have patient void before irrigation is given,
De
6.
Te
Suggested temperature of solution is 105°- 110°F, Adjust
temperature according to patient's tolerance,
Solution and amount is ordered by physician. 1000cc is the
Suggested amount of solution administered,
Fluid should reach all parts of vagina.
Equipment
om Central Supply
y
26
36
he
De
6
Irrigating can, rubber tubing, Hoffman spring clamp.
Douch nozzle
Two metal cups, one with four cotton balls, other for waste.
Gmesis basine
Perineal pad.
Two dry cotton balls.
From Department
Procedure
i.
Qe
3
5.
Sterile rubber gloves
Light
Standard
Bedpan and cover
Bottle of aqueous zephiran 1:2000
Have patient void, empty bedpan.
Prepare solution in service room or treatment room
Loisten cotton balls with zephiran,
Arrange light, lower back rest, remove all but one pillow,
Assist patient onto bedpan.
Drape with bath blanket,
Place tray at foot of bed between patient's feet,
Open tray and hang irrigating can 12<1h inches above
the level of patient's hips by placing loop of
gauze on standard,
Put on rubber gloves, maintain aseptic technique.
Attach douche nozzle to rubber tubing.
Separate labia, cleanse with zephiran, using four cotton balls.
Pick up nozzle, release clamp, and al low a small amount of
solution to flow over the vulva,
Gently insert nozzle 14 = 2 inches following contour of
vagina,
�
87.
Irrigation = Vaginal (cont'd)
Procedure
14. Keep solution can from becoming empty in order to prevent
air from goin; into the vaginal tract.
15. Remove nozzle slowly, clamp off tubing.
16. Detach nozzle from tubing, wrap in 4 x h gauze, place
in emesis basin,
17. Dry vulva with cotton balls, remove tray, and place on
bedside stand.
18. Remove bedpan from tient, cover and place on chair.
19. Put perineal rad in place, turn patient and dry buttocks
with towel,
20. Note contents vhen emptying bedpan.
Charting
Clinical Sheet
1. Treatment Column
a. Treatment
be Solution
c. Temperature
d. Amount
2 Date Colwnm
a. Time
b. Nurse's initials
Nurse's Notes
Le Time
2. Treatment
36 Character of return flow
he Patient's condition
5. Nurse's complete signature
8/12/58
hh
�
an
eae”
88,
FRESBYT RIAN AND WOMAN'S HOSPITAIS
DIRECTIONS FOR -REPARING MEDICINE GARD
Purpose
© provide information needed to give a nedicatior
General Information
1. Accepted abbreviations for unit of measurement
They are:
grain = gr.
grams = Gi.
milligrams - ME e
minims «= Me
drams = dre
ounceS = OZ»
cubic centimeters = cc,
2. Use proper name of drug rather than chemical
symbols,
3. Use arabic numbers,
4, Number precedes unit of measurement, ieee 5 dr.
5 Two or more medications, ordered to be given
at one time, are printed on one card,
6. The back of the card is used for additional
information, Print "over" in lower right
hand corner of front to indicate additional
information.
E ment
eh white medicine card, size 23" x 2 3/)!"
Ze Fen
36 Wax
Procedure
« Fill in card
a. Patient's name ~ last name first
be Geographic location
Ce Drug
d. Dose
@. Circle mode of administration
f£. Time
ge Complete signature of nurse transcribing
order.
h. Expiration date for medication ordered
a specific number of days or doses,
8/11/58
hh
] lanatory Statement
Name $.-, WY 10
Tite oaks
may be used,
ee
Room
Dug Dose
ASPirim 10-GQry
|--—~..Adminis tration
Oral -Hypo-=Ili--IV
Rectal oe Lt Eye
Time glth p.r.n,
S
Nurse's Signature
Vtg! aa
iration Date:
Name Bey fee Mea py
Room No. loi
Drug Dose
AC+H. we:
Administration
Oral--ilypo--Gi>-IV
Rectal Rt,Zye Lt.Eye
Time 7A, M-
Nurse's ‘Signature,
71 ?
& fration Date:
G-/- 57
Name (dao ¢ June
Room No, 5"
donin Be ‘ay
nistration 7
(ral>-Hypo-=Tii--IV
Rectal <p Lt tye
Time H.-S, PPA,
Nurse's Si ture ,
A eee
�
89.
ae eee
PRESBYTERIAN AND WOMAN'S HOSPITALS
ADMINISTRATION OF MEDICATIONS
]
@ General Information
1. A physician's written order is required in order to administer a
medication,
2. All medications require a medicine card except verbal orders for
emergency "stat" medications,
3+ Before giving an emergency "stat" medication to patient, name and
dosage must be repeated to doctor. If medication comes Single dose
in an ampule or vial, this should be taken to the bedside with medi-
cation,
4. All 7 A.M. medications and treatments are to be administered by the
nurse on the 11-7 tour of duty.
5+ Medicine cards are checked at 7 A.M. Doctor's orders for previous |
2h hour period are checked with cards by nurse in charge,
6. When checking medication Kardex, nurses are responsible for checking
treatment Kardex to prevent giving medications when a patient is to
have a diagnostic test or special treatment,
7. Cards are arranged according to patient location in a medicine card
r box,
{ ,
| 8. The dose, symotoms, action, use and mode of administration must be |
known for all medications. This information is found in the chysi- = «'
cian's Desk Reference. .
9. Avoid all distractions when pouring medications,
10. If there is any change in color, consistency or odor of drug, return
written explanation to pharmacy,
ll. Transfering drugs from one storage container to another or labeling
containers increases possibility of error and is not to be done in
this hospital.
12, Medications are not to be poured back into bottle,
|
|
|
13. Discard any nedicine glass that is cracked, chipped or broken to pre-
vent injuring patient.
14. All calculations for fractional dosages should be made on paper,
15. Medications are to be prepared, administered and charted by the same
nurse,
16. A doctor's written order is required to leave medications at the bed-
side,
8/15/58
�
ADMINISTRATION OF MEDICATIONS (cont'd) 90.
17. Nurse in charge is to be consulted before PRN medications are prepared.
Clinical sheet is checked for time of last administration,
18. Nurse is responsible for questioning an order for a drug, if in her
judgment the order is in error or if the writing is illegible,
19. Medicine cupboards and narcotic boxes are locked, except when in use,
The keys are carried by the charge nurse at all times,
20, If an error in medication administration occurs:
a. Notify charge nurse and clinical instructor.
b. Notify physician who makes a note on progress sheet,
c. Notify nursing service office,
d. Fillin error in medication form and send to nursing service office,
21, Charting and recording:
a. Fenicillin and streptomycin are recorded on antibiotic record,
b. Narcotics are recorded in narcotic book immediately after being
prepared, :
c. Wasted narcotics and antibiotics are recorded in the same place.
d. Medications are charted immediately or cards are placed in "n+
charted" indicator of box,
@. Medications are charted directly from medicine card,
f, If medication is not given, reason for omission is charted
in nurses! notes,
22. Medications are checked three times while being prepared,
25. PRN medications require nurse's notes Stating reason for giving drug and
resultsobtained in 30-60 minutes,
24, Accepted abbreviations:
BeBe - of each
Bele ~ before meals
ad lib ~ - freely
bid ~- twice a day
c - with
Pele - after meals
Pelee - according to necessity
Gee - every day
Gehe - every hour
gid - four times a day
stat = at once
tid - three times a day
heS. - hour of sleep
25. Accepted times of administration
G 2h = GH10912020)—6
8=10912=20);—6
Ga 3h @ 9n12—3=6
Gol 2—3~6
Ge 4 h - 9u1=5-9
9-41-59
Ge Oh - 12-6
12-6
Ge 8 h eo 8 aem,. = 4 pem, = 12 mid,
bid =9=6
teiede = Qu Gh
Geicde = Gal a5=9
daily -9a.m
hes. ~ at bedtime every night
8/15/59
�
a
Administration of Medications (cont'd) 91.
tid. asc. - = hour before each me according to time patient eats,
tid. pec. = % hour after meal according to time patient eats,
PeloNe ~ as necessary
Ge 12h, = 949
hoS.
26,
l.
ee
Be
te
De
5
7.
8.
PePeNe~ at bedtime if needed
Narcotic orders are good for 5 days, then must be renewed,
GENERAL INFORMATION FOR ORAL MEDICATIONS |
Drugs which are destroyed by digestive juices cannot be administered orally.
Oral medications are contraindicated for patients who have nausea
and vomiting or a gastric tube,
Tablets orcapsules are poured into the cap of the container and then
transferred to the pill tray,
All capsules and pills except digitalis préparations may be placed
on one pill tray,
For liquid medication:
' @ Hold calibration of glass at eye level.
b. Keep label in palm of hend,
Ce Place thumb nail at desired calibration and measure with
the bottom of meniscus,
d. Never mix liquid medications unless specifically ordered,
e@. Cover every glass of liquid medication with pill tray.
f, Dilute all liquid medications to one-half ounce by addition of cold
water unless contra-indicated,
For powder medications:
ae Use tongue blade or spoon to transfer powder to glass,
b. Make paste with small amount of liquid, then add desired amount of
Oral medications are not administered hypodermically without physician's
order,
A minim glass is to be used to measure drugs ordered in minims,.
GENERAL INFORMATION FOR HYFODERMIC & INTRA-MUSCULAR MEDICATIONS
1. Alternate sites of injection to avoid scars and bruises.
26
30
he
De
6.
Te
8.
9.
10,
ll.
12,
13.
Avoid moving needle once it is inserted,
Needles are tested:
ae For roughness by drawing them across the alcohol sponge.
b. For patency by drawing back and forth on the plunger once,
c. For tightness by twisting the hub of the needle securely in place,
Tops of vials are cleansed with alcohol sponge before medication is
withdr awn,
An amount of air equal to the amount of solution to be withdrawn is ine
jected into a vial before withdrawing,
Gauze sponge is wrapped around neck of ampule to prevent shattering of
glass,
Medicine card is placed under Syringe, avoiding contact with alcohol
sponge,
Sites of injection are cleansed in a rotary motion with alcohol sponge,
Starting at center and working toward the periphery.
Tissues may be squeezed and lifted to form a cushion or spread taut.
Hypodermic needles are injected at a 5 degree angle.
Intramuscular needles are injected ata 90: degree angle,
Usual sites of injection for hypodermics is:
a. Lateral surface of upper arm
b, Anterior or lateral aspect of thigh
Site of injection for intramusculars
a Usual site is inner aspect of upper outer quadrant of buttocks
b.Alternate sites
(1) Anterior thigh
(2) Deltoid
eet
�
General Information for Hypodermic & Intra-Muscular Medications 92.
i, Plunger is withdrawn slightly to determine if needle is in blood vessel.
® If this occurs, medication is discarded and re-prepared using clean
S Syringe and needle,
15. No more than four syringes are to be carried on one tray at one time,
16, Amount of medication given intramuscularly in one site should not
exceed 5 cc,
17. Remove air from syringe and needle by pushing on plunger until one
drop of solution is expressed,
18. Select proper steritube,
a. Black ruboer cap signifies a syringe and needle for
intramuscular injection.
b. Brown rubber cep signifies a syringe and needle for
subcutaneous injection,
c. Masking tape or red mark paimted on brow rubber Signifies a
Syringe and needle for insulin injection.
d. Large steritubes
th Black rubber cap signifies 5 cc,
(2) Brown rubber cep signifies 10 cc,
ADMINISTRATION OF MEDICATIONS
<p pment
m Medicine cupboard
1. Oral Medications
a. Bakelite tray
b. Pilltrays
r c. Medicine glasses for liquids
d. Tongue blade for powders
e. Medication card
2. Hypodermic Medications
a.Tray
b. Steritube with brown cap
Ce 2 alcohol sponges for each syringe
d. Medication card
3. Intramuscular Medications
a Same as hypodermic except steritube with black CaDe
lh. Cartrid Medications
a Tray
b, Metal syringe
c. Needle in wrapper (inside box with medication)
d.Medication card
Procedure
1.Select medicine card and check with kardex
2. Arrange cards according to patient location
3e Place medicine cards together with only onec ard visible
4. Pick up top medicine card, read completely
5« Place hand on medication, check card with label on container (1st reading)
6, Remove container from shelf, check label with container just before
3 pouring (2nd reading)
7. Pour or withdraw medication
8, Check label of container against medicine card
9. Place medicine card under pill tray, medicine glass or syringe
10, Replace medication
ll. Carry tray to bedside,
|
;
i
|
�
Administration of Medications (cont'd) 93.
12, Check name on medicine card with identiband. If identiband is not avail-
able, check with bed tag. If neither is available, ask patient to state
his name.
13. Give medication to patient; provide water unless contraindicated.
14. Remain until patient has taken medication.
Charting
Clinical Sheet Date Column
1. Medication Column 1. Time
a. Name of Medication 2. Nurse's initials
b. Mode of administration
Ce Dosage
Nurses' Notes (if indicated)
1. Date
2. Time
3. Significant observations
. Reason for omission
5S. Nurse's complete signature
DISPOSABLE CARTRID
1. Tear paper lengthwise, exposing hub of needle.
2. Screw exposed point of needle into syringe.
3. Pull metal plunger back and down to open syringe.
4, Insert cartrid into syringe with rubber cap toward needle; push down
until needle pierces rubber,
5. Pull plunger up and screw into threaded part of cartrid,
DISPOSABLE NE_DLE AND SYRINGE
1. At bedside
a. Renove shield from needle
b. Screw shield into rubber plunger in barrel of syringe.
c. Discard syringe and needle after injection is given.
8/15/58
�
)
FRISBYTEIRIAN AND WOMAN'S HOSPITALS
IsSULIN
General Information
le
26
30
le
5.
6.
Insulin coverage is given immediately after urine reduction.
Insulin is held when fasting blood sugary is tobe dram, If
patient is on insulin coverage and daily insulin, both dosages
are held until blood has been drawn then each is given in a
separate syringe.
Daily dose of insulin is given one half hour before breakfast,
Insulin injection is given with a hypodermic needle at 90°
angle.
For patient instruction, secure Squibb's A Handbook for Diabetics
and insulin tray for teaching from Central Supply.
‘hen patient is to receive two kinds of insulin, the units per ce
should correspond,
7. When drawing up a long acting insulin with regular insulin:
1. Inject desired amount of air into long acting insulin
bottle,
2. Inject air into rogular insulin bottle.
3. Withdraw regular insulin,
hh, Withdraw long acting insulin,
This preyents the possibility of slow acting insulin entering
the regular insulin which is frequently used in emergencies for
rapid action,
efr/se
�
956
PRESBYTERIAN AND “ONAN'S HOSPITALS
SPECIAL METHOD OG? FREPARATION AND/OR ADIINISTRATION OF THE FOLLOWING DRUGS:
IODINE PREPARATION
iugol's solution and saturated solution of Potassium Iodide.
Give in 3 ounces of dark fruit juice to disguise taste and appearance.
Check patient's diet.
»
CASTOR OIL
Give with one dram sodium bicarbonate plus one half glass orange juice to
disguise taste, Mix at bedside with tongue blade. Check patient's diet
for sodium restriction..
PARALDEHYDE
Chill. Have patient take ice before and after taking drug to disguise
taste,
LIVER EXTRACT
Give in 3 ounces glass dark fruit juice to disguise taste and appearance,
Check patient's diet.
MAGNZSIUM SULFHATE
Dissolve presgribed amount of magnesium sulphate crystals in equal amount
of water, Follow with one half glass fruit juice tovemove after taste.
Check patient's diet,
CODEING SULIHATE
Give codeine sulphate by mouth in gelatine capsule to disguise taste.
METAMICIL-HYDROCIL
Dissolve in one glass of water and follow vith water,
ANTACIDS
1. Gelusil
2. Amphojel If no specific orders, give in one half glass of water
3. Maalox to increase volume and to coat entire lining of stomach.
he Tetrilac ;
5. Aluarox
ALL iiARCOTICS
Count respirations before giving. If respirations are below 12-do not give.
Report to charge nurse. These drugs depress respiratory center of brain.
NITROGLYCERING
Direct patient to allow tablet to dissolve under tongue. Gastric secretions
destroy action of drug.
�
96.
~/
Special Method of Preparation and/or Administration of the following Drugs (cont'd)
os ] DIGITALIS PREPARATIONS
Put tablet on separate pill tray. Count radial pulse for one minute, if |
below 60, withhold and take apical pulse. Report to charge nurse, who will .
notify physician. Chart pulse rate on clinical sheet beside time given. |
Chart significant observations on nurses! notes, |
DILUTE HYDROCHLORIC ACID |
Put in one half glass of water. Direct patient to use straw, since this
medication dissolves enamel on teeth. Sip with meals. !
COUGH SYRUP
Cough syrup given for local effect is not diluted,
LIQUID TROW
Give in 3 ounces of water, Sip throuch straw to prevent discoloration
of teeth,
EXPECTORAITS
Dilute up to 1/2 ounce, |
8/10/58
hh
�
*
PRESBYTERIAN AND WOMAN'S HOSPITALS 97.
INSTILLATION OF EYE DROPS
Purposes
1. To relieve pain
2. To produce anesthesia
3- To dilate the pupil and rest the eye
4. To contract the pupil and relieve ocular tension
5, To stimulate circulation
6. To relieve inflammation
7. To prevent adhesions
8. &s a tonic
9. AS an antiseptic
10. As a stain to locate lesions
Equioment
From Central Supoly, Eye & Ear Hospital From Pharmacy
1. Basin with cellu-cotton 1. Medication
2, Basin for soiled cotton (6" emesis basin)
3. Sterile medicine droppers,
4. Sterile eye pads
5. Adhesive strips, 6" x 4"
Procedure
° € out requisition in duolicate ~ take one to Nursing Service Office
at Presbyterian and one to Bye & Bar,
2. Cleanse eye with cotton if discharge is present.
3. Draw up amount of solution required. Discard unused amount in waste basin,
4. Have patient turn head back and look up.
5. Heid cellu-cotton in other hand,
6, Press down gently on cheek bone just below the lid and make a little
pocket of lower lid,
7» Instill amount of drug ordered a little toward outer canthus; avoid
dropping drug on cornea,
8. Press on nasal wall, if poisonous or irritating drug is instilled,
9 Have patient keep eyes open for a moment and look down then have patient
gently close eyes. Avoid squeezing.
10. Control lids by having patient open eyes wide and by placing your index
and forefinger against the lower and upper portion of the bony orbit, if
patient blinks too much.
11. Roll Cellu-cotton gently over the lids to dry off excessive tears,
12. Replace dressing using a sterile eye pad if eye has been covered,
INSTILLATION OF EYE OINTMENTS
Purposes
1. To produce a prolonged action of a drug
2. To produce absorption of a drug
3. To prevent adhesions
4. To soothe and protect the eye
5. To retard bacterial growth
Equipment
From Department From Pharmacy
1. Sterile cotton 1. Eye ointment
= =
|
�
8.
Instillation of Eye Ointments (cont'd) ?
Procedure
3 1. Renove screw top from ointment,
¥ 2. Press gently on cheek bone just below lid. Invert lid Slightly.
3. Hold tube parallel with the eye and outline inner margin of lower lid
with ointment. Eye should not be touched with tube tio. Start from
outer canthus. (Do not outline lid margin when instilling atropine.) |
4. Break off ointment with a sharo turn of the tube away from inner canthus, j
5. Allow ointment to melt a little, .
6. Grasp lashes of upper lid. Use wisp of cotton between fingers,
7. Bring upper lid over lower,
INSTILLATION OF EAR DROPS |
Furposes
e To relieve pain
2. To produce local anesthesia
3. To localize abscesses
4. To soften crust and impacted wax
z To kill insects before removing them
« To retard growth of bacteria
7. As a dehydrating agent
a. To shrink vegetable foreign bodies
b. To retard fungus growth
Equioment
om Central Suvoply From Pharmacy
|
a. Sterile medicine dropper 1. Medication |
b. Sterile cotton ball From Department |
c. Small solution pan 2" x }u 1. wtledicine Glass |
}
Administering the Medication
Procedure
e Place medicine glass containing medication in solution basin with an
hot water to slightly warm drug.
2. Lower backrest,
Have patient turn on side with treated ear UP.
3.
4. With free hand, grasp auricle and pull outward and upward or downward
Which ever is necessary to straighten,
5» Instill drops slowly. Allow solution to flow over posterior superior
wall of canal and down over ear drum. Instruct patient to be in this
position for 10 minutes, 1
6. Place small piece of cotton in lobe of ear,
7. Instruct patient to lie on treated side ten or fifteen minutes to be i
Sure drug reaches ear drum,
8. If other ear is to be treated, turn patient to the other side. Allow |
ten minutes before turning.
%e Replace cotton with fresh piece if indicated,
8/19/58 |
�
PRESBYTERIAN AND WOMAN'S HOSPITALS 99.
INSTILI.ATION OF NOSE DROPS
Purposes
1. To relieve congestion
2. To soften crust formation
3, To relieve pain
« To increase or retard flow of secretion
5. To check hemorrhage
6, To check odors
7. As a local antiseptic
8. As an emollient
Equipment
on Clinical Division
1. Medication ordered in half ounce bottle marked with patient's name
2. Cellu-wipes and face towel
From Central Supply
1. Medicine dronper if none in bottle
Procedure
1. Lower backrest,
2. Remove pillow from under head and place under shoulders.
3. Have patient throw head back and breathe through mouth.
4. Instill drug toward upper part of nostril.
5. Have patient remain in position for five minutes to allow solution to
spread over mucous membrane,
6, Wipe off excess solution around nostrils.
7. Treat both nostrils at one time unless patient is uncomfortable.
8. Replace pillow but keep bed flat twenty minutes.
RECTAL SUPPOSITORIES
Definition
An easily fusible medicated mass introduced into the rectum
Equipeent
om Department
1. Bakelite tray
2. Medicine card
3. Suppository as ordered by physician
he. 4 x h gauze
5. Lubricant, water soluble
6, Rectal glove
Procedure
« Place suppository on piece of gauze and lubricate if necessary. Follow
medication procedure,
2. Place patient on side if possitle,.
3. Insert suppository into rectum aout three inches with gloved finger,
4. Apply pressure over anus with gaaze for a few minutes until desire to
expel supoository is reduced,
8/19/58
�
PRESBYTERIAN AND WOMAN'S HOSPITALS 100.
HYPODERMOCLYSIS-ASSISTING WITH
oses
1. To supply fluids to the body when fluids cannot be taken by mouth
2. To supply fluids to the body when injection of fluids by vein is con~
traindicated
General Information
1. Observe site of injection for excessive swelling. This indicates solution
is entering tissues more rapidly than patient can absorb it,
2. Common sites for hypodermoclysis are submammary regions and anterior
aspects of thighs.
3. A hypodermoclysis is started by I.V. team.
4. Rate of flow is prescribed by physician.
Equipment
Fron Department
1. Standard
2. Solution as ordered by physician
3 . Sub -Q-pak
4. 2 sub-q needles, 20 or 19 gauge
5. Tray as used for intravenous injection
Procedure
» Attach sub-Q-pak to solution bottle, close clamp on tubing and carry to
bedside,
2. Invert bottle of solution and attach bottle to standard,
3. Prepare 6 pieces of $" adhesive \" long to secure needle.
BLOOD TRANSFUSION-ASSISTING WITH
Equipment
From Department From Blood Bank
1. Standard 1. Blood
2. Tray as used for intravenous infusion Secondary
3. Padded arm board blood recipient set if
4h. 18 gauge needle saline is ordered with
5. Veno-Pak blood
3. Blood Recipient Set
Procedure
« Take blood type and crossmatch report from chart to blood bank to ebtain
blood, necessary tubing, saline if ordered,
2. Replace blood type and crossmatch report on patient's chart.
3 Check blood bottle tag with blood type and crossmatch report on patient's
chart before taking blood to bedside.
4. If blood alone is used, attach blood recipient set to bottle.
5. If normal saline is used with blood, attach Veno-pak tubing to normal
Saline and attach secondary blood recipient set to blood bottle.
6. Proceed as for intravenous infusion,
8/19/58
�
PRESBYTERIAN AND tives. cs ace
id,
INTRAVENOUS INFUSION-ASSISTING WITH
* Pu. posus
1. To supply body with fluids when ravid absorption is necessary |
2. To supply body with food or medication
General Information |
1. Between 9:00 A.M. and 5:00 P.il., Monday thru Friday and 9:00 A.M. and
3:00 P.M. Saturday, notify a member of intravenous team to begin in-
travenous infusion. Intern is to be called to begin treatment at any
other time,
Equipment |
rom Department |
1. Standard |
2. Solution as ordered by physician |
3. Veno-pak and Secondary Veno-pak if necessary
4. Tray containing:
a. Container of 2 x 2 dry sponges
b. Container of 2 x 2 alcohol sponges
c. Rubber tourniquet
d. Adhesive 4 inch width
e. Sterile needles #19,20,21 gauge
f. Roller bandage, 2 inch gauze
g. Container for waste
h. Small forceps and holder
5. Padded arm board
Procedure
» Check label as for any medication,
2. Attach veno-pak to solution bottle,
3. Clamp tubing.
Lh. Add medication to I.V. bottle
a. Follow medication technique for identifying and preparing medication.
b. Remove needle from syringe after medication has been withdrawn.
c, Remove metal ca> on air filter from veno~pak attached to solution
vottle.
dad. Place tip of syringe into air filter and insert medication in bottle
of solution.
@. Use medicine card as a guide for completion of label on solution.
5. Carry equipment to bedside and prepare site of injection in following
manner:
a. Invert bottle and attach to standard,
b. Attach needle to adapter, unclamp tubing and allow solution to run
through tubing expelling solution and air bubbles into waste con-
tainer. Clamp tubing.
Cc. Have tourniquet, needle, alcohol sponge available for physician.
d. Release tourniquet and tubing clamp when needle is inserted in vein.
e. Apply padded arm board under area and secure with roller bandage,
f. Regulate rate of flow to 40-60 drops per minute or as specified by
physician,
6, Discontinue treatment
a. Clamp off tubing
a b. Remove adhesive
c. Apply dry 2 x 2 sponge over site of injection while removing needle
d,. Exert slight pressure until bleeding stoos. If bleeding continues
it may be necessary to secure sponge with adhesive
@. Encourage patient to move arm
�
-_
f 102,
Intravenous Infusion - Assisting With (cont'd)
Chart
Clinical Sheet
1. Medication Colum
&- Name of medication if added to I, V,
2. Date Column
a. Time
b. Nurse's initials
3 Treatment column
a. Name of I, V. solution
b. Time
Cc. Nurse's initials
Nurses! Notes
1. For beginning procedure
a. Date
b. Time
Ce Name of person starting procedure
ad. Site of injection
@. Rate of flow
f, Nurse's complete Signature
2. For discontinuing procedure
a. Date
b. Time
Ce Name of person discontinuing procedure
d. Significant observations
@. Nurse's complete signature
8/11/59
ena ee
;
i
�
PRESBYTERIAN AND WOMAN'S HOSPITALS 103.
e EXTERNAL APPLICATION OF DRY HEAT AND COLD
Purposes
Heat
1. To relieve pain
2. To dilate blood vessels and reduce inflammation
3. To relax muscular spasm and rigidity
4h, To afford comfort to patient
Cold
1. To relieve congestion and pain
2. To retard suppuration
3. To reduce temperature
4. To arrest hemorrhage
General Information
« Test container for leakage,
2. Always use a cover.
3e ee A temperature of water with a dairy thermometer, maximum temperature
120°F.
4, Fill container 1/3 - 1/2 full to prevent discomfort,
5. Oserve area of application of heat or cold,
a. Burn from ice = pale skin, mottled bluish appearance
be. Burn from heat - pronounced redness
6, Hot water bottles and ice bags are left in place for only 60 minutes at
one time,
7. Sign ice bags and hot water bottles in and out on card in linen room to
show disposition of equipment,
Equipment
— Clinical Area
Ice bag ~ Ice collar ~ Hot water bottle
Dairy Thermometer
Ice
Cover for container
Paper towel
Procedure
1. Fill container to desired amount, 3, Dry with paper towel; cover
2. Expel air and close, 4. Apply to prescribed area
Ed
Clinical Sheet
1. Treatment Column
a. Hot water bottle or ice bag
b. Temperature of water if hot water bottle
c. Area applied
2. Date Column
ae Date
, b. Time
8/21/58
�
PRESBYTERIAN AND WOMAN'S HOSPITALS
EXTERNAL APPLICATIONS OF DRY HEAT
ELECTRIC HEATING PAD
10h.
General Information
1. The apolication of a heating vad requires a written order
Equipment
Chart ing
8/21/58
26
from a physician,
Heating pads brought in by patients are to be checked by
engineer,
Examine and test heating pad before apolying to designated
area,
Do not allow vad to become damp or wet,
Cover pad and avoid pinning pad in position,
Adjust pad to medium or low heat,
Pad is not to be used when oxygen is in room.
Check patient hourly.
From Central Supoly
1, Electric heating pad
From Department
l.
2.
l. Pillow Case
Clinical Sheet
1. Treatment Column
a. Electric heating pad - temperature
b. Area applied
Date Column
ae Time
bd. Nurse's initials
�
PRESBYTERIAN AND WOMAN'S HOSPIT:.LS 105.
HOT SOAK-FOOT OR HAND
Purposes
® e To relieve congestion
2. To relieve pain and swelling
3. To dilate blood vessels and reduce inflammation
General Information
e Keep plastic away from patient's skin.
2. Before adding hot solution, remove extermity,.
Equipment
iron Central Supply
1. Foot or hand soak tub
From Devartment
1. Dairy thermometer
2. Large rubber or plastic sheet
3. Two bath towels
4, Bath blankets
z0 Solution ordered
- Necessary equipment to dress wound if indicated
Procedure
lL. Fill tub with solution ordered, at tenoerature ordered or 110°F,
2. Cover rubber sheet with bath blanket, place on bed under ex-
termity.
3. Place tub in position and lower extermity into it,
kh. Pad tub for comfort,
5. Wrap rubber sheet and bath blanket around tub to retain heat.
o ©, Replace covers and allow extermity to remain for time ordered,
Charting
Clinical Sheet
1. Treatment Column
a. Treatment .
b. Solution and temperature |
c. Area immersed .
2. Date Column
a. Time
b. Nurse's initials
8/21/58
�
PRESBYTERIAN AND WOMAN'S HOSPIT 106,
i) UNSTERILE RECTAL COMPRESSES
Purposes
« To maintain cleanliness of operative area
2. To stimulate healing
30 To provide a soothing effect
General Information
1. The doctor usually requests that patient apply his own comoresses
after receiving a thorough explanation and demonstration from nurse,
2. Patient should be checked hourly by nurse to make certain that he is
carrying out the procedure oroperly,.
3. It is the nurse's responsibility to see that all equipment is avail-
able to patient and to assist him when necessary,
4. When a patient is to take home dressings from the hospital, the
dressings are provided after a charge has been sent to the Gentral
Susply Room.
5. If permitted by the ohysician, Sanitary belts may be worn instead
of T-Binders.
6. Solution should be hot but comfortable to touch.
7. T-Binder or sanitary belt should be applied to exert enough pressure
over operative area to lessen danger of bleeding,
Eouioment
From Central Supply From Splint Room
» 1. Sterile stainless steel basin 1. Small portable
2. Boric Acid Solution unless othe: wise ordered table
3. Bag of 4" x \" gauze squares From Department
4. Electric hot plate 1. Hot water bottle
5. A.B.D. pads, cut in half (wrapped) with cover
aa T-Binder and
pin
36 Quilted pad
4. Paper bag |
Procedure
1. Place basin on hot plate and pour in small amount(approx. h oz.) of
solution. Turn on hot plate.
2. Place quilted pad under oatient,
3. Place two kh" x " gauze squares in basin. Allow to become saturated
with solution. Squeeze excess solution from gauze,
lh. Apply gauze compresses directly over operative area,
5e Place ABD pad over gauze squares.
6, Apply T-Binder or Sanitary belt.
7. Place hot water bottle over operative area,
8. When compresses become cool, discard in paper bag. New ABD pad used
only when necessary.
ee |
Clinical Sheet
1. Treatment Column
ae Name of Treatment |
» b. Area involved .
2- Date Column
ae Time |
b. Nurse's initials
8/21/58 |
�
eo
PRESBYTERIAN AND WOMAN'S HOSPITALS 107.
&PPLICATION OF STUPES
Purposes
1. To stimlate contraction of smooth muscle
2. To promote circulation
3. To relieve pain
4. To relieve tympanites
5. To stimulate absorption of exudates
6. To reduce swelling
General Information
Ll. Change stupes every 20 minutes or as ordered by physician,
2. Watch condition of skin and use additional lubricant if necessary.
3. Flannel is to be thrown away after treatment is discontinued,
Equipment
From Central Supply From Department
1. Stupe ke*vle 1. Waxed paper
2. Two pieces of flannel 2. Mineral oil in medicine glass
3. Cotton balls
From Pharmacy 4. Scultetus Binder
1. Turpentine if ordered 5.. Safety pin
6. Paper bag
Procedure
. Place water in bottom part of stupe kettle before taking to bedside.
2. Plug in stupe kettle. Place stupes in upper part of kettle.
3. Place binder under patient.
4. Apply lubricant to abdomen with cotton balls,
a. Use mineral oil unless other medication is ordered
b. For turpentine stunes-apply mixture of |; parts mineral oil and
1 part turpentine before every other stupe
5. Remove stupe from kettle, shake stupe and test against inner side
of wrist for temperature. Apply gradually to abdomen,
6. Cover stupe with waxed paper,
?. Pin binder in place over stuve.
Charting
Nurses Notes
1. Date
2. Time
3. Treatment and results
e Condition of skin
5. Patient's reaction
6. Nurses complete signature
8/18/59
ee
�
PRESBYTERIAN AND WOMAN'S HOSPITAL 108
BATH=ALCOHOL SPONGE 7
sorpese
e To reduce high body temperature,
General Information
1. Avoid chilling and exposure; if chilling occurs discontinue procedure
and report to charge nurse.
2. Observe patient's pulse, color and general condition,
3. Usual duration of sponge is 20 minutes,
Equipment
« Bath basin for solution.
2. 3 parts tepid water to 1 part 70% alcohol
3. Bath blanket.
lh. Two bath towels
5. Bath thermometer
6. Elevation tray.
7. Laundry bag
Procedure
i Take T.P.R.
2. Drape with bath blanket.
3. Remove patient's gown,
4. Wring out wash cloths and place one at each groin and axilla. Change
frequently,
5« Sponge patient's face and neck, Pat dry with bath towel.
6. Sponge body in following order, using bath blanket and towel as in
cleansing bed bath.
a, Arms and hands
Ve Chest
c. Thighs.
d. Legs
@. Back
7. Check vsulse
8. Check patient's T.P.R. one-half hour after treatment.
Charti
Nurse's Notes
1. Date
2. Time
3. Treatment
4, Temperature, pulse and respirations initially and 30 minutes
after treatment
5. Results obtained
6, Patient's reaction
7. Nurses complete signature
7/29/58
�
PRESBYTERIAN AND WOMAN'S HOSPITALS 109.
APPLICATION OF CLEAN COMPRESSES
Definition
compresses are moist gauze dressings,
Pur
: To help promote healing by cleansing wound of discharge and Slough,
2. To increase blood supply to locally infected area to aid suppuration,
3. To apply medication to a locally infected area,
General Information
1. Requisition all supplies from Central Supply except Kerlix which
is ordered on a charge slip,
2. Check condition of skin closely when bandage is changed.
ipment
rom Central Supply
Hot Plate
Solution Basin
Solution
Kerlix
Asepto Syringe
From Department
"x hk" sponges
Plastic Sheet
Bath Towels and sterile towels
Hot Water Bottles
Gloves
Pins
Procedure
° ce bath towel, rubber sheeting and sterile towel under part to have
clean compresses.
2. Heat solution to desired temperature (105°~ 110° F,),
3« Clean area if necessary.
4. Open sterile packages before putting on gloves.
5» Place k x and Kerlix in heated solution,
6. Wring out the 4 x k's and allow few drops of solution to drop on
inner aspect of forearm to test solution.
7. Place h x 4's on skin lightly and lift, after a few seconds, to ine
spect patient's skin for degree of redness,
8, Wring out Kerlix, loosen roll to cool slightly.
9. Wrap Kerlix around area snugly and mold it to the skin surface. Check
under initial turns for degree of redness,
10. Cover moist pack with sterile towel.
1l. Place covered hot water bottles over towel.
12. Bring plastic and bath towel around hot water bottles and pin.
13. Open top towel and plastic to add heated solution to dressing with
asepto syringe as ordered,
Clinical Sheet
1. Treatment Column
a. Treatment
2. Date Colum
a. Time
b. Nurse's Initials
8/18/59
�
PRESBYTERIAN AND WOMAN'S HOSPITALS 110.
£PPLICATION OF ACE BANDAGE
ose
- To prevent edema 4h. To secure dressings |
2. To support vessel walls 5. To support a weakened part
3. To control circulation 6, To apply pressure
General Information
1. Ace bandages are 2, 3, and 6-inch widths
2. Make out charge ticket for new ace bandage; C.S. requisition for
used, laundered ace bandage.
3. Bandage is removed every morning and area is hathed unless otherwise
ordered,
4. If patient has been charged for initial bandages, he may take a
bandage home,
Equipment
Fie Cenerda Supply
1. Ace bandages
From Department
1. Safety pins if bandages have been laundered
Procedure
L, Obtain specific instructions from Kardex, head nurse or doctor, as to:
a. Purpose of ace bandage
b. Area to be wrapped
c. Length o- time to be applied
ad. Direction of application
2. Check area to be bandaged for cleanliness and dryness,
3. Place part to be bandaged in functional position,
4. Begin bandaging arm or leg at distal portion and work toward trunk
unless otherwise indicated.
5. Leave fingers,toes, and heels exposed to check circulation unless
otherwise indicated,
6, Each turn should overlap the preceding one, one-half to two-thirds.
7. Secure with clips or safety pin. Avoid clipping over bony prominence,
8. Discard bandage down laundry chute.
in
Clinical Sheet
1. Treatment Column
a. Ace bandage; specify area
2. Date Golumn
a. Time
b. Nurse's initials
7/31/59
�
111.
PRESBYTERTAN AND WOMAN'S HOSPITALS
APPLICATION OF SCULTETUS BINDER
Purposes
1. To apply pressure
2. To vrovide support following abdominal operation
3. To vrotect dressings
General Information
1. Choose binder according to size of patient-small, medium or large.
Equipment
From Department
1. Two safety pins
2. Scultetus binder
Procedure
1. Place body of binder smoothly under patient. Lower edge to be well
down over hips with 2 inner tails 3 to ) inches below iliac crests.
2. Cross and overlap alternate tails obliquely until top tails are
reached,
3. Cross the top left and right tails over the abdomen; secure each
with safety pins in the opposite iliac regions. Do not secure
directly over bony prominence.
Chart
Clinical Sheet
1. Treatment Column
a. Scultetus binder; specify area
2. Date Column
a. Time
b. Nurse's initials
APPLICATION OF T-PINDER
se
To hold perineal dressings in place
Equipment
From Department
1. T-Binder - single for female patient; double for male patient
Procedure
« Place binder corresponding to the cross bar of the T around waist.
2. Place vertical portion between the thighs. The male patient is in-
structed to place the split vertical portion of the male T-Binder
on either side of the genital organs.
3. Secure by tying at the waist
Charting
Clinical Sheet
1. Treatment Column
a. T-Binder
2. Date Column
a. Time
b. Nurse's initials
8/20/58
�
PRESBYTERIAN AND WOMAN'S HOSPITALS ll2.
RESTRAINTS
ses
1. To protect the patient
2. To protect others
General Information
1. Physician's order is necessary for the use of restraints.
2. Restraints should fit comfortably yet allow for freedom of movement.
3. Arm restraints should be secured to bed springs at side of bed; leg
restraints should be secured to bed springs at foot of bed.
4. Opposite upper and lower extremities or all four extremities should
be restrained. Exception may be made in the case of hemiplegia,
when extremities on one side may be restrained,
5. Restraints should be removed every 3 hours and the areas massaged.
Alternate restraints every 6 hours when opposite extremities are
used and chart the same,
6, Side rails may be used in conjunction with restraints, but are not
necessary. Physician's order is necessary for the use of side rails.
7» Send charge tickets to P.C.S. listing number of restraints needed.
Please return all parts of the restraints, sponge rubber and stock-
inette to C.S. when no longer in use.
8, Explain the need for restraints to menbers of the family if they
are present,
Equipment
From Central Supply
1. Ankle restraint-94 inches x 3 inches
e. Wrist restraint + 8 inches x 3 inches
3. Foam rubber padding, one for each restraint
kh, Stockinette, one for each restraint
5. Leather restraint straos, one for each restraint
From Nurse's Station
1. Restraint key
Procedure
1. Place foam rubber padding on inner aspect of restraint. Slip
stockinette over restraint and padding,
2. Apply restraint to opposite upper and lower extremities, or all
four extremities.
3. Insert strap through metal loop on restraint and fasten to bed
springs.
4. Lock restraint strap.
5. Checkrestraints for tightness, comfort and range of motion.
Charting
Nurse's Notes
1. Date
2. Time of application
3- Where applied
4. Why applied
5. Effect on patient
6, Time of removal
7. Nurse's complete signature
8/20/58
�
PRESBYTERIAN AND WOMAN'S HOSPITALS 113.
ADMINISTRATION OF OXYGEN
ses
1. To reduce pulse rate
2. To improve efficiency of respiration
General Information
e« to tiate oxygen supply for tents;
a. Report to Medicinal Oxygen Company the name, room number, and
address of private and semi-private patients who are receiving
oxygen by tent. Also inform this company when they call, of the
hour of the day the tent was started and stopped. Medicinal
Oxygen Company is open 8-4:30 Monday thru Friday and Saturday 8-12,
b. Send a charge ticket to business office for each cylinder obtain-
ed from splint room for ward patients.
2. To initiate oxygen supply for nasal, B.L.B. nebulizer, etcs
a. Send a charge ticket to business office for every cylinder obtained
for the above reasons stating the method of administration. Send
credit slip to business office when treatment is discontinued and
indicate amount of oxygen remaining in cylinder, 3/h, 1/2, 1/h.
3. Storage of oxygen cylinder:
a. Oxygen cylinders for ward patients will be stored at the rear of
the alcove on 2 Presbyterian.
b. Oxygen cylinders for private and semi-private patients will be
' stored on the right side of alcove on 2 Presbyterian,
c, Reserve oxygen cylinders for Operating and Post Anesthesia Rooms ?
Emergency oxygen and special mixture will be stored on the left
Side of the splint room.
d. All empty cylinders will be stored on left side of alcove on
2 Presbyterian.
4. There is no charge for the use of the small cylinder of oxygen which
is kept on the department,
5. When repairs are necessary for any oxygen equipment:
a. Mark equipment with "out of order! sign.
b. Make out repair slip and send to "Anesthesia Department" des-
cribing what appears to be wrong with the equipment. Take damaged
equipment to "Anesthesia Department" except for oxygen tents which
are returned to 2nd floor Presbyterian.
6. Oxygen carriers are repaired by the engineer. Send requisition to
Engineering Department.
7. The orderly on each tour is responsible for supplying and removing
oxygen cylinders from each clinical area,
8, When oxygen therapy has been discontinued, write the number of liters
remaining in cylinder on label on cylinder. When the oxygen supply of
a cylinder has been exhausted, place "empty" label on the sylinder.
9. Safety precautions when oxygen is in use:
a. Remove all matches, cigarettes, lighter fluid and such explosive
materials.
b. Remove all woolen blankets and rubber sheets,
¢. Disconnect all electrical equipment which is not explosive proof,
a such as call bell,
10, When oxygen is in use post "No Smoking" signs.
a. One on door to room
b. One inside the room in the patient area
�
ll.
12.
13.
15.
16.
17.
2.
36
4.
Se
7.
8,
9.
ADMINISTRATION OF OXYGEN (cont'd) 11h.
Crack cylinder of oxygen before removing from storage area to
a. Prevent frightening patient
b. Prevent forcing of sediment into gauge
To turn on oxygen:
a. nee liter flow regulator by turning counter-clockwise until
00Se.
b. Open cylinder valve slowly standing behind regulator,
ce. Adjust liter flow regulator to 8 liters per minute for tent ;
3-5 liters per minute for mask or nasal administration, unless
otherwise ordered by physician,
To turn off oxygen:
a. Turn off liter flow regulator by turning counter clockwise. Wait
until indicator reaches zero,
b. Close cylinder valve.
Change oxygen cylinder when liter rate can no longer be maintained,
Oil and oxygen are a combustible combination. Do not handle or
permit anyone to handle cylinder valves and gauges with any oily
substance on hands.
Call orderly to obtain and set up oxygen equipment,
If an alcohol rub is neeessary when a patient is in an oxygen tent,
move canopy and cylinder to hallway until fumes have evaporated from
designated area,
18. Plastic mattress covers can be used safely with oxygen therapy.
Oxygen by Tent
Equipment
From Department From Designated Area
1. Oxygen cylinder strap 1, Cylinder of oxygen
2. Two "No Smoking" signs
3. Hand bell From 2nd Floor Presbyterian
h. Wrench Hospital
5. Oxygen carrier 1. Oxygen Tent
6. Bath blaniiets 2. Disposable canopy
Procedure
Place tent on left side of bed whenever pessible,.
Attach gauge to oxygen cylinder and tighten with wrench.
Attach motor plug to wall socket; turn on motor.
Secure cylinder to bed with strap,
Turn on oxygen.
Unfold tent; extend canopy rod,
Flood tent with 15 liters/mm for 2 minutes.
Place canopy over patient; tuck under mattress at head of bed, both
Sides,
Make top of bed in following manner;
a. Cover patient with bath blanket, sheet and spread.
b. Fold canopy into sheet and spread at patient's waist.
c. Tuck at sides.
d. Use another bath blanket as a shawl if needed,
Place hand bell inside the tent within the patient's reach. Secure
bell with gauze and safety pin.
Discontinue oxygen when ordered,
�
ADMINISTRATION OF OXYGEN (cont'd) 115.
Oxygen by Mask
Equipment
1. From Anesthesia Departs nt
1. Mask
2. Regulator with humidifying bottle
From Clinical Area
1. Oxygen cylinder strap
2. Two "No Smoking" signs
3. Wrench
lh. Oxygen carrier
From Designated Area
Ll. Cylinder of oxygen
|
/
;
|
Procedure
1. Strap cylinder to bed.
2. Fill humidifying bottle two-thirds full of water,
3. Attach regulator to cylinder.
- &ttach mask to tubing from cylinder,
5. Turn on oxygen.
6. Test mask for leakage.
7. Apply mask to patient.
9 8. Discontinue treatment when ordered.
Oxygen by Nasal Catheter
Equipment
From Anesthesia Departmant
| lL. Humidifying bottle attached to regulator
2. Two plastic catheters
From Clinical Area
1. Oxygen cylinder strap
2. Two "No Smoking" signs
From Designated Area
1. Cylinder of oxygen
Procedure
« Secure cylinder of oxygen to head of bed.
2. Fill humidifying bottle two-thirds full of water.
3. Attach regulator to cylinder and catheter to tubing.
4. Measure catheter from top of nose to lobe of ear. Distance marked by
adhesive or by pinching off with fingers.
5. Moisten nasal catheter with water.
6, Turn on cylinder gauge but leave liter gauge off.
7. Gently insert catheter through nostril short of distance indicated.
If any resistance is met, try the other nostril.
4 8. Secure nasal catheter with adhesive tape.
9. Slowly turn on liter gauge to desired liters.
10. Change nasal catheters every 8 hours in alternate nostrils.
ll. Discontinue treatment when ordered
a, Return cleaned nasal catheter to anesthesia department and
place in alcohol container.
�
Administration of Oxygen (cont'd) 116.
Aerosol Therapy
4 * General Information |
1. Aerosol therapy is a form of medical treatment used in combating certain |
lung diseases by means of inhaling medications, |
2. This procedure can be done with or without oxygen as prescribed by .
physician.
3. Never place medication in humidifying bottle as the patient does not !
receive benefit from the medication and the medication ruins the gauge. |
4. Send charge slip to Central Supply to obtain DeVilviss Nebulizer.
Aerosol with Oxygen
“~
Zquipme nt
From Anesthesia Department
1. Gauge
2. Humidifier
From Central Supply
1. Y glass connector
2. Two lengths of rubber tubing, each three feet in length
3. DeVilviss Nebulizer
From Designated Area
1. One Gylinder of oxygen
From Clinical Area
“ 1. Medication
2. Two "No Smoking" signs
3. Oxygen carrier
- Place patient in comfortable position, 70-90° angle or in chair at bed-
side,
2. Attach nebulizer to tubing on liter-flow regulator.
3+ Remove rubber stopper from top of nebulizer and place in desired medi-
cation in nebulizer,
4. Turn on oxygen. Hold finger over opening while patient inhales.
5. Encourage patient to breathe deeply. Length of treatment varies with
individual patient and/or physician's orders,
6. Remove finger from Opening while patient exhales to prevent loss of
medication.
7. Turn off oxygen flow and Liter gauge when treatment is terminated,
a. Cleanse nebulizer after each use. |
b. Label nebulizer box with patient's name and room number; store |
nebulizer in box in medicine cupboard between treatments. |
c. Return nebulizer to 0.S. with credit slip if vatient does not
take nebulizer home.
3
3
�
Administration of Oxygen (cont'd) 117.
Aerosol Therapy with Nebulizer
Equipment
From Central Supply Room
lL. De Vilbiss nebulizer
From Nurses! Station
Ll. Medication and medication card
Procedure
Ll. Remove stopper from top of nebulizer.
2. Instruct patient to place finger over opening where stopper was re-
moved and, as the bulb is squeezed, take a deep inspiration. During
expiration, finger is removed from opening and bulb is released,
3. Repeat for length of time ordered or until medication has been utilized,
4. Clean nebulizer after each use.
5. Return to designated area in nurse's station,
Charting for all Oxygen Procedures
Nurses! Notes
1.
8/26/58
Date
Time
Name of treatment; medication if used
Liters per minute
List articles removed for safety precautions
Duration of treatment if indicated
Condition of patient
Nurse's complete signature
�
118,
PRESBYTERIAN AND WOMAN'S HOSPITALS
PRE-OPERATIVE SKIN PREPSRATION
Purpose
© prepare the operative site and surrounding area for surgical
procedures.
General Information
1.
2.
36
L.
6.
ui
When hair is to be shaved from head, secure written permission
from patient or patient's family.
a. Braid hair of female patients before shaving.
b. Save sample of patient's hair for color and texture.
c. Place in small envelope; write patient's name, and room
number on outside,
d. Attach to chart,
@. Send special order requisition to Presbyterian admitting
office requesting barber to do head shave.
Wear gloves:
a. To protect the patient against introduction of bacteria from
operator's hands; gloves should be worn for infected or
potentially infected cases,
b. If a perineal preparation is being done on a patient who has
a profuse vaginal discharge,
Areas needing special attention:
a. Umbilicus, clean with applicator.
b. Finger nails, trim and clean with orange stick.
c. Toe nails, trim with clippers, clean with orange stick.
d. Clean cautiously between toes.
e. Tibia, be careful not to abrade skin,
Hair on linen from shave preparations gets on other linen in
laundry. Besides being unsightly, this is dangerous in the
operating room. Please use a disposable pad under area to
be shaved,
Instruct patient to avoid use of cosmetics on prepared area.
Cosmetics such as powder and lipstick are considered foreign bodies,
After applying phisohex, add water to skin to increase sudsing
power,
From department ;
le
Skin preparation tray
a. razor
b. monel basin 3" diameter
c. 2 razor blades
a. h x kts
e. Phisohex
f,. Orange wood stick
&- 3 unsterile applicators
h. Anti-rust aqueous zephiran 1:1000
(sufficient to cover razor)
i. Denture cup for sterilizing razor
Paper bag
Disposable pad
Bottle of nail polish remover
Gooseneck lamp
Rubber gloves if necessary
�
~
12.
13.
Charting
8/25/58
hh
119,
Pre-Oprative Skin Preparation (Cont td)
Check Kardex for doctor 's order.
Check procedure book ford escription of area to be prepared.
Confirm area with charge nurse.
Confirm identification and drape patient with bath blanket,
Place pad under area to bd prepared,
Expose area,
Squeeze phisohex onto x h;,
Scrub area vigorously,
Shave prescribed area,
Clean razor during procedure as often as needed,
Bathe area with clear water to remove phisohex and
hair,
Have area checked by charge nurse or Supervisor on evenings
or nights.
Soak ragor in anti-rust aqueous sephiran for 20 minutes,
dry and replace on Cleantray.
Nurse's Notes
1 a“ Date
2. Time
3- Specific area prepared,
4. Any skin eruptions present, before or after
preparation of skin,
5. Nurse checking procedure,
6. Nurse's complete signature.
�
120,
PRESBYTERIAN AND WOMAN'S HOSPITALS
Description of Areas to be Shaved
Cranial region Entire head (To be done by barber except in emergency).
Sample of hair to be placed in envelope, identify with
patient's name and room number. Attach to chart,
Special order slip sent to Presbyterian
Admission Office.
Chemopallidectomy
Cranioplasty
Craniotony
Lobotomy, pre-frontal
Trephine
Ventriculogram
�
l2l.
Facial region -3" above ear even with posterior part of ear lobe on
affected side to hair line. Front to nose, DO NOT
SHAVE EYEBROWS,
Trigeminal rhizotomy
coetiatee e
Me.
‘ \
an iitiniaenire
—-. rr
/ deal a
v7 §, ay
‘ cn 2 |
“
AY ay
tS #@ ’ & tr"
a f
e 4 \ ‘
OM A PO |
s “ft oF. 2S
ey , a ™ a i }
/ dr : a ; F
s *
fy ! s
lee ae YL: cf {,
~— Sf , z
; ;
t ,
: ;
{
Cervical region -Post occipital protuberance to lower scapular margin,
Include 3" upper arm on each side,
Cervical Chordotomy
Cervical Diss
et 4
s ZF ae
, - “
f ‘f C ss 4
f tH
} Ai? =\
f ‘ \ { 3
ee Be
cee '
Pies
eee
| tle
\ j i
Per
Poe ea
\ ; ;
oo. \
I f 5 /
r . f \
-
Posterior
�
-
122,
Neck region Anterior: Jaw line to nipple line including axilla; continue
laterally to include upper 3" of shoulders,
Bankhart repair dislocated shoulder
Cervical lymph node
Radieal neck
Scalinotomy
Sub-maxillary gland resection
Thyroglossal duct cyst, excision of
Thyroidectomy
Anterior
�
123.
Thoracic region I -Anterior: Jaw line to iliac crest on affected side,
Continue laterally to nipple line on unaffected side,
® Include axilla and upper arm to elbow on affected side,
-Posterior: Hair line to iliac crest » continue laterally
to scapula on affected side. Upper arm to elbow,
Mastectomy
a tn 1
Se ge
. j \ ‘
Ps ? i Fe
‘ e ‘ / a” 4 FF in
{ Vz if \ f a
. (4 , \ |“ 7
, | f iy fy ie 4
0 / A ts ae A i? KA
Pos iS sf dhl i f\ wr /
f } | J faZr Ps | ret
[f\. 744 ce I wy
rz, A A ci f i Met
Lf et i ee
Es “a te | re \{
= f Pa
i ; ' \ '
\ Fay (= foot
: ‘ \ fh i
} ' | ’ fy j
\ | \ “Lo
7 | é ;
| I ' {
' i ' | :
Pie: Pee: |
j \ ; i \ / \
eS Sear al
Anterior Posterior
@
�
12h.
Thoracic region II Anterior: From clavicle to iliac crest on affected side
including axilla; continue laterally to nipple line on
| ® unaffected side,
~Posterior: From hair line to iliac crest; continue
laterally to 1" beyond vertebral colum,
Biopsy of rib
Coarctation of aorta
Diaphragmatic hernia, repair of
Esophageal resection
Lobectomy
Lung abscess
Mitral Commissurotomy
Patent ductus, closure of
Pleural biopsy
Pneumonectomy
9 Pulmonic Valvuloplasty
Thoracotomy
Co : acoe% ‘
a6 .
f
te
‘
X
\
\
‘ _
—
\ fF a
an...
—e
--* -
™~
a
’
‘
oe
4
is
\
—
4,
.
\
~ ‘
=—
on”
a
— porcine acess
ah \ / ety } \
a a} \ / I wi :
7 / aca \ ( f [-2-\ |
oe ae a ee. AI
| —_ — 3 iat
(4 } \
| ; tf
| .. y \ }
ao ee
; Bs
I} | aig
| } | i
“ / i \
(ete E
—
- fe.
aie
;
—_ é {
~
Anterior Posterior
�
125.
Nipple line to lower margin of supra pubic
Continue laterally to bed line on unaffected side.
On affected side include flank to 2" below iliac
crest and continue laterally to bed line.
~Anterior:
hair.
Lumbar region I
~
Lumbar sympathectomy
Obturator Neurectomy
OO A eee
a ~_
——.
Posterior
Anterior
iain diaanubin anecinaeiiaeldlanelimaibzcoiianesTimaion neeadaseans ames
�
126,
Lumbar region II Posterior lower scapula margin to lower gluteal fold;
continue laterally to bed line on each side, Include
> anal area if ordered,
| Coccygectomy=include anal area
Pilonidal sinus, excision of
Spinal fusion-include graft site as indicated
¥ 4 |
Ss - Le - SA
~— ry f \ |
LA Kh gags \
/ \ / . j hee | |
(Au he ON NZO\| |
| j¢ / / , ees { io ey \ \ |
| 0 vk X i | i rm A |
po |
\ Vee ae |
iy [\ / |
Anterior Posterior
�
127.
Lumbo-Dorsal -Posterior: Entire back from hair line to mid buttocks,
Region Continue laterally to bed line on each side.
Lumbo-dorsal sympathectomy
res a
fo a |
Ps
| / |
f A eS
{| {
oi
et
Wee one”
. noe a -P
a
~
Anterior Posterior
�
128,
Abdominal region -dnterior: Nipple. line to lower margin of supra pubic |
hair, include mons veneria. Continue laterally to bed
® line on each side. |
Appendectony |
Abdominal exploration
| Abdomino-Perineal Resection-also perineal region
Cecostomy
Cholecystectomy
Colon resection |
Colostomy
|
|
Gastric resection
Gastrostomy |
Herniorrhaphy, ventral, umbilical |
Hysterectomy |
Oophrectomy |
Pelvic laporatany
Ureterolithotony
.
Vagotomy |
ae Pe. |
oe |
, Ai . o f \ |
y / 7 /f i | ‘ / \
ea WY i" N | )
| bi he ae bar)
\ TP frl | : .
if WW a\ \i If V\! |
| ip ph \ , 4 aoe |
| \ SLT: f\ | _ | a |
| } ote 4 |
poe is er ee
\ \ j \ A {
: \ ! \ .
. 4 { i } E
» PA a |
{ cian 7
me EY
ie Pak (
is hood
Anterior Posterior |
�
129.
Kidney region “Anterior: Nipple line to 2" below iliac crest on affec-
ted side. Continue laterally to nipple line on unaffected
‘® Side, Include supra pubic hair and axilla on affected
a side.
-Posterior: Lower scapula margin to mid buttocks: on
affected side. Continue laterally to 1" beyond verte-
bral column,
Nephre ctomy
Nephrolithotomy
Nephropexy
Nephrostomy
Pyeloplasty
— —*
Anterior Posterior
°
�
130,
Inguinal region Anterior 2" above umbilicus to mid thigh on affected
side, include pubis; continue laterally to bed line.
Herniorrhaphy, inguinal, femoral
“a gn”
CLA Py wn
GEM
ae
“Gan, : = ~~ *e. ~— am
Posterior
4&nterior
�
131.
Hip region -From umbilicus, include pubis, pubic hair, entire leg
surface to knee of affected side. Continue laterally
® _ around affected hip to vertebral column,
Arthrodesis, hip
Arthroplasty, hip
| Arthrotomy, hip
Femoral head replacement
Anterior Posterior
�
132.
Vaginal region Supra pubis and pubic hair, labia and " laterally be-
yond labia, Include anal area within 3" radius of anus.
Dilitation and Curretage
Dilitation and Evacuation
Perniorrhaphy
Vaginal Plastic
Vaginal Hysterectomy
Rectal region -Anus and entire area within 3"radius of anus.
Anal fistula, excision of
Hemorrhoidectomy
�
133.
Perineal regien -Anterior: Supra pubic and pubic hair, include anal
area and upper 6" of thigh.
~Posterior: Buttocks below lumbar area, include upper
6" of thigh.
Perineal prostatectomy
Transurethral Procedures
Posterior Resection
�
13h.
Extremities -Arms;:
|
Forearm: Entire hand and fingers. Include )" above
9 proposed operative site. Include finger nails, |
Upper Arm: From finger tips, include finger nails » to
axilla,
| Legs:
| Below Knee: Entire surface of leg from toe tips to
| 4" above proposed operative sité. Include toe nails.
}
| Above Kaee: Entire leg surface from toe tips to groin,
| include toe nails,
|
| Amputation of arm Bunionectomy
| Amputation of leg Patellectomy
Arthrodesis, knee Minisectomy
|
Arthrotomy, knee Synovectomy
| Triple arthrodesis
xa
; ; j ‘ 4 ‘ ;
P VA oon
| ve —\ fi ar
¥/, \ ¥ ve
4 : } us fh
ato k\ [det \ YY
AN ANN 7 Ky
ke / ! ; i \ / } 4N
| A j f (f) pl Ree V4)
| “44 { é f 7 \ Wf
| of Ni \ act. 3 : AA
iA TAC A Me oi
Arty wih Bal — a
Y tHe 1 Awa
| YY, { ie } Za
é , } \ ‘
YE A \ AF
| \ a, 4} \ / ’ F
Va \ i LANA
Y iA. LA, fe
Bi (Z CL “A
| PAu a 44,404,
(7) Yi; LA \ /}
A, L G ‘A
DIZ ZA @ ci” & D
Anterior Posterior
0 EXTREMITIES
A.Forearm C.Below Knee
�
‘®
1356
Lower Extremity region -Anterior: Entire affected leg, include toes and
toenails, foot and up to iliac crest. Include pubis
and pubic hair, bedside to bedside-from iliac crest
to pubis,
-Posterior: Entire affected leg from heel to gluteal
fold, include anal region.
Vein ligation
tal le
! i ( }
ee eae
/ ‘\ \
Dean iis }
fy Ab {478 ql
\ \
; A ; \ | | i’ : \
) : : \ {
pee Ppp ee 3
f e t \ i \ ' '
1 \~ RE GeeC ot womt/eg i
1 \,
if
Sr
»
be ‘
. bs
~,
_—=—.
<
ees. |
fj Ly 1 |
* /
ie oaegiml
a
\
ae.
engunneemenne TS
VE \S
ot
\ .
AY
Lie
Lik Ho |
$k A Nd
ne ee
an 2 if’ \
�
136.
Specific Instructions:
© Thoraco-abdominal laparotomy = chest region #2 and complete abdomen
region,
Laminectomy - shoulder line to and including the buttocks. Bed line |
to bed line.
Splanchnicectomy - shoulder line to and including buttocks, Bed line
to bed line. |
Endarterectomy - entire leg. |
Abdominal aortic aneurysm <Anterior: Nipple line to knees including
mond veneris, Continue laterally to bed line
on each side,
Nephro-Ureterectomy (2 incisions) = need complete abdominal plus both
kidney regions,
Skin grafts — area to be prepared must be specified,
Aortic Commissurotomy - Posteriorly, hairline to iliac crest, bedline
to bedline; anteriorly, clavicle to iliac crest
including axilla, bedline to bedline.
All skin preparation for plastic surgery is to be ordered individually.
0 Paratidectomy - 3" above and around ear on affected side.
Look for specific instructions for following:
Bursa, excision of
Exploration of nerve
Incision and drainage
Open reduction
Tendon transplant |
8/27/59 |
�
137.
FRISBYTSRIAN AND WOLAN'S HOSPITALS
‘eg SURGICAL DRESSING-AS ISTING JITH CR PERFORiING
Purpose
1. To assist physician in applying surgical dressing, protecting
the wound from injury or contamination,
2. To aid in the comfort of the mtient.
General Information ,
1. Prepare patient mentally as well as physically for this procedure.
2» Nurses and doctors should be free from respiratory infection,
3e Hands should be washed before and after dressing has been changed.
4, Avoid sweeping and dusting immediately before dressing is changed,
5. Give narcotic before procedure if necessary.
ipment
om Department:
1. Dressing carriage with supplies or dressing tray.
2. H& F, other instruments as indicated,
Procedure
- Bring dréssing carriage or tray to bedside.
a. Place tray on bedside stand or on a convenient place.
b. Place carriage in convenient place accessible to nurse
assisting doctor,
| 2. Assist patient to a comfortable position making the wound accessible.
® 3 Adjust bedside lamp for proper lighting.
4. Provide receptacle for soiled dressings by placing a paper bag
in the large basin from the carriage and placing basin on side
of bed where doctor is standing.
5. Remove binder and bandages.
| 6. Remove outer portion of dressing and place in bag for soiled
| dressings.
7» Provide a sterile field by opening a package of sterile instruments
marked H and F (hemostat and forceps) and place in convenient place.
ae Sterile mslin wrapper provides the sterile field,
be Have handles of instruments toward operator.
8, Place several cotton balls and xl sponges on sterile field, using
pick yp forceps from cart.
9, Usual sequence of procedure:
ae Remove drainage
be. Clean covered area, Start at wound and work to periphery.
Hold xl with hemostat to clean,
ce Use forceps to place \xh's over cleaned area,
| 10. Re-apply any bandages or binders.
| ll. Place washed instruments in box in nurses! station provided
for soiled instrwrents,
caar ting
Nurse's Notes
1. Date 5, Significant observations
'® 2. Time 6. Removal of sutures, clips, drains |
. 3. Dressing changed (by whom if 7. Symptoms presented by patient |
not self) 8, Nurse's complete signature
. Any special care
�
PRESBYTERIAN AND WOMAN'S HOSPITALS ‘
TRACHEOSTOMY CARE 138.
Purposes
« To maintain patent airway by keeping tracheostomy tube free of secretions.
‘> 2,
To prevent dislodgment of outer cannula
General Information
le
26
36
k.
Se
6,
7°
8.
9.
LO,
e
if specifically ordered by physician, shave neck from ear to ear and
from chin to nipple line, Do not shave women, children or emergency
patients.
— majority of tracheostomies are done in the Woman's Hospital Operating
om
Tracheostomy tubes and trays are stored in Vioman's Hospital Central
Supply Room.
a, Each tracheostomy tube consist of three parts which are not inter-
changeable
(1.) Outer cannula
(2.) Inner cannula
(3.) Ooturator
b. A sterile replacement is kept at the patient's bedside at all
times.
c. The initial extra tube accompanies the patient if the procedure
is done in the operating room.
d. Check chart to verify size of tracheostomy tube when replacing.
Operating Room personnel
a, Miake out a requisition for 2 tubes. The requisition should in-
Clude the patient's name, room number and size of tubes used.
o. Will immediately obtain two tracheostomy tubes from the Woman's
Hospital
(1.) One tube will replace tube used from O.R. tray
(2.) Second tube will be sent with patient te department
Each patient will be charged with 2 tubes and when they are no longer
needed, a credit slio should accompany each tube when it is. returned
to the Woman's Central Supoly Room,
Tracheostomy tube for exchange, is to be cleaned thoroughly with deter-
gent solution and replaced as soon as possible by the nurse assigned to
the patient.
For the first 2) hours vost-operatively, encourage continuous observation
of the patient.
Patients who require infrequent suctioning should have inner cannula re-
moved and cleaned at least every four hours.
The duplicate tube is to be taped to the side of the suction machine,
The soiled service tray is to be exchanged for a clean one daily.
�
Tracheostomy Care (cont'd)
1396
Equipment
From Woman's Central Supply
1. Tracheostomy service tray
a. Whistle tio catheter with rounded ends
= b. Three solution basins (one marked with black line around rim)
C. Roller bandaze strips (2" x 8" fine mesh)
d. One monel boat (83" x3" x 14")
(1.) One curved hemostat
(2.) One scissors
(3.) One obturator guide without ti
(4.) Two glass connectors (large 31")
(5.) Two tracheostomy tapes (}" x 15")
(6.) Four safety pins Fron Department
e. One small towel 1. Pad and pencil or
2. Small jar vaseline magic slate
3. Saction machine 2. Box of cellu-wipes
4. Duplicate sterile tracheostomy tube. 3. Paper bag
5. Dressings: 4. Detergent solution
a. 6 fine mesh gauze dressings (1 teasooon of Sprex
b. Plastic dressing to fit gauze or Dreft to 1 quart
dressing water) Bottle of
detergent kept in
utility room
Procedure
1. Prepare equipment for use
a» Fill basin marked with black rim with detergent solution. Fill
other basins with tao water.
b. Place one basin with tap water on suction machine or bedside stand
| to flush catheter,
6 Ceo aoa towel into pocket, Fold towel in half; fold in thirds 3; make
1s" cuff.
d. Pin towel to handle of suction machine.
@. Attach the glass connector to the catheter on the suction machine.
f, Test suction machine by turning on suction mechine and flushing
catheter,
8» Place catheter in towel pocket.
h. Pin paper bag to bed,
2. Suction Tracheostomy Tube
a. Place patient in semi-fowlers position.
b. Observe for signs of respiratory obstruction: .
(1.) Indrawing of soft tissues around (2.) Apprehension |
suprasternal notch and intercostal (3.) Restlessness
spaces. (4.) Gyanosis
c. Remove inner cannula holding outer cannula in place
d. Place inner cannula in detergent solution.
@. Turn on suction machine, |
f. Dip 5" of catheter into basin used for flushing to test patency of |
catheter and to lubricate outside of catheter. |
g- Pinch off catheter while inserting anto outer cannula to prevent |
catheter from adhering to sides of tube. |
h. Insert catheter -5",
i. Suction
(1.) Kelease finger tips to suction.
(2.) Jse rotating motion while withdrawing catheter.
p (3.) Patient may cough due to stimulation.
je Suction until airway is clear,
k, Clean catheter by suctioning water through catheter.
1. wipe catheter with gauze. |
m. Replace catheter in towel pocket.
n. Clean inner cannula
�
Tracheostomy Care (cont'd) 10s
3- Clean Inner Cannula
he
ae
be
Ce
Se
he
i.
je
Moisten gauze strips in detergent solution and remove inner cannula
from basin of detergent solution,
Push gauze strips through inner cannula with obturator guide with-
out tip.
Grasp opposite end of gauze strips with hemostat und pull through
inner cannula,
Discard gauze strips in paper bag.
Repeat procedure until inner cannula is clean.
Rinse inner cannula in basin of water on tray and shake off excess
water,
Lubricate outside of inner cannula with vaseline. Apply only a thin
layer of vaseline with a folded gauze strio to prevent adherence of
cannula,
Suction outer cannula,
Insert inner cannula and lock in place,
Change dressing as necessary.
Change the Dressing
Be
Cc.
d.
e.
f.
he
ie
Remove pins,
Remove soiled dressing from behind tube and tapes,
Discard soiled dressing in paper bag. ;
Clean skin around tube. Use " x 4" gauze moistened with tap water
from solution basin on tray.
Blot skin dry with h" x " gauze.
Make dressing, unfold two 4" x k" gauze squares once.(Dressing now
measures " x 8"), Place the two dressings (i" x 8") together. Fold
dressing lengthwise. Approximately 14 inches 2 from folded edge cut
down i"Make right angle cut to folded edge. Place plastic between
the two k x 8 pieces of gauze.
Pe 138 a = hn |
f " ‘ (
Bu yn yn &"
| |
| |
| | |
1" |
Vv
5
Pin here
Pin here — . ‘ ee » ©
Slip prepared gauze and plastic under tapes, pull tabs gently until
dressing fits securely under tube.
Fold tabs down over tapes, avoid covering tracheostomy opening,
Pin tabs to gauze farthest from opening of tube.
�
Tracheostomy Care (cont'd) ua
5. Change Tracheostomy Tapes
ae A graduate nurse and an assistant are required to change tapes.
b. Unwrap clean taves,
Cc. Hold tube in place, have assistant hold tube firmly without pressing
S on trachea keeping airway patent.
d. Cut soiled tracheostomy taves near tube. Use caution not to cut
tube or patient.
@. Discard soiled tapes into paper bag.
f. Replace with clean tapes
a. Grasp slit end of tape and draw up from underside of neck
plate.
b. Pull other end of tape through the slit and pull securely.
Ce Repeat on other side.
g. Tie tapes together at side of neck with two square knots. Test knot
for security. Avoid constriction. Be able to Slip finger under
tapes,
6, Assist Doctor with Changing of Tube
a. Open wrapper with tracheostomy tube and check size of tube,
b. Place emesis basin on bedside stand to receive soiled tracheostomy
tube and dressing.
c. Have patient cough to dislodge mucus,
d. Suction if necessary.
e. Position patient with neck slightly extended.
f. Cut tapes when told by doctor.
g. Instruct patient to take a deep breath before doctor removes tube
and dressing.
h. Doctor removes tube and dressing.
i. Clean skin around tracheostomy ovening with gauze slightly moistened
with water. Work rapidly.
4 j. Doctor will insert clean tube and tie tapes. ‘while inserting, hold
thumb over obturator, which is in outer cannula.
(1.) Tube is inserted into opening until neck plate is flat
against skin, ;
(2.) Remove obturator and tie tapes in place with two square knots.
k. Suction if necessary.
1. Lubricate and insert inner cannula. Lock in place.
7. Cleaning Bquipment
a. Take cannulae and obturator in emesis basin to service room.
b. Remove and discard soiled tapes and dressing.
¢. Soak in detergent solution for thirty minutes,
d. Remove service tray to service roon.
@.- Clean cannula with gauze strips until free of secretions.
f, Send to Central Supply with a credit slip.
3- Treatment - Suctioning, cleaning, replacing tubes
4, Nurse's complete signature
8/26/58
�
PRESBYTERIAN AND WOMAN'S HOSPITALS 1h 9
SSL hsSySSsnneSSAneene e
ASSISTING WITH A THORACENTESTS
c Purpose Thoracentesis Tray
To remove fluid from the chest cavity : on ba
kh x h gauze squares
Equipment 2 culture tubes
rom Central Supply 2 test tubes with two size 0 rubber
1. Thoracentesis tray 3 applicators stoppers
2. Novocaine 1% 2 fanfolded towels
3. Bucket 1 fenestrated sheet
From Dressing Cart 2 cc. syringe(wrapped inh x )
1. Solutions for preparation of the skin 50 cc.L.L.(Wrapped in paper
2. Sterile dressings towel)
3. Adhesive tape 2 needles-25 gauge 5/8"; 14"
From Patient's Unit 3 needles -15,19,20 gauge -3"
1. Waste basket 1 needle -13 gauge-13" or 2"
2. Bath blanket 2 10" lengths of Dakin's tubing with
From €linical Area 1 glass adaptor
1. Ampule file 1 3-way stopcock - Thoracentesis
2. Gloves 1 3-way stopcock ~ Spinal
1 medicine glass
Procedure 1 curyed hemostat
» ASSist patient into desired position as specified by physician,
2. Expose and drape area,
3. Open tray and gloves,
4. Assist physician with skin preparation.
5 Open novocaine ampoule and hold for withdrawal of medication. Read
0 lebel to physician,
6. Assist patient in maintaining position,
7. Place tubing in \ucket for the collection of fluid. Assist with
ccllection of specimen, 200 cc. sterile specimen is preferable amount
of fluid for specimen,
8. Assist physician with application of dressing.
Chart
Tien Notes
1. Date, time, amount of fluid obtained, amount of fluid sent to
laboratory, physician performing treatment,
2. Patient's condition
3. Nurse's complete signature
8/26/58
�
PRESBYTERIAN AND WOMAN'S HOSPITALS he
die .
ABDOMINAL PARACENTESIS, ASSISTING WITH
Purpose |
| 1 To remove fluid from the abdominal cavity |
f Equipment
From Central Supvly
1. Abdominal paracentesis tray 2. 2 vials of novo
a. A 2 ac. syringe caine 1%
b. A 50 ce. syringe 3. Bucket
c. Two needles, 25 gauge x 5/8 or 14"
d. Three 3 inch needles - 15, 19, 20 gauge
@. One 13" needle - 13 gauge
f. One scalpel handle #4)
Ze One scalpel blade #20
h. One pair forceps with teeth
i. One pair surgical scissors
je One curved hemostat |
k, Straight skin needle and two lengths -O silk
1. One abdominal trochar and cannula with 3 feet of block tubing
M. 3 in one glass connector in center of rubber tubing.
n. Tubing with glass adapter
0. Two 3 way stopcock
p. Six cotton balls
qe Six x h gauze squares
r. Three applicators
Ss. Two sterile towels |
t. One fenestrated sheet
u. Iwo test tubes with two size O rubber stoppers
0 v. Two culture tubes
F w. One medicine glass
From Department
1. Roll of 4 inch adhesive tape
2. Gloves
3. Abdominal binder if requested by the physician
4. Bath blanket
5. Alcohol 70% and Tincture Iodine 33%
Procedure |
1. Have patient void, |
2. Place patient in vosition
ae Sitting on chair or edge of bed with feet and back well supported
b. Fowler's position, close to edge of bed
CG. On the side of puncture, if nade in the linea semilunaris
3. Drape patient with bath blanket.
4. Open tray and have it in a convenient place for use.
5. Nurse should assist ohysician to prepare the skin and collect fluid.
6. Nurse observes patient closely during procedure to note any changes in
color, pulse or respiration,
7. When cannula is removed a sterile dressing is applied, Abdominal binder
may be applied if physician desires,
8. Patient should rest in bed after treatment.
9. Fluid obtained shouldbe accurately measured and specimens should be
labeled and sent to laboratory.
> a |
Nurses Notes
1. Date 4. Quantity and character of fluid removed
2. Time 5. Patient's reaction .
3. Procedure performed by 6. Nurse's complete signature \
8/26/58 ;
�
— vy
PRESBYTERIAN AND WOMAN'S HOSPITALS anh.
WATERSEAL DRAINAGE
ses
1. To facilitate drainage of the chest cavity following:
a. Intrathoracic operative procedures
b. Empyema
Cc. Hemopneumothorax
(1.) Spontaneous
(2.) Traumatic
d. Serous fluid collections
e. Hydropneumothorax
2. To re~establish pressure relationships in the chest following:
a. Intrathoracic operative procedures
b. Spontaneous or tension pneumothorax
General Information
1. Chest tube is always inserted by a physician,
2. Insertion is usually done in the operating room but may be done in the
emergency room or on the department.
3. Wangensteen suction may be used with water seal system because it allows
the continuous asoiration of fluid by controlled suction.
h. Pressure relationships are usually re-established in 2) hours. Tube
remains in chest to facilitate drainage.
5. Tube is usually left in place 2 to k days following intrathoracic
operative procedures and may be left in chest 7 days or longer follow-
ing introduction by closed thoracotomy.
6. If tube is accidentally removed, apply pressure dressing and notify
head nurse, who will immediately notify physician.
7. Prevent tension on tubing to avoid pulling tube out.
8. Chest tube is clamped by nurse only in an emergency if connection be-
comes loose,
9. Chest tube is clamped only when transporting patient from surgery and
when drainage bottles are emptied. If the chest tube is clamped over
a prolonged period of time, the air does not have an outlet into the
bottle, and it accumulates in the chest cavity under pressure. This
may occur rapidly when a lung is leaking air actively. This condition,
which is known as tension pneumothorax, collapses the lung on the affect-
ed side. Eventually, the media stinum is pushed over to the unaffected
Side and collapses the lung on the other side. This condition must be
corrected immediately or the patient will die.
10. Bottle is emptied and equipment disconnected only by physician.
ll. Prevent kinking, twisting, and collapse of tubing to maintain con-
tinuous drainage,
12. The patient is returned to the denartment with the drainage bottle tied
securely to the bed frame with muslin bandage to orevent tipping or
breakage of bottle and prevent gravity return of drainage,
Equipment IF TUBE INSERTID IN OPERATING ROOM
From Central Supply
1. Wangensteen suction (if ordered)
~
Procedure
‘¢ Remove clamp to open drainage system. ;
�
145.
If Tube Inserted in Operating Room (cont'd)
2. Note water level marked clearly with tape to accurately observe amount
of drainage.
3. Note that glass tube from drainage tubing is maintained below fluid
level one inch,
4. Tape hemostat to top rail of bed on side of chest tubes, Have 1
hemostat for each chest tube, Have hemostat available to chmp chest
tube if connection is broken, Clamp immediately if this occurs,
5. Attach Wangensteen suction to air outlet if ordered by physician.
6, Pin tubing to draw sheet to prevent tension on tubing,
7. Tape bottle to floor with wide tape,
IF TUBE INSERTED AT BEDSIDE |
ipment
rom Central Supply
1. Wangensteen suction machine (if ordered)
2. Water seal drainage bottle and tubing
3- Flask sterile distilled water = 1000 cc,
4. Emergency thoracotomy tray
a. #3 knife handle with #11 blade
b. Tissue forceps with teeth
c. Tissue scissors
d. 2 curved hemostats
@. 3 trocars, assorted
f. needle holder
g- prep stick
h. small basin
i. 1 10 cc.luer loke syringe
je needles
(1) 1 #25
(2) 1 #22 (13")
(3) 1 #22 (2h)
k, Curved cutting skin needle with #2-0 braided wire and #2-0 silk
1. 8 xh gauze sponges
m. 3 towels
ne 1 medicine glass
©. 1% novocaine ampules
Pp. 5 rectal tubes (1 each #22, 24, 26, 28 and 30)
qe Safety pin,
From dressing cart
1. Tr. zephiran chloride 3 Gloves
2. Tape adhesive 1 inch l. Muslin Bandage
Procedure |
Le ove cap from drainage bottle maintaining aseptic technique.
2. Pour 1000 cc, sterile distilled water into drainage bottle, |
3. Connect tube to rod which is at least one inch below water level, .
4. Keep end of tubing sterile that is to be attached to chest tube,
5. Tie bottle underneath bed to Springs to prevent tipping and breaking bottle,
6. Fosition patient as directed by physician, .
7. Expose chest area,
8. Open sterile tray and gloves, |
9. Assist physician with skin preparation.
10. Physician drapes area with towels,
ll. Physicim infiltrates area with anesthetic,
�
13.
1h.
15.
Water Seal Drainage (cont'd) 16.
Physician makes small incision and introduces catheter clamped at
Ooposite end,
Physician sutures catheter to skin, Prepare tape for later use,
Physician connects sterile chest tube to sterile end of drainage
tubing using straight connection for one chest tube andyconnector for
two, Prepare dressing,
Physician applies small dressing; tapes tube in place. Plug in.
suction.
Fasten tubing to draw sheet.
Physician attaches tubing of Wangensteen to short rod of drainage
bottle.
Turn on suction allowing suction aoparatus to run for 5 minutes to
facilitate immediate suction.
Physician to unclamp chest tube by gradually releasing hemostat to
prevent further pain,
Tape hemostat to Wangensteen. If Wangensteen not used,tave clamp to
head of bed.
Observe drainage bottle
a. Observe glass tubing for fluctuation, Fluid will rise and fall
in the tubing with each respiration until lung re-expands,
b. Observe color and amount of drainage. Excessive bright red
drainage indicates bleeding. Notify the doctor.
¢. Air bubbles may occur in bottle. This may indicate air escaping
from chest or leak in drainage system. —
Assisting with Removal of Tube
Equipment
From department
l.
26
36
he
5.
6.
7.
Procedure
1. Position patient on unaffected side near edge of bed to make area more
accessible,
2. Expose area,
3. Open instruments.
4. Instruct patient to exhale when tube is removed to prevent air from
entering the pleural cavity.
Charting
Surgical scissors
Hemostat
Forceps
Vaseline gauze
Sterile dressing
Adhesive tape
Paper bag
Nurse's notes
8/26/58
le
ae
36
4.
5.
6.
Date
Time
By whom started or discontinued
Amount, color and consistency of drainage when measured
Significant observations
Nurse's complete signature
�
PRESBYTERIAN AND WOMAN'S HOSPITALS
| ;
| t ASSISTING WITH STELLATE BLOCK (PARAVERTEBRAL) 147.
Definition
injection of novacaine into a specified ganglion
Purposes
1. To determine radiation of pain and/or numbness
2. For therapeutic effect
Equipment
From Central Supply
1. Tray for nerve block
a.l 22 gauge, 3 in, needle; 1 20 gauge l" needle
b. 1 18 gauge needle,14" needle
c. 1 25 gauge needle, 5/8" needle
d. 1 10 cc. leur lok control syringe
e. 5 x h gauze squares
f. 1 sterile towel
2. 1 30 cc. vile novacains
3. Table for skin preparation
From Department
1. Sterile gloves
Procedure
1. Place patient in position as directed by physician generally modified |
semi-fowlers or supine position. |
® 2, Open gloves and tray, i
3. Assist with skin preparation.
lh. Open novacaine when requested by physician and read label.
5. Assist with dressing.
6, Observe patient for favorable signs: Ptoses of eye lid, absence of
perspiration on affected side, numbness, radiation of pain,
eS
i n
Charting
Nurses! Notes
1. Date
2. Time
3. Name of procedure
4. By whom performed
5. Significant observations
6, Nurse's complete signature
8/25/58
i
�
FRESBYTZRIAN AND WOIAN'S HOS PITALS
POSTURAL DRAINAGE
Purpose
fe fromote drainage of secretions from the bronchi and lungs by
aid of gravity.
ipment
om Department:
1. Bath blanket
2. imesis basin
3. Foot stool
h. iiouthwash
5. Disposable sputum cup
6. Paper bag
From 728
1. Sawdust
General Information
i. Watch patient closely during entire procedure, especially
for syncope.
2. Avoid procedure one hour before and after meals,
3 Do not use sawdust in sputum cup if sputum is to be measured,
kh. Use quilted pad on floor or foot stool so that patient will have
a clean place to put hands,
5. Use same equipment, if possible, if procedure is done more
than one time for the same patient,
Procedure
1. Instruct patient to lie on abdomen laterally across bed, unless
physician specifies position; drape as necessary.
2. Hang head downward from hips with forearms resting on footstool or
floor, The trunk should incline perpendicularly to the floor,
position maintained for a maximum of 20-30 minutes,
3- Place sputum cup on newspaper so that patient can expectorate into it.
4. Instruct patient to cough and breathe deeply. Correct position and
coughing will promote drainage of thick purulent material,
5. Maintain position for 15 minutes out of each hour unless othervrise
ordered by physician.
6. Assist patient back into horizontal position.
7. Have patient rinse mouth with mouthwash.
Charti
Clinical Sheet
1. Treatment Colum
ae Treatrent
be. Length of time
2. Date Colum
ae Time
b,. Nurse's initials
8/25/58
hh
�
PRESBYTERIAN AND WOMAN'S HOSPITALS 149%
~~ MEDICAL ASEPTIC TECHNIQUE
Definition- Practices which help reduce the transfer of disease-producing
> micro-organisms from one person to another, either directly or indirectly.(1)
General Information
» Technique of medical asepsis must be ordered by the physician. Consult
Medical Aseptic Technique Chart for mode of transmission and precautions
to be followed,
2, The patient and everything in his unit will be considered contaminated,
ae The Surgical Cart is never taken into an isolated unit.
3.Extreme caution should be used by the nurse if she has any breaks in her
skin, Any piercing of skin should be reported at once to the charge nurse
who will send person to E,0,R, where an accident report will be made out.
l, Attire of personnel
a. The nurse may replace her cap with a surgical cap to protect her har,
b. Watches and rings should be removed before entering isolated unit,
c. Students may remove their aprons and bibs when wearing gown over
long period of time, Leave bib and apron in clean area, outside of room,
5. All patients isolated for tuberculosis or other respiratory infections
must be provided with a mask prior to transport to any department
in hospital,
6. Departments to be notified when patient is placed in medical asepsis umit:
a, Housekeeping department
b. Cashier and room assignment clerk when tuberculosis is the diagnosis
c. 7P so that equipment can be delivered,
ad. Dietary department
7. The following rooms are available for isolation:
i 1027 727
@ 927 om
827 SA
Private rooms may be used when permission has been granted through the
Nursing Service Office,
8. Send contaminated articles to C.5. in two plain paper bags, not waxed,
marked "Isolation" for autoclaving. Steam willnot penetrate wax bags,
Person preparing these bags for C.S, is to sign her name and department
then have charge nurse who checked the package sign her initials.
9. Securing and returning supplies, equipment, linen
a. Supplies, equipment and linen which will be stored in 728 will be
delivered to each isolated unit by a nurse's aide at the time
isolation begins,
be. A nurse's aide from 7P will deliver linen and supplies to each
isolated unit daily.
c. Medical asepsis equipment is to be returned to 728 between 8 a, m. and
3 Pe m only,
10. Use "clean" nurse as necessary.
ll. Transport ice from ice machine to the isolated room in a paper bag,
(1) Elinor V, Fuerst and LuVerne Wolff, Fundamentals of Nursing, J.B. Lippincott
Company, Philadelphia, c. 1956 p. 55.
o
NS
�
Medical Aseptic Tsciunique (oont'd) |
SS pol 1504
E nt, Supplies and Linen
e Store
ae Equipment
a. (3:3 Mobile unit (6)
by (2.) Metal laundry hamper (6)
(3.) Step-on can (3 extra)
b. Linen
$2) Hamper bags-blue denim and white canvas
2.) Gowns = isolation
(3.) Plastic pillow covers (12)
Cc. Supplies
(li Sawdust
(2.) Glass water sitchers and glasses
(3.) Waxed denture cup with cotton pledgets
(4.) Step-on can liners. (waxed)
(5.) SO0# bags
"
|
2. Stored in Central Supply
a. Thermometer holder and thermometer
b. Disposable syringe and needle orcer by size
+) Medicine cups - calibrated, waxed and souffle
«) Paper clothes bags:
«) Paper masks
3
A
5
6
7
8
9.) Dapper brush
3. Other supplies needed from nursing unit
a. 70% alcohol
Procedure
e Cown technique
a. Putting on gown
(1.) Pin watch and ring in uniform pocket or place on
paper towel on stand,
(2.) Obtain clean gown from the mobile unit.
(3.) Put on gown,
(4.) Tie gown strings at neckline.
5.) Overlao edges of gown and tie strings in back,
)
) Wash hands,
) Untie neck strings,
+) Cross arms and grasp gown at shoulders.
) Pull gown forward and off keeping contaminated
surface folded together,
6.) Roll into a loose bundle keeping arms well away from
body.
(7.) Discard gown in laundry hamper
(8.) Wash hands before leaving unit,
2. Handwashing technique
a. Stand well away from sink to prevent contamination of clothing,
b. Pull up gown sleeves and lather hands.
D> ¢c. Rinse soap bar and replace on sink,
| d. Work up a heavy lather covering hands well beyond area of con-
tamination,
e. Wash hands using friction for at least 1 mimte paying parti-
cular attention to areas between fingers and around and under |
fingernails,
�
Medical Aseptic Technique (cont'd) re
f. Rinse hands thoroughly under water allowing water to
flow from fingertips.
ey ge Turn off water faucet with elbow or paper towel,
he Dry hands with paper towel.
3. Glove Technique in Medical Asepsis
a. Put on sterile gloves (skin to skin & glove to glove technique)
(1.) Pick up powder packet and powder hands,
(2.) Pick up right glove by cuff and put it on,
(3.) Slip right hand inside cuff of left glove and put it
on. Be sure to maintain a cuff.
(4.) Pick up cuff of left glove and place over cuff of gown.
(5.) Slip left hand under cuff of right glove and place over
cuff of gown,
b. Remove gloves when gloves are soiled, wash with soap and water,
making certain all drainage and blood has been removed, then
rinse well.
c. Place gloves in two plain paper bags mark "Isolation" and send
to Central Supply.
4. Medications
Follow the usual medication procedure with the following ex=
ceptions:
a. Oral Medications
(1.) Pour oral tablets and capsules into disposable “pill: tray
(2.) Pour liquid medications into disposable medicine glass.
@ (3.) Give medications to patient in isolated unit after giv-
= ing all other medications.
(4.) Place medicine tray on mobil isolation unit outside
door of unit. It is not necessary to wear a gown un-
less patient requires help that will necessitate close
contact,
(5.) Enter room carrying only the patient's medication.
Leave medicine card on tray.
(5.) Pour tablets into patient's hand and hand him his
liquid medications, Avoid contact,
(7.) Instruct patient to discardcontainers into paper bag
pinned at side of bed if he is able. Give patient any
help he requires.
(8.) Wash hands,
b,. Parenteral Medications
(1.) Use disposable syringe and needle, Prepare and ad-
minister his medication separately.
(2.) Place medicine tray outside room on Mobil Isolation
Unit.
(3.) Enter room carrying only patient's medication,
(4.) Have patient position himself. It may be necessary
to wear a gown if the patient needs help in positioning,
(5.) Discard disposable syringe and needle unit in paper
bag marked "glass",
(6.) Wash hands,
5. Taking Temperature
a. Fill thermometer holder with 70% alcohol.
b. Rinse thermometer with cold water before giving to patient,
C. Wipe thermometer with cotton pledget moisted with 70% alcohol
from top to bottom after use,
d. Replace in holder.
e. Wash hands,
�
ye
Ne
Medical Aseptic Technique (cont'd) 152
6, Care of Patient's Clothing
a. When taken home by family
(1.) Seal clothing in large paper clothing bag. Keep
outside of bag clean,
(2.) Advise family about the care of the clothing.
(a.) Washable clothing should be laundered in
hot soapy water.
(b.) Unwashable fabrics should be sunned and
aired, then dry cleaned.
(1.) Hang in noonday sunlight for 4 hour
or in light and air for 6 hours,
(2.) Instruct cleaner that clothing is
contaminated,
(c.) Leather articles may be exposed to light
and air (noon sun for + hour otherwise for
6 hours) and then cleaned.
b. When remaining with patient in dresser.
ae Seal in paper clothing bag
2.) Store in dresser drawer
7. Visitors
a, Caution visitors to vrotect themselves as well as the
patient. Avoid close contact, especially kissing.
b. Visitors must wear gown when indicated on Medical Asep-
tx Technique chart.
8, Care of Equipment
a. Instruments
(1.) Wash with hot soapy water using brush and inspect
con adherent particles, Obtain dapper brush from
728. |
(2.) Store in disposable box on ledge above sink until |
contaminated supplies are sent to Central Supply.
(3.) Place in two paper bags mark "Isolation"; send to
Central Supply Room for sterilization. .
b. Carriage or wheelchair should be cleaned thoroughly and
aired before being used again only if grossly contaminated
such as by drainage from gas gangerene lesion or feces |
from typhoid patient.
¢. Television is wiped with 70% alcohol after unplugged.
d. Mail - Take to Physical Medicine Department and expose
each side of paper and envelope to ultraviolet rays for
5 minutes. Advise use of pencil. |
e. Care of Sphygmomanometer
(1.) Arrange paper towels on bedside stand and place
sphygmomanometer on towels,
(2.) Wrap face towel around arm where cuff will be placed,
(3.) Follow procedure for taking blood pressure,
9. Care of dishes and food
a, lieals are served on paper dishes.
b. A metal tray with silverware is served with the first meal.
¢. Dispose liquid waste in commode,
d. Dispose solid waste and paper in step-on can.
e, Viash tray and silverware in soap and water in patient's
bathroom after each meal,
f, Set up tray with napkin and tray cover, A supply of nap~
kins and tray covers are to be stored in dresser drawer,
Additional supplies can be secured from dietary department,
er
SS ae z = =
�
la - *
Phe
Medical Aseptic Technique (cont'd) 153.
8» Ec. subsequent meal will be served on bakelite tray.
This tray is to remain outside the isolated room. A
clean person is to transfer the food to the metal
tray in the room,
10. Care of linen
a. Place laundry hamper inside isolated room and place blue denim
hamper bah on hamper,
b. Yhen blue denim bag is 2/3 full, tie bag securely. Daily,
after morning bath, and more often if two thirds full.
Isolation bag is a small sized blue denim laundry bag with
a drawstring.
¢. Have clean nurse at doorway of isolated room hold white/or
white and blue isolation bag by slipping both hands under fold
and grasping tabs in corners,
d. Drop blue demim bag in white/ or white and blue bag.
@. Clean nurse will close white/or white and blue bag by holding
onto tabs and pulling from under cover.
f, Place in laundry chute,
ll. Care of body wastes
a. Care of stools, urine and emesis
(1.) Dispose of stools, urine and emesis by lifting seat of
comnode and discarding waste into commode,
(2.) Specimens to leboratory
(a) Specimen containers are to remain outside the isolation
room. |
(b) Wipe the outside of the contaminated culture container
with 70% alcohol.
b. Care of sputum
(1.) Patientswith slight to moderate amount of sputum
‘ instruct to cough into 2-3 thickness of tissue,
b) Discard soiled tissue into paper bag pinned to bedside
(c) Patient should fold down top of bag whan 3/) full.
(d) Patient should put soiled bag into clean waxed paper
bag held by nurse.
(e) Fold down top of clean bag and place in step-on can,
(2.) Patients with copious amount of sputum
(a) Fill waxed sputum bup 1/); full of sawdust.
(bo) Instruct patient to expectorate directly in center
of cup and cover securely with lid, Patient should
handle own sputum cup if possible.
(c) Place sputum cup in paper bag with lid side up when
not more than 4 full and at least daily. Fold top of
bag and put in step-on can.
c. Care of dressings
(1.) Place soiled dressings in paper bag, use waxed bag if
dressings are damp,
(2,) Place soiled bag in step-on can.
12. Disposal of waste
a. Step-on can is to be lined with waxed liner,
b. Place waste in 50# bags outside room for pick-up by the
porter who takes it to the incinerator in Health Professions
Building,
SR
�
Medical Aseptic Technigue (cont'd)
(1.) Porter pick-up schedule 15h.
Tuesday - 9 a.m.
i Wednesday = 9 am.
Thursday 9 agm.
Friday 9 aM.
Saturday 9 a.m.
Sunday 9 a.m.
Mionday - 9 asm. = 2 poem,
c. Waste can be taken to incinerator in H.P.B. and placed
in can marked "Isolation" anytime of day or night.
d. Incinerators located in Woman's Hospital treatment room
may be used when necessary.
e. Glass (I.V. bottles, disposable syringes) must be placed
in a separate bag and marked, "glass".
2 Pome
2 Pele
2 PeMe
2 Pele
43. Housekeeping duties
Dusting and mopping are done by housekeeping personnel on
each nursing department under the supervision of the nurse
in charge. This unit is done last.
ae Dusting
(1.) Damp dust furniture, ledge above sink and window
sills.
(2.) Place cleaning cloths in blue denim hamper bag for
soiled linen,
(3.) Wash hands thoroughly.
b,. ilopping
(1.) Use hot soapy water.
@ (2.) Clean mop with soap and ammonia solution.
- (3.) Wash hands thoroughly.
1h. Terminal cleaning
a. Send all linen to laundry including drapes if used.
Collect all equivment which can be autoclaved, wash with
soap and water and send to Central Supply.
b. Ventilate room for 2) hours if patient with tuberculosis
occupied room,
c. Remove plastic mattress cover and pillow cover and wash
with soav and water, Notify housekeeper when walls are
to be washed. All washable equipment in room, wash with
hot soapy water and wipe with 70% alcohol,
15. Care after death
(1.) Usual procedure with the following exceptions
(a.) Note in red ink on the Death Notice under
the Nurse's signature the disease for which
the patient was isolated.
(b.) Ask laboratory for instructions before tak-
ing body to morgue in cases of =a &
radio activity.
y? 8/15/58
�
III. Diseases Transmitted by
Contact with Muc. sdembrane . ’
wot. ile Conjunctivitis, acute : ‘ee tt a
en bacterial 1 ta if if Sterilize eye equip. |
2. Gonorrhea | bate Pre-venicillin therapy |
iss eos x _ x i x iPre-penicillin therapy
. Trichomoniasis “% ; ee
IV. Diseases transmitted by
Ontact with wo or
Skin Lesions
in Impetigo x x
a. au ne = x 1 Bit+-3 so other clostridia
z inea (Rinpworm x e: x
-. Tubercvlors lesions x HEB:
. 5. Tularemia x x| x 5 .4-8-4+
' V. itiscellaneous
1. Serum hepatitis x xj
2. Pediculosis x HES x
3. Scabies x Tx ’ Ix
VI. Diseases that are not t
transmitted by direct
contaét
1. Biastomycosis x x t
2. Botulism
= Brucellosis x x i» a
4. Coccidiodomycosis x j x t control important
De __ Cryotococcosis x Sache i
6, Histoplasriosis x} x ee a i 9 t
7. Leishmaniasis tropica i xi nal
3. Malaria Hi x.
9. Moniliasis x
10, Rabies x|_ x x ( i
11, Tetams it x La ated to keep him quiet)
12, __Trichinosis she inesbend. id wed wey pmo $s opr i! ‘
13. Virus encepha lomy elitis! | x | | FL tf ddim | x (Arthropod borne disease)
staplacoccus .:urcus SZZI=a=z x x zis = &
* Recommended, Must have order from physician,
## Advisable in pre-icteric and icteric stages only.
% Patient with gc cangrene should be isciated from others vith surgicah or traumatic wounds
�
MEDICAL ASEPTIC TECHNIQUE CHART
Py
tA | % Ye igo dG |g 3 | a | ® | |
4 5 195 Bis ia ai 8 a |
eggs 2h edas 18 4 Sills Ae
r © od al 3 ? lo ds asl? ao
B | ae eh es ao de 2 ae case a),
g oO; cor wo fu “Af O oO
4 je Bla ois Ane ga Sigie g:
| laid #8 omoddoda ichdle Flo
aa Ig @3\H lo pt o cual
MSSadegke sy hhas 8 id Bais 86
I. Diseases Transmitted by :
Respiratory Secretions i |
1. Chicken pox ,Varacella) xi xixix xi xl x x ' {
2. common cold ee x or
3. _Diohtheria x, x!xix| xixl x x : ! xx
Ti. German measles (rubella) ., ¥ x x. - it
5. Herpes simplex x i eS
6. Herpes zoster en x 2 }
7. infectious mononucleosis , x x Ba
8. Measles (Rubeola) yl xixixl x x xix E
Ze __ideningitis, meningococcal} y/ x! [xi x Ix! x 7 3 _Firs hrs _o
10. __ Mumps i x i x xi i
ll. Pertussis t x x x x!
12. Poliomyelitis (acute) ! x ai xt ze ix |x
13. Pneumonia (all types - Hf j
1b. Small pox (Tariota) x x =) x zi x _ Xx
15. Streptococcal infactions | tu xia x Lo mi
16, Tuberculosis, pulmonery } } | !
Positive scutum tx! | ialnrs,
Negative sputum xx " T ia a
3z. Diseases Transmitted by !
and/or urine i ae
1. _Amebic dysentery x! x {
z wees aes, | .
Shigellosis 2 -
36 ___ Infectious hepatitiss+ . x'x/i [x: ae ar a oS 7 x4
4. Typhoid @ :2>.typhoid xix’ ix 212 (ae ee Y. 'X Xj a}
»
eo )
enn ee
.
�
157.
FRISBYTERIAN AND WOMAN'S HOSPITALS
ST!RILE URINZ CULTURE
Purposes
_ i. Prevent introduction of bacteria into urethra and
bladder,
2. Keep contaminants out of urine specimen.
General Information
1. oend a requisition for urine culture to the laboratory at the
time the order is written. The procedure is usually performed
in the evening.
2. Urine for culture will be collected by a member of the
Bacteriology Department.
3. If a stat culture is necessary and the technician is not available,
nurses are to perform this procedure on female patients and the
intern or resident physician on male patients. As soon as the
specimen is obtained. notify the laboratory technician on duty
that you have a urine specimen for culture,
4. A member of the nursing unit must be present with the technician
when this procedure is performed on a female patient.
5. When the technician performs the procedure, he will take the
specimen to the laboratory.
Equipment
c From Central Supply From Department:
1. Catheter pack 1. Squeeze bottle FPhisohex
2. Two catheter boards with 2- 181000 Aqueous Zephiran
catheters 3 Pair of rubber gloves
3. Sterile culture bottle 4. Bath blanket
5. Disposabb pad
Procedure for Female
i. Apply perineal drape and place disposable pad under patient's
buttocks lengthwise.
2. Open catheter pack between thighs.
a. Four approximately ounces of aqueous zephiran over
cotton balls in bowl.
b. Squeeze phisohex over 2 cotton balls on outside of bowl.
3. Place dry cotton ball. in vagina,
4, Starting at meatus in a circular motion, use a cotton ball
with phisohex to cleanse meatus and surrounding area, Discard,
5. With second cotton ball with phisohex, cleanse meatus and
labia minoriagz. Discard.
6. Flush cleansed area with about 3 ounces of zephiran from
basin of pack.
7e Cleanse meatus’ labia minoriarea with zephiran moistened cotton
ball. Discard.
8. Place zephiran moistened cotton ball directly over meatus.
9. Move bowl and wrapper to foot of bed.
10. Wash hands.
ll. Open glove pack and shake down gloves,
—_
�
“158,
Sterile Urine Culture (Cont'd)
12. Open catheter pack, leaving last flap over board,
13. Open wrapper of sterile urine culture bottle, remove lid and
stand bottle up on paper field between thighs,
1h. Apply gloves
15. Pick up catheter 23" from tip with hand #1,
16, Discard cotton ball from meatus, separate labia minora to expose
meatus with other hand,
17. Put end of catheter in culture bottle, insert catheter into urethra,
18, Collect 3/ bottle of urine or until urine ceases to flow freely.
19. Remove catheter from urethra, bottle and area,
20. Using hand that inserted catheter, close culture bottle,
21. Remove cotton ball from vagina and discard.
22. Dry perineum with cotton balls.
23. Have patient turn on side, remove disposable pad,
2h. Dry buttocks.
Procedure for Clear Voided Specimen for Culture for Male
1. Obtain following equipment for the physiciane
ae From Central Supply
(1) Catheter pack
(2) Sterile culture bottle
b. From Department
(1) Squeeze bottls of phisohex
(2) Aqueous Zephiren 1:1000
2 Fhysician will clean meatus with phisohex and aqueous zephiran.
3 Patient will voii a small amount into bowl,
k. Fhysician will collect specimen for culture in culture bottle.
Charting
sets Notes
l. Date
2. Time
3. Procedure
4. Person performing: procedure if not nurse
5. Approximate amount obtained and sent to
laboratory
6. Nurse's complete signature.
8/25/58
hh
�
Ps
ia
PRESBYTERIAN AND WOMAN'S HOSPITALS
1596
TREATMENT FOR PEDICULOSIS
Purpose
e To add to comfort and well-being of patient,
2. To rid hair of pediculi and nits,
Equipment
. From Central Supply
1. Fine tooth comb
2. Two solution basins
From Dressing Cart
1. Cotton balls
2.Paper bag
From Nurses' Station
1. Safety pins
From 728
1. Cap and gow
Procedure
1.
26
36
he
5e
6.
7.
9.
10.
il.
12.
13.
Put on gown,
if desired,
Cap may be worn
Remove all but one pillow from
under patient's head.
Place protector covered with face
towel over pillow,
Comb patient's hair,
Separate hair into strands and comb
with fine comb; continue until all
hair has been combed,
Separate strands of hair, Apply
cuprex to scalp and hair with
Saturated cotton ball, massage
scalp and hair,
Wrap head with triangular bandage;
pin securely,
Remove bandage;fine comb hair. Re-
peat cleaning comb with celluwipes
after combing each strand.
Shampoo hair.
Leave bed protected with second
towel while hair dries.
Fine comb hair when dry,
Discard comb into bag, burn bag,
Repeat treatment if necessary.
Chartin
Tiinical Sheet
1. Treatment column
ae Cuprex Treatment
26
De
6.
Te
9s
From linen closet
1.Rubber bed protector
2. Two face towels
3.Triangular bandage
From bedside stand
1. Comb
2. Celluwipes
From Pharmacy
1. Medication as ordered by
physician.
Explanatory Statements
To avoid scattering pediculi and nits,
Comb should be examined for nits and
wiped with celluwipes each time it is
drawn through the hair. Celluwipes
should be discarded into bag.
Keep medicine away from eyes.
Bandage to remain for 15 minutes.
Use vinegar rinse which loosens
the nits.
Fine comb should be thoroughly cleaned
in medication and vinegar before using
on clean hair.
2.Date Column
a. Time b. Nurse's initials
�
PRESBYTERIAN AND WOMAN'S HOSPITALS
INSTRUCTIONS FOR US OF NURSES! REMINDER SHEET 100.
1. To provide a olace to make notations when receiving revort on
vatient assignment,
2. To assist the nurse in organizing nursing care for her patients.
3- To assist the nurse when: recording on patient's chart.
4. To assist the nurse in giving revorts to charge nurse and to relief,
Procedure
1. Secure Reminder Sheet when re-
porting on duty.
2. Complete Reminder Sheet heading.
3. Complete following from assign-
ment sheet,
4. Complete columns for your tour of
duty in following mamer:
a. Care Column
b. B.R.P. Column and Out of Bed
Column
ce. Use check (/) for remaining
columns
5. Under hour designate by code when
datient is to receive treatment,
wedication, sxercise or Feeding.
©, Remarks Column.
7/10/58
Explanatory Statements
1. Reminder Sheets are located in nurses!
station,
2. Examole: Hours on duty
Name Date
3. Example:
Room Patient's Name
243 John Brown
537 Mrs. ee
“Relieve Jean Truby Dinner,7Supver_
Relief Jean Truby Dinner_ Sunper .~
lh. Information is received from verbal
reoort and Kardex,
a. Code;
5S = Self
P ws Partial
C = Co.nple te
“ith Assistance
db. Cc
S = Without Assistance
c,. List:
Red Rest
Feed Patient
BP and weight
5. Code:
T = Treatment
M <= Medication
& = Exercise
F = Feeding
Code symbols and checks are a reminder
that nurse must refer to Kardex or
order Sheat.
6. Use for pertinent remarks,
�
Sy
PRESBYTERIAN AND WOMAN'S HOSPITALS |
;
KARDEX ROUTING 162, |
Purpose
1. To provide a more efficient summary of doctor's and nurse's current
orders and administrative information,
General Information
i.
2.
36
ke
5.
10.
ll.
12.
13.
15.
Two Kardex Cards are to be filled out for each patient upon admission.
Orders will be segregated into two divisions. Unvper card will be used for
all medication orders, Lower card will be used for treatment orders and ad-
ministrative information.
Orders may be transferred to Kardex by ard Clerk and checked by nurse in
charge. Nurse's complete signature must follow last order on Doctor's order
sheet.
Stat Orders will not be transferred to Kardex. Stat orders will be carried
out directly fron Doctor's Order Sheet. Write: "given" and sign full name
opposite order after it has been carried out.
Single orders, other than stat orders, but to be carried out immediately, are
not transferred to Kardex. Write "done" on the Doctor's order sheet after
order has been carried out and chart as required.
Single orders to be carried out later in day are recorded on Kardex in usual
manner,
P.R.N. orders - Start on bottom line of card and work up on Medication and
Treatment cards.
Cross off times on Test Column,
Lines must be drawn through discontinued orders by nurse noting orders.
Care
a, Complete Care - wieans the nurse must give all care to the patient.
b. Partial Care - Means the patient is able to carry out some portion
of his care,
ce Self Care - Means the patient is able to care for himself under
supervision and with minimum of help.
Original Treatment Kardex Card is recopied only when necessary.
Kardex Treatment Card without administrative information will be used as
necessary. Attach with paper clip to original card when filled. Write in
name of patient at too of treatment column and draw diagonal line through
card recopied. Medication Kardex Card - put new card on top of filled card. ~
Kardex Cards are discarded after census sheet if filled out, and discharge is
noted on day or night report.
Extreme Unction, when adainistrated, is noted in space provided for religion.
Seriously ill patients will be so designated by red celluloid tab inserted
under isinglass at extreme right side of Kardex. Write S.I.List and date in
upper right corner of treatment card,
�
16,
17.
18.
19.
Kardex Routine (cont'd.)
162.
When transferring Doctor's orders to medication Kardex fill in appropriate
columns. Write date and time medication is discontinued if an order is for
a specific number of days,
Kardex is checked every morning by nurse in charge as soon after 7 A.M.
as is practical.
a. Wedication cards will be checked with Kardex immediately before pre-
paring medications for administrations by nurse preparing and ad~
ministering the medication.
If additional space is required, use second medication Kardex card, Cut
medication Kardex card on 7th line from top and clip to medication card,
Pencil is used for the following: Diet and date ordered, private duty
nurse, type of care, type of activity and dates of frequent tests.
1. Note nurse's order and tour in parenthesis, when obtained erase
parenthesis,
2. Mark 2.S. beside test ordered to show that a requisition has been
sent.
3. Draw line thru date when completed.
Kardex insert card is used for one time orders that change frequently; for
orders including details too extensive to put on treatment card and Ee¥e
fluids,
a. Write patient's name and Koom No, at top of card near perforated edge
to ensure accurate identification,
b. Card may be destroyed by nurse terminating the treatment, after
charting has been completed.
7/1/58
�
163.
PRESBYTERIAN £1] WOMAN'S HOSPITALS
DPAPING THE PATIUNT "O° TXAMINATION OR TRTATIENT
Purpose
To prevent unnecessary exposure of patient.
eon
From bedside stand
le. Bath Blanket
Procedure to Anply Bath Blanket
1, Fan-fold top linen to patient's
waiste
2e Open bath blanket in half, cross~
WLS»
3. Place bath blanket across chest
of patient,
lh. Tuck under patient's shoulders
or sive one edge to patient to
hold.
S. Facing foot of bed grasp other
edge of blanket and cuff of top
linen, fanfold to foot of bed,
7/10/58
To Remove Bath Blanket
1. Facing head of bed, grasp both
blanket and cuff of top linen at
foot of beds pull up linen over
patient's chest,
2 Remove bath blanket from under
top linen,
�
PRESBYTERIAN AND WOMAN'S HOSPITALS 161i.
= SERIOUSLY ILL PATIENT
General Information
1. Notify evening or night supervisor of change in patient's condition.
2. Patient is placed on seriously ill list by Resident or Interne.
3. Physician will discuss patient's condition with responsible
person if present.
h. Relatives of seriously ill patients are permitted to be with patient
any hour, day or night. It is advisable to limit the number of
visitors to two,
Procedure
1. Notify admitting office by telephone that patient has been placed on
seriously ill list. Inform admitting clerk if family is present and
notified. If responsible person was not present, give name of patient,
room number, and religion, so that responsible persons may be called,
2. Assist responsible person or patient to contact religious counselor
of his choice, Telephone operator will contact designated person if
desired,
3. Prepare three seriously ill patient slips. Send to:
Admitting Office
Nursing Service Office
Place one on patient's chart,
. Place red signal in Kardex,
é 5. Write "Extreme Unction" in religion colum on kardex after it is
administered,
CHARTING
Nurses Notes
1. Date
2. Time
3. Condition of patient
« Name of physician notified
5. Date
6. Time
7e Responsible person present.
8, Religious counselor visited.
9. Extreme Unction if administered.
10. Nurse's complete signature.
When Patient is Removed from Seriously I11 list
1. Notify admitting office,
2. Discard seriously ill slip which is attached to the chart.
�
PRESBYTERIAN AND WOMAN'S HOSPITALS 165,
COUNTING THE APICAL-RADIAL PULSE
General Information
1. Two nurses count simultaneously.
a. One nurse counts the radial pulse.
b. One nurse counts the anical pulse.
2. The count is taken for one full minute.
Equipment
From Department
1. Stethoscope
2. 2" x 2" alcohol sponge
3. Watch with second hand
4. Reminder sheet
5. Pencil
Procedure
le Apply the stethoscope at the 5th intercostal space, about 33" left
from the sternun.
2. The nurse taking the apical pulse starts the count by saying "one"
and stops the count by saying the word "stop",
Charti
Clinical Sheet
1. Make an "X" on avprovriate line for radial voulse.
2. Make an "X" on avprovriate line for apical pulse.
3. Connect with dotted line.
Nurses Notes
1. If both rates are the seme, chart
"Apical rate - redial rate =- 80"
8/25/58
�
PRESBYTERIAN AND WOMAN'S HOSPITALS 166.
COLLECTION OF FRESH SPUTUM FOR CULTURE
ses
« To collect sputum raised from within chest.
2. To reduce bacterial contamination from materials present in
nose, throat, and mouth,
General Information
I. twenty-four hour collections of sputa are examined only for
tubercle bacilli. They do not require mouth cleansing.
2. Sputum culture is collected and sent to laboratory between
8 a. m and p. m
Equi fuent
rom department
1. Mouthwash
2. Sterile culture bottle
From bedside stand
1. Emesis basin
Procedure
1. Have patient gargle three times with full-strength mouthwash and
dispose.
2. Have patient cough secretions into sterile culture bottle,
If the patient is unable to raise secretions from chest:
a. Change position several times from sitting to lying and
from side to side,
b. Have patient cough again,
c, If unsuccessful, enlist aid of house staff,
3. Send specimen to laboratory at once for examination.
Charting
Nurses! Notes
1. Date
2. Time
3."Gargled three times with mouthwash and approximate
ec's of sputum to laboratory for culture."
lh. Nurse's complete signature
9/26/58
�
PRESBYTERIAN AND WOMAN'S HOSPITALS 167.6
OPERATION OF THE STRYKER TURNING FRAME
OPERATION OF THE FOSTER REVERSIBLE ORTHOPEDIC BED
oses
To provide immobilization, physiological rest and to facilitate nursing care
for the patient who needs frequent changing from supine to prone position.
SEs
Uses of the Stryker frame and the Foster bed:
Spinal cord injuries,
Tuberculosis of the spine.
Spinal and pelvic fractures,
Spinal fusions,
Vesico-vaginal fistulae,
Burn cases,
General Information
1, The underlying principles of operation for the Stryker frame and the
Foster bed are the same with slight variations in technique.
2. The Foster bed can be adjusted for hyperextension. The Stryker frame
requires separate hyperextension frames.
3. Both can be elevated at either the foot or head end to provide traction
in pelvic and intertrochanteric fractures or for fractures of the
cervical vertebrae.
4. Both have a rotary bearing, pulley traction apparatus at each end for
the maintenance cf traction during the burning process,
5. Obtain the asseubled unit from 728.
Equipment
The Stryker frame;
Anterior and posterior frames with canvas covers.
Overhead bar,
Cart with sliding utility tray.
Face support.
2 arm supports,
iT at Se Sa Te, FE. ; - G+ y ated ate Grih f,
ANPIOBI, oY sans Or 8 kere 63
The Foster bed:
Anterior and posterior frames with canvas covers,
2 arm boards,
1 reading board.
1 bedpan rack.
1 foot traction piece,
2 traction pulleys.
Position of the Patient
1. Ihe purpose for which the patient is placed on the frame, i.e., whether
immobilization of the spine is required or not, governs the position in
which the patient must be maintained and the amount of motion permitted,
2. The canvas frame covers are held in place and are kept evenly and con-
tinuously taut by wide flat rubber bands with removable hooks which are
attached to the brass eyelets along the sides of the canvas.
3. The anterior frame cover should extend from just below the shoulder
girdle to the internal malleolus. If in one piece, a round perineal
opening is provided,
If the divided anterior covers are used, the upper cover should extend to
the symphysis pubis. A )-6 inch perineal opening is left between the
two covers. In the prone position, the feet should hang free and per~
pendicular to tne -rtoor,
�
"9
OPERATION OF THE STRYKER TURNING BRAME 168,
OPERATION OF THE FOSTER REVERSIBLE ORTHOPEDIC BED (Cont'd)
Position of the Patient (cont'd)
4.
5.
7.
8,
9.
10.
Turning
Le
36
h.
5.
The posterior frame covers are divided with a 4-6 inch perineal opening
which should correspond to the opening on the anterior frame. The
buckle strap covering the opening should be kept in place at all times
except when the bedpan is being used. The heels should be elevated and
free from pressure when the patient is on the posterior frame. Place the
foot support so that the feet are at right angles with the legs. Sa
of the buttocks paren the perineal opening will result in poor spinal
alinement. Plantar flexion must be maintained to prevent foot drop.
Place an abdominal pad between the inner aspects a the ankles if the
patient is varalyzed,
Change the position of the arms by placing pillows on the arm supports,
Change in arm position prevents adduction of the shoulder and flexion
contracture of the elbow,
Keep the knees slightly flexed when the patient is on the posterior
frame by placing a small roll of bath towels or a pillow beneath them,
Only a small, preferably no pillow, should be used while on the post~-
erior frame if immobilization of the spine is being maintained.
if ice-tong traction or halter traction (for cervical fractures) or
skeletal traction has been applied, the nurse shoubd understand the
principles involved in each case as the traction must be maintained at
all times. Traction will remain constant when the frames are turned.
To hyperextend the Foster bed:
The point of hyperextension is determined by the doctor.
The patient's buttocks should be directly over the cutout for the
bedpan and the patient measured to the point where the hyperextension
should begir:.
The frame hinge lock pins on the sides near the head end of the
frames are pulled out and the hinges are slid to the point where the
hyperextension is desired.
Hach frame is adjusted to exactly the same degree of hyperextension,
the patient
Remove the foot supports if the patient is lying on the posterior frame,
Reversal of position is achieved by fastening the two franes together
with the patient between them and turning the 3 parts as one, 100%
aro a horizontal axis.
Clamp and detach drainage tubes if any are in use.
Place pillows over the lower extremities to prevent the legs from slip-
ping during the turning process,
Remove arm supports.
Instruct the patient to wrap his arms tightly around the frame before
turning is begun,
If the arms are paralyzed they are placed at patient's side and secured
with a sheet,
To turn the Stryker frame;
Remove round nuts and lower the second frame on the pivots of the
turning discs, Press down firmly and tighten nuts securely. The
patient should fit snugly between the two frames. Place turning
straps around the frames at the level of the arms, hips and knees
as necessary if additional safety measures are needed. Pull out
the locking springs, warn patient, then quickly and smoothly rotate
the frame. Should the frame be turned by one person, the operator
moves to the side of the patient after the locks are disengaged.
The frame is then turned towards the operator for greater security.
�
OPERATION OF THE STRYKER TURNING FRAME 169.
OPERATION OF THE FOSTER REVERSIBLE ORTHOPEDIC BED (cont'd)
the patient (cont'd)
er turning is complete, tilt the frame gently if the spring
locks do not catch. The spring locks must be securely locked,
extending through both frame discs.
Remove top frame, Attach added supports, drainage tubes and place
pillows as desired. Replace round nuts on the pivots.
6, To turn the Foster bed:
After preparing the patient, lower the second freme over the patient.
Fit the fram locking bars through the corresponding holes first
at the head end and then the foot end of the bed. Loosen the safety
lock "T" handle and while grasping the lock with one hand turn the
patient. After turning, tighten the "T" handle safety lock.
If one person turns the patient, he should stand at the side of the
patient near the head end.
Grasp the safety lock with the right hand and the frame with the
left and turn towards the operator.
Remove the frame locking bars, lift off the top fram and replace
the frame locking bars in the holes in the head and foot esoumay
units. i*:: ’ oe Sexe 5 ’ Se eo 5 oe. c ie ?
| 4a) cA ae. hea oa “y. * .
a ee eee
8/28/59
�
2
Ace bandage, application of
Acetone, Testing for Presence in Urine
Admission of Patient
Leresol Therapy
with oxygen
with nebulizer
Afternoon and Evening Care
Alcohol Sponge Bath
Apical - Radial Pulse, Counting
Anesthetic Bed
Applications
Electric Heating Pad
External Dry Heat and Cold
Clean compresses
Stupes
&reas to be Shaved, Description of
Arterial Blood Pressure
Axillary Temperature
B
Back, care of
Bandage, Application of Ace
Bath
Alcohol Sponge
Bed
Sitz
Tub
Bed
Anesthetic
Closed
Cradle
Occupied
Open
Oscillating
Sanders
Bed bath
Bedpan, giving and removing
_ Binder, Application of Scultetus
Bladder
Instillation
Irrigation
Blood Pressure Arterial
Blood Transfusion, Assisting with
120-136
22
110
108
15,16
18
12
10
13
15, 16
25
lil
82
81
4s
�
INDEX
g
Care of Back
Care of Dentures
Care of Clothing
Care of Valuables
Catheter
Insertion of Foley
Removal of Foley
To empty drainage bag
To release retention
To connect retention catheter to straight drain
To discontinue straight drain
Chart, Medical Aseptic Technique
Charting, T.P.R,
Cleaning Equipment
Closed bed
Cold Apolication of External Dry
Collection of Stool Specimens
Collection of Single Urine Specimen
Colon Irrigation
Colostomy
Dressing
Irrigation
Compresses
Rectal unsterile
Clean
Catheterization
Counting the pulse
Counting the respirations
Cradle bed
Culture, sterile Urire
D
Dentures, care of
Discharging patient
To another institution
Who signs release
Drainage
Postural
yaterseal
Drape
Examination or Treatment
Perineal
Dressing, Surgical
E
—_
m
Ear
Instillation of Drops
Enemas
Cleansing
General Information
Retention Enema
Siphoning an enema
Special Enemata
Anthilnintic
Carminative
Emnolient
PAGE
21
31
31
31
118
Wy
163
83
137
�
INDEZ
E (cont'd)
Nutrient
Oil
Sedative
Stimulating
Tidal Wave
Enteroclysis
Equipment and Sterilizing
Evening Care
Examination, physical
Eye
Instillation of drops
Instillation of ointments
F
Foley Catheter, Insertion of
Foley Catheter, Removal of
Foot Soak
Foster Reversible Orthopedic Bed, Operation of
G
Gastric Lavage, Assisting with
Gastric Tube, Insertion of
Irrigation of
Removal of
Gastrostomy Feeding
Gavage
Nasal
Oral
Glassware, Cleaning and Sterilizing
H
Hand Soak =
Heat, Application of external dry
Heating Pad, Electric
Hypodermic
&dministration of
General Information
Hypodermoclysis, assisting with
Hygiene, oral
I
Instillation of
Bar drops
Eye drops
Eye ointments
Nose drops
Insulin, general information
Intake and output
Charting
Intramuscular
Administration of
General Information
Intravenous Infusion
Assisting with
Irrigation
Bladder
Colostomy
Vaginal
Isolation Technique
Technique Chart
PAGE
59
62
62
67
63
L6
97
97
78
80
105
167
101
81
75
19
155
�
INDEX
A iG
Kardex Routine
L
Lavage, Assisting with Gastric
M
illaking surgical stretcher
Medical Aseptic Technique
Chart
Medicine Cards,Directions for Preparing
Medications, Administration of
Cartrid Disposable
General Information
Hypodermic and Intramuscular
Oral Medications
Insulin
General Information
Needle and Syringe Disposable
Special Method of Preparation and/or administration
of the following drugs
Antacids
Castor Oil
Codeine Sulphate
Cough Syrup
Digitalis Preparation
Dilute Hydrochloric Acid
Expectorants
Iodine Preparation
Liquid Iron
Liver Extract
Magnesium Sulfate
Metamucil Hydrocil
Narcotics
Nitroglycerine
Paraldehyde
Metalware,cleaning and sterilizing
Mouth care, special
Murphy Drip
N
Nose, Instillation of drops
0
Occupied bed
Open bed
Oral hygiene
Oral medications
Administration of
General Information
Oral temperature
PAGE
161
99
12
10
19
91
39, lO
�
INDEX
0
Oscillating bed
Oxygen, administration of
Aerosol
General Information
M ask
Nasal Catheter
Tent
FP
Paracentesis,Assisting with abdominal
Paravertebral Dlock, Assisting with
Pediculosis,Treatment for
Perineal
Drape
Hygiene
Ambulatory
Bed Patient
Physical examination
Plastic materials - cleaning md sterilizing
Post-mortem care
Preparing patient for mortician or autopsy
Preparing patient for viewing
Transporting patient to morgue
When patient ceases to breathe in O.R or P,A.R,
Postural drainage
Practices, common to procedures
Pre-breakfast care
Proctoclysis
Preparation, skin
Description of areas to be shaved
Pulse
Counting Apical Radial
Counting Radial
Q
R
Rectal
Compresses, unsterile
Suppositories
Temperatures
Tube, insertion of
Reminder Sheet, Instruction for use of
Respirations, counting the
Restraints
Retmtion Enema
Rubber materials, cleaning and sterilizing
120-136
165
43
106
99
160
43
112
58
�
S
Sanders bed
Scultetus, pplication of binder
Seriously ill patient
Shampoo of the hair
Siphoning an enema
Sitz bath
Special mouth care
Starting patient's record
Soak, Hot -- foot or hand
Sputum, collection for culture
Stellate block, assisting with
Skin preparation, preoperative
Sterilizing equipment
Stool specimens, collection of
Straight, drain
To connect retention catheter to
Stretcher, making a ourgical
Stripping linen from empty bed
Stripping linen for re-use
Stripping soiled linen
Stryker, Turning Frame, Operation of
Stupes, application of
Sugar, testing for presence in urine
Suppowitcries, rectal
T
T-Bindezs, application of
Temperatr res
Axillzry
Charting
Oral
Rectal
Terminal cleaning of unit
Testing for presence of sugar in the urine
Thoracentesis, assisting with
Tidal Wave Enema
Tracheostomy, care
U
Urinal, giving and removing
Urine culture, collection of sterile
Urine specimen, collection of single
Urine specimen, twenty-four hour
V
Vaginal irrigation
Valuables, care of
W
Watérseal Drainage
PAGE
13
16),
23
57
17
28
105
166
147
118,119
�